How To Fix Wet Laminate Flooring. Tips From Professionals
If you have a laminate floor and notice standing water on it, there’s always a chance it could have water damage. While water damage can be frustrating, there are some things you can do to save your laminate flooring or replace it if the damage is severe enough to call for it. Here are some things to keep in mind if you think your laminate flooring may be damaged.
How To Fix Wet Laminate Flooring:
The first step is always to dry the floor completely. The faster you remove the water and dry the floor, the less damage there will be. The next step is to use a roller to flatten out swollen parts. Use a laminate replacement kit if the damage is only on the top. To reduce minor swelling and prevent the floor from swelling more, you can put something heavy on the swollen parts. For more severe damage you need to replace the swollen planks.
In this blog, I will further explain in detail how you can fix a swollen laminate floor without replacing it. And also how to dry laminate flooring with water under it, how to fix a warped laminate floor, how to fix a Pergo water damage, and how to fix a damaged vinyl floor.
Contents
- 1 How Do You Fix A Swollen Laminate Floor Without Replacing It?
- 2 How To Dry Laminate Flooring With Water Under It
- 3 How Do You Fix A Warped Laminate Floor?
- 4 How Do You Fix Pergo Water Damage?
- 5 How To Fix Water Damaged Vinyl Floor
- 6 Tips For Protecting Floors From Water Damage
- 7 Repairing Minor Chips and Scratches on Laminate Flooring
- 7.1 • Replacing a Damaged Board
- 7.2 • Special Case: Replacing a Board in the Middle of the Floor
- 7.3 • Factors to Consider: Difficulty and Cost
- 7.4 • The Dangers of Excessive Steam Cleaning and Wet Mopping on Laminate Flooring
- 7.5 • Pitfalls of Incorrect Installation of Laminate Flooring
- 7.6 • Salvaging Laminate Flooring Post-Moisture with a Hairdryer or Heater
- 7.7 • Repairing Minor Bubbling In Laminate Flooring
- 7.8 • Using a Roller on Laminate Flooring
- 7.9 • Replacing Damaged Planks In Laminate Flooring
- 7.10 • Responding to Water Damage In Laminate Flooring
- 7.11 • Final Reminders
- 8 Utilizing Laminate Floor Scratch Repair Kits
- 8.1 • Identifying a Matching Material for Replacement
- 8.2 • Starting Disassembly From the Groove Side of the Flooring
- 8.3 • Drilling Relief Holes
- 8.4 • Removing the Baseboard Carefully
- 8.5 • Prepping the New Plank Installation
- 8.6 • Gluing and Setting the New Plank
- 8.7 • Adding Weight to Ensure Secure Attachment
- 8.8 • Consultation with a Professional
- 9 Addressing Water Damage Under Laminate Flooring
- 9.0.1 • Repairing a Warped Laminate Floor
- 9.0.2 • Fixing Pergo Water Damage
- 9.0.3 • Steps to Repair a Water-Damaged Vinyl Floor
- 9.0.4 • Tips for Protecting Floors from Water Damage
- 9.0.5 • The Popularity of Laminate Flooring
- 9.0.6 • Potential Problems with Laminate Flooring
- 9.0.7 • Repairing Scratched Laminate Flooring
- 9.0.8 • Addressing Buckled Laminate and Water Damage
- 9.0.9 • Fixing Peeling or Chipping of Laminate Flooring
- 9.0.10 • Resolving Laminate Peaking
- 9.0.11 • Removing Dents in Laminate Flooring
- 9.0.12 • Repairing Soft Spots In Laminate Flooring
- 9.0.13 • Addressing Laminate Floor Gaps
- 9.0.14 • Replacing Damaged Laminate Planks
- 9.0.15 • Preventing Further Damage
- 9.0.16 • Essential Repair Items
- 10 Causes of Bubbling and Swelling in Laminate Flooring
- 10.1 • Repairing Swollen Laminate Flooring
- 10.2 • Remedying Minor Bubbles
- 10.3 • Mending Laminate Scratches, Cracks, and Chips
- 10.4 • Repairing Separating Laminate Flooring
- 10.5 • Replacing Water-Damaged Laminate Planks
- 10.6 • Steps for Replacing Severely Damaged Planks
- 10.7 • Properly Lifting and Relaying Laminate Flooring
- 10.8 • Preventing Laminate Flooring Damage
- 10.9 • Causes of Laminate Flooring Bubbles
- 10.10 • Trapped Air: A Silent Damager
- 10.11 • Simple DIY Solutions for Minor Damages
- 10.12 • Replacing Damaged Planks
- 10.13 • Professional Assistance for Extensive Damages
- 10.14 • Summing Up
- 10.15 Identifying Potential Causes of Water Damage to Laminate Flooring
- 10.16 • How to Identify Water Damage to Laminate Flooring
- 10.17 • The Importance of Prompt Response to Water Damage
- 10.18 • Professional Services for Repairing Water Damaged Laminate Flooring
- 10.19 • Prevention Tips for Water Damage to Laminate Flooring
- 10.20 • Costs Associated with Repairing Water Damaged Laminate Flooring
- 10.21 • The Importance of Proper Maintenance in Preventing Water Damage
- 10.22 • Potential Health Risks of Water Damaged Laminate Flooring
- 11 Causes of Swelling and Bubbling in Laminate Flooring
- 12 Causes of Swelling in Laminate Flooring
- 13 Damage Commonly Found on Laminate Flooring
- 13.1 • Repairing Swollen Laminate Flooring
- 13.2 • Dealing with Scratches and Chips
- 13.3 • Resolving Separating Laminate Flooring
- 13.4 • Handling Water Damage on Laminate Flooring
- 13.5 • Replacing a Whole Laminate Plank
- 13.6 • Lifting and Relaying Laminate Flooring
- 13.7 • Preventing Damage to Laminate Flooring
- 13.8 • The Vulnerability of Laminate Flooring to Water Damage
- 13.9 • The Hazard of Incorrect Installation
- 13.10 • DIY Solutions For Minor Damages
- 13.11 • Seeking Professional Help for Extensive Damages
- 13.12 • Conclusion
- 14 Dealing with Swollen Laminate Flooring Without Replacing it
- 15 Understanding Swollen Laminate Flooring
How Do You Fix A Swollen Laminate Floor Without Replacing It?
If you notice that your laminate floor is swollen slightly and do not see any standing water, it may not need to be replaced. Here are some alternatives to replacing it.
● Step 1: Dry It Completely
Dry the floor as soon as you notice it’s wet. The swelling comes from the water that is absorbed over time. The faster you remove the water and dry the floor, the less damage there will be. You can dry the floor by opening windows, adding fans to the room, and putting in a dehumidifier to reduce the moisture in the air and pull it out of the flooring.
● Step 2: Use A Roller
You can roll down the swollen areas to help remove the water and flatten out the swollen portions of laminate flooring. You can rent a roller from your local home improvement store or a flooring store.
● Step 3: Laminate Repair Kit
If you notice that the top of the laminate floor is damaged but the structural part is still intact, you can find laminate replacement kits that allow you to resurface the laminate to make it look flat and normal.
● Step 4: Weigh It Down
To reduce minor swelling and prevent the floor from swelling more, you can put something heavy on the swollen parts. This will help push out the water that is inside the laminate and make it harder for the floor to absorb any more water. I prefer to use a stack of large books, but some professionals will use anvils and bricks to weigh down the flooring.
How To Dry Laminate Flooring With Water Under It
Laminate flooring is water-resistant, but it can still be damaged if there is a flood or serious water leak. The sooner you remove the water from the laminate flooring, the less severe the damage.
Use the following steps to dry it properly:
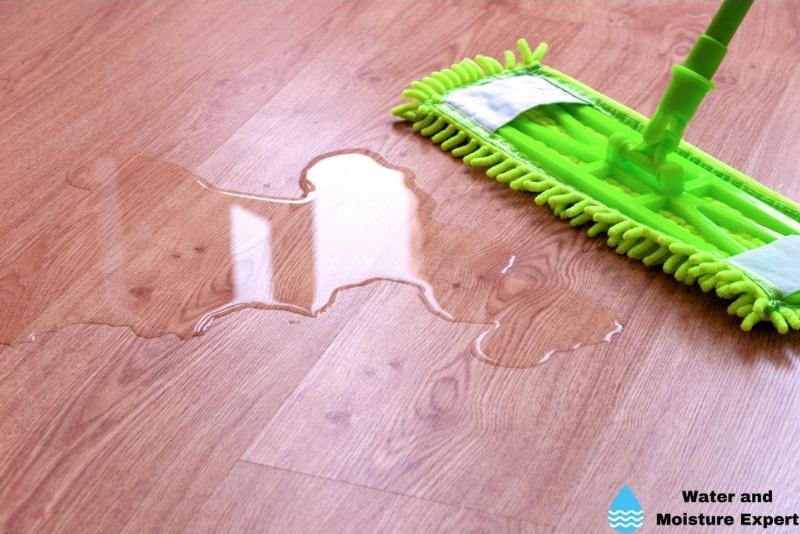
● Step 1: Soak Up The Water
You need to get any standing water off the floor as soon as possible. You may need to use a mop or towels to soak up the water. Keep in mind that the laminate flooring can absorb a lot of water and may swell as a result. Removing the water before it can soak into the floor is crucial.
● Step 2: Open The Windows
The best way to prevent moisture buildup and dry the floors is by improving the air circulation in a room. You can do this by opening the windows in the room or the entire home. Depending on the severity of the flood or the amount of standing water in the room, it may take several hours or days for the flooring to dry.
With water under the top floor, it may be hard to see if it is dry or not. The top may look dry, but the bottom can still be wet. If you can not check the subfloor, dry some additional days after you think it is dry.
● Step 3: Use Fans or a Dehumidifier
Fans can also help circulate the air and dry the floors faster. You can use personal fans to help dry the floors, or you can rent commercial equipment that is larger and works faster to dry out the floors so you can make any necessary repairs.
Using a dehumidifier can also be a great help to dry the floor faster. Bear in mind that the household dehumidifiers can only remove a small amount of water per hour. Professional models are more potent. You can rent them at various locations.
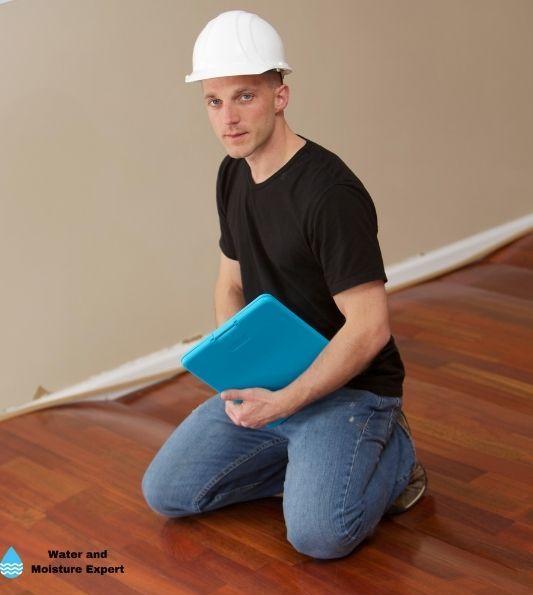
How Do You Fix A Warped Laminate Floor?
If your laminate flooring is damaged and needs to be replaced, you want to make sure you do it properly. Follow these steps to get the job done right.
● Step 1: Assess The Damage
In many cases, you won’t need to repair the entire floor. If only a portion of the laminate is damaged, you may be able to replace that part of it. You should check the flooring to determine where the damage starts and stops and remove any damaged pieces.
● Step 2: Replace The Damaged Areas
Choose the new laminate flooring and install it in the room. You may need to remove any molding or trim around the walls to install the laminate flooring properly. Before installing any new flooring, check to ensure the subfloor is not damaged and completely dry. If you see that it is, you will need to replace it before replacing the laminate boards.
● Step 3: Correct Any Gaps
When you have a flooded floor, the laminate flooring can be messed up, so the gaps are not correct, or the pieces do not line up properly. You will need to go through the pieces as you install them and make sure they are connecting correctly and that the boards are lined up, and the gaps are evenly spaced.
● Step 4: Add A Protectant
If you want to make sure you don’t have the same problem in the future, you can apply a protectant to the laminate flooring. This helps reduce the speed that water can be absorbed and could prevent water from ruining the laminate or soaking deeper into the subfloor if there is another spill, leak, or flood. I always recommend applying such a protectant to your floor, even if they aren’t susceptible to flooding or water damage.
How Do You Fix Pergo Water Damage?
Pergo laminate flooring is very popular and durable. It is highly water-resistant, but that doesn’t mean it’s not susceptible to water damage. If you notice that your Pergo floor has been flooded or shows signs of water damage, follow these steps to fix it:
● Step 1: Find The Leak
Before you can start repairing your Pergo flooring, you need to find the leak and make sure it is repaired. If water continues to leak into the flooring, it will do no good to replace it.
● Step 2: Dry The Floor
Dry the floor entirely before you start to work on it. This will make your work area better and allow you to determine the severity of the damage. And how much of the floor needs to be repaired. You can dry the floor by opening windows in your home to provide air circulation or bringing in fans to move the air around.
Using a dehumidifier will speed up the drying process considerably. I always recommend renting a professional dehumidifier. Those models can remove a lot more water per hour than a household model. Remember that drying a really wet floor can take a lot of time (days, depending no the amount of water). And if the top of the floor looks dry, it does not mean the bottom and subfloor are dry as well.
● Step 3: Assess The Damage
The severity of the damage will determine what repairs are needed. If there is only minor swelling, you may not need to pull up any of the boards. Moderate damage may require some of the laminate boards to be replaced, and severe damage may result in the whole flooring needing replacing.
● Step 4: Make The Necessary Repairs
If you find that the floor only has minor damage, you can add a stack of books or something large and heavy to the swollen area. This will help push the excess water out and should allow the floor to level out. If there are areas that need to be replaced or if the entire floor is damaged, you will want to remove the damaged piece and replace them with new Pergo laminate flooring.
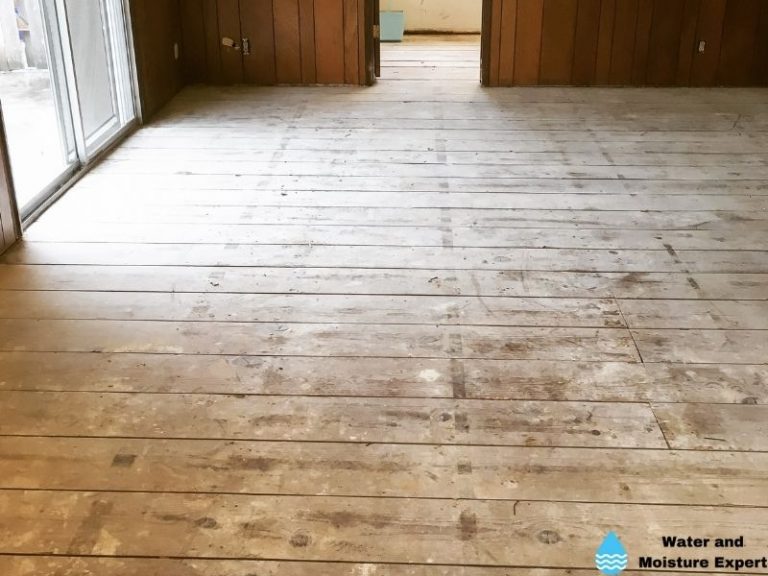
How To Fix Water Damaged Vinyl Floor
Vinyl flooring is durable and water-resistant, but if there is a big leak or a severe flood, the water could soak into the flooring and can cause damage. If you notice standing water on your vinyl floor, follow these steps to fix it:
● Step 1: Remove The Water
Locate the source of the water and fix it before removing the water. Remove the standing water with towels or a sump pump. It would be best if you allowed the floors to dry for several days so you could check the damage. You can dry the floors with fans, a dehumidifier, or open the windows.
● Step 2: Look For Signs Of Damage
The signs of water damage on vinyl flooring can vary based on the type of flooring and the color. In general, some common signs to look for include,
- Stains or discoloration
- Bulging planks
- Cupping
- Separation
- Squishy sounds
- Musty odors
- Mold growth
● Step 3: Prep The Floor
Whether you are planning to replace the entire floor or just a few damaged sections, you will need to prep the subfloor. You want to make sure it is completely dry, install the padding, and ensure any areas that are not being removed are lined up and ready to connect to the new pieces.
● Step 4: Install New Planks
Your new vinyl floor planks should line up well with your current ones. I’ve found that this can be the trickiest part of the process. It’s best to use the same type and color of flooring so it will connect correctly and look cohesive. You may need to remove the trim around your walls and doors to ensure the flooring fits well in the room.
● Step 5: Protect It
You can use a protectant spray on the floor to keep it from being damaged by water in the future. This will not protect the floor completely, but it will add an extra level of water resistance to help reduce any damage that may occur if there is a spill or flood in your home.
Tips For Protecting Floors From Water Damage
Repairing your water-damaged floor can be stressful, and the best way to avoid it is to prevent the water damage in the first place. Here are some tips that can help you do that.
- Keep drinks out of the room
- Check appliances for leaks often
- Add a dehumidifier to the room
- Keep windows sealed tightly during storms
- Check pipes to ensure there are no leaks or drips
- Clean up any spills immediately
- Apply water-resistant protectants to all floors
Repairing Minor Chips and Scratches on Laminate Flooring
When it comes to minor damages on your laminate flooring, such as chips and scratches, fear not! There are simple ways to remedy these little mishaps. First, always ensure the damaged area is clean and dry. After making certain of this, evaluate the size and depth of the damage.
– Choosing the Right Tools
For smaller chips and scratches, a laminate floor repair kit packed with efficient putty can do the job. A floor repair marker might be more suitable for surface-level damages. Carefully apply the marker or putty onto the damaged area with precision.
After the application, wipe away any excess marker residue or putty with a clean, dry cloth. It’s vital to give it ample time after the application to dry properly before stepping on it.
In general, a laminate flooring repair guide from American University Facility Management could be useful for homeowners for basic maintenance tips here.
• Replacing a Damaged Board
Sometimes, the damage might be more extensive, and a chip or scratch fix won’t suffice. In such cases, you’ll need to replace the damaged board entirely. This requires a larger scope of work but is entirely doable with the right steps.
– Preparation
Start by removing any baseboards, thresholds, or molding around the damaged area. This step ensures you have a clear path to work on the damaged board without any obstructions.
Have a pry bar ready to lift the adjacent boards starting from the edge closest to the damaged one. Continue this process until you can reach the damaged board.
– Replacement
Once reached, remove the damaged board effectively. Replace it with a new board that matches your existing laminate flooring.
Remember, accuracy in fitting this new board is crucial for its longevity and overall visual appearance. Then, move to reassemble the surrounding boards. Lastly, reattach the baseboards, molding, or thresholds back to their original places.
• Special Case: Replacing a Board in the Middle of the Floor
In certain cases, you might need to replace a board that’s located smack in the center of your floor. Here’s how to handle such a case with ease.
– Cutting and Drilling
You’ll need to carefully mark a cut line from each corner of the board, resulting in a rectangle in the middle. Next, relief holes are drilled at the end of each cut line, following which you can cut out the middle of the board using a circular saw.
– Prepping and Placing
After successfully removing the center of the damaged board, you’ll need to separate the remaining laminate pieces from the surrounding boards. Prepare the replacement board by removing its grooves appropriately. Apply floor glue on the replacement board, ensuring it’s evenly spread.
Position the replacement board fittingly into its designated spot, ensuring it aligns perfectly with the adjacent boards. Remember to clear away any excess glue instantly. Post this, and place a weight on top of this board for a full 24 hours to allow the glue to dry and settle.
• Factors to Consider: Difficulty and Cost
While these steps may seem simple, keep in mind that the difficulty of laminate flooring installation shouldn’t be undermined. If you are unsure of the process, consider hiring a flooring contractor.
Assess the estimations of the cost involved beforehand to make the right financial decision. The National Wood Flooring Association is a helpful resource when considering professional assistance.
Through regular maintenance and careful attention to scratches and damage, your laminate flooring can last for years without losing its shine and elegance.
• The Dangers of Excessive Steam Cleaning and Wet Mopping on Laminate Flooring
Steam cleaning is commonly considered an effective means of cleaning many types of flooring. However, it is essential to keep in mind that excessive steam cleaning and wet mopping can lead to the deterioration of laminate flooring over time.
Laminate flooring is made of multi-layer synthetic products fused together through lamination processes. These materials are highly sensitive to water and can swell, split, and warp when overly exposed to moisture.
Therefore, it’s critical to limit the extent of wet cleaning techniques to protect the integrity and appearance of the laminate flooring.
• Pitfalls of Incorrect Installation of Laminate Flooring
One common mistake with laminate flooring installation that often leads to damage is not leaving enough expansion gaps. Like many other material types, laminate flooring expands and contracts due to changes in humidity and temperature.
Without enough expansion gaps around the perimeter of the room, the laminate could peak, bubble, and buckle. For this crucial reason, I recommend always following the manufacturer’s instructions for proper placement and distancing of expansion gaps.
• Salvaging Laminate Flooring Post-Moisture with a Hairdryer or Heater
If moisture exposure has occurred, but the problem has been caught and resolved quickly, it’s still possible to salvage the laminate flooring by applying a hairdryer or heater to dry out the moisture.
The heat will help accelerate the evaporation of the moisture, reducing the potential for the laminate flooring to swell or warp. However, using this method should only be a temporary solution and not a regular practice.
• Repairing Minor Bubbling In Laminate Flooring
Occasionally, minor bubbles may form on the surface of your laminate flooring due to underlying moisture or tension issues. Fortunately, there are steps you might be able to take to repair the defect yourself.
I recommend that you first dampen the area with a cloth. Then, make a slight incision at the center of the bubble, apply wood glue beneath the bubble, and then press the laminate down firmly with a heavy object. This method may be sufficient to relieve the tension and help the flooring lay flatter.
• Using a Roller on Laminate Flooring
While forcing laminate flooring back into shape with a roller may offer a temporary fix, it doesn’t address the root cause of the problem. Rolling the laminate with a heavy 100lb roller may indeed force it to flatten.
Still, without addressing the underlying reason for its misshape (such as excessive moisture or improper installation), the problem will likely reoccur.
• Replacing Damaged Planks In Laminate Flooring
Sometimes, the damage to laminate flooring is localized to a few boards whose condition, unfortunately, cannot be salvaged. If the underlayment is still intact and undamaged, it is possible to replace the affected boards without having to replace the entire flooring.
To do this, it will be necessary to remove the wall molding and then carefully extract and replace the damaged planks. Always ensure to adhere to proper installation procedures, especially in terms of expansion gaps, to prevent the new flooring pieces from developing the same issues.
• Responding to Water Damage In Laminate Flooring
Water damage is a primary cause of many laminate flooring issues, and it can lead to substantial damage if not immediately addressed. If you’ve noticed signs of water damage in your laminate flooring, don’t hesitate to hire a professional to provide immediate assistance.
Make sure you check guidance and tips from authoritative sources, for example, the University of Minnesota’s guidelines on preventing and addressing moisture problems in the home.
• Final Reminders
Laminate flooring is an excellent choice for many home and office settings because of its aesthetic appeal and durability. However, like any flooring option, it isn’t exempt from potential damages.
Regular maintenance, correct installation, and prompt corrective measures for minor troubles can increase life expectancy and maintain the appearance of laminate flooring.
Utilizing Laminate Floor Scratch Repair Kits
One smart option for mending damage on laminate flooring is the use of a commercial product known as a laminate floor scratch repair kit. These kits serve as a go-to solution, especially for minor scruffs, and are designed to cover and fill in minor scratches.
They consist of a repair pen or marker, filler material, and sometimes even buffing tools. However, these kits are best reserved for small scratches since they may not be effective for bigger and deeper marks.
• Identifying a Matching Material for Replacement
When dealing with more complicated issues like chipping or warping, minor repairs may not suffice, and replacement of the damaged plank might be necessary. If this is the case, it’s essential to try and find a matching laminate material.
Storing some extra laminate flooring planks is advisable during the original installation to ensure you have a matching piece when necessary. Understandably, not everyone has the foresight for this.
If you do not have matching material in stock, you could seek from manufacturers or local suppliers offering the same model and color laminate flooring.
• Starting Disassembly From the Groove Side of the Flooring
When it comes to plank replacement, the repair process begins with the disassembly of the damaged plank. The ideal starting point is from the groove side.
This procedure usually entails detaching the tongue of the damaged laminate board, ensuring it comes up without causing any harm to the surrounding pieces.
• Drilling Relief Holes
Before taking out the damaged plank, drilling relief holes at each corner of the plank and along the cutting line eases the removal process. Drilling makes it easy to cut the plank using a circular saw. Care must be taken to ensure the holes do not drill through to your underneath pad or subfloor.
• Removing the Baseboard Carefully
As the repair ensues, it may be necessary to remove the baseboard. One must exercise caution during this phase to avoid any unwanted damage to the wall or the baseboard itself.
Gently pry the baseboard from the wall using appropriate tools like a pry bar or a utility knife to cut through any caulking connecting the baseboard to the wall.
• Prepping the New Plank Installation
Before installing the replacement piece, modifications to the new laminate plank are necessary. This includes cutting off the bottom lip of the grooves and one of the tongues.
Preparing the plank in this manner ensures it fits perfectly and seamlessly into the empty slot without disrupting the rest of the floor.
• Gluing and Setting the New Plank
Once prepared, the new plank should be glued into place. Excess glue needs to be wiped off immediately to avoid any residue that could affect the appearance of the new flooring. You can utilize a damp cloth or sponge for this purpose.
• Adding Weight to Ensure Secure Attachment
To secure the new plank firmly, placing weights on it is recommended until the glue has dried completely. The weight ensures the plank bonds completely with the surrounding pieces, avoids any potential lippage, and guarantees seamless integration.
• Consultation with a Professional
In some cases, DIY solutions might not be the best course of action. Situations like significantly uneven floors or a large area of flooring damage may require the expertise of a professional installer. They’re equipped with advanced methods and tools to restore your laminate flooring efficiently and effectively.
For further resources about laminate flooring repair, the University of Florida (https://edis.ifas.ufl.edu/he885) provides an extensive guide.
Whether it’s small scratch fixes or extensive replacements, having a comprehensive knowledge base eases the repair and maintenance of laminate flooring while ensuring its longevity and beauty.
Addressing Water Damage Under Laminate Flooring
When dealing with water damage under laminate flooring, it is crucial we first identify the source of the problem. Leaky pipes, flooding, or spills can cause undesired water underneath. Once we have pinpointed the source, implementing a solution can be achieved through a methodical process.
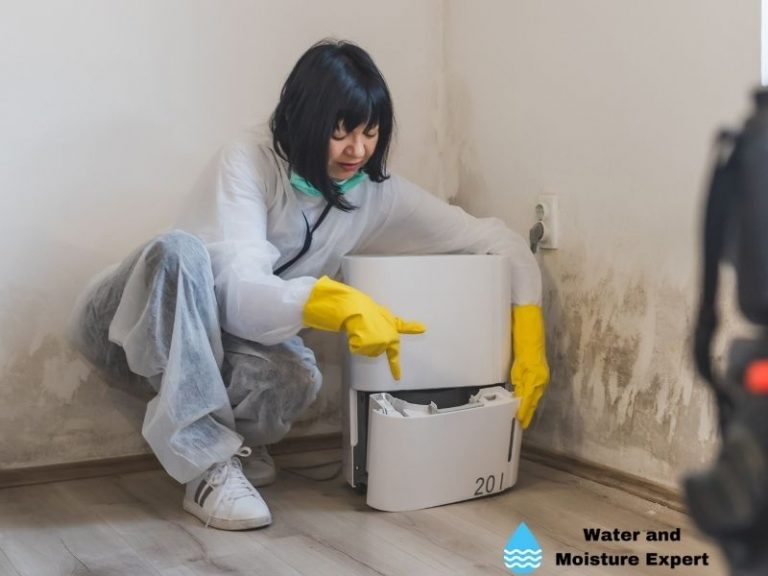
- Remove the water – Use a wet vacuum to suck up as much water as possible from under the floor.
- Dry the area – Set up dehumidifiers, fans, and, heaters to accelerate the drying process.
- Replace damaged boards – Identify and replace any irreparable water-damaged boards.
Remember to frequently check your pipes and appliances for leaks to prevent any damage in the future.
• Repairing a Warped Laminate Floor
Laminate flooring is highly resistant to damage. However, harsh environmental conditions may cause warping. To repair a warped laminate floor, follow the steps mentioned below.
- Identify the warping – Not all distortions of the boards are considered warping. It could result from the expansion and contraction of the boards as well.
- Remove the warped boards – Separation of the faulty boards from the rest of the floor is essential for further rectification.
- Replace the warped boards – Install new boards that are of the same design and color scheme.
Do remember quality matters. Choose high-grade laminate flooring such as Pergo to reduce the possibility of warping.
• Fixing Pergo Water Damage
Although Pergo flooring is extremely water-resistant, it is not completely impervious to damage. Here are some pointers on fixing Pergo water damage.
- Assess the damage – Pinpoint the damaged area and evaluate the severity.
- Remove the damaged planks – Utilize a tapping block and pull the bar to remove the faulty planks.
- Replace with new planks – Once the damaged planks are removed, replace them with the new ones and ensure they fit correctly.
• Steps to Repair a Water-Damaged Vinyl Floor
Vinyl flooring is known for its durability and water resistance, but it can still take a hit from excessive moisture. Here’s how to fix a water-damaged vinyl floor.
- Remove the damaged section – Safety is paramount while utilizing a utility knife to remove the damaged section.
- Prep the floor – Thoroughly clean the exposed subfloor and allow it to dry completely.
- Replace the section – Install the new section of vinyl following the manufacturer’s instructions.
You can always refer to reliable sources such as the US Environmental Protection Agency website for more details on handling water-damaged floors.
• Tips for Protecting Floors from Water Damage
Keeping your floors protected from water damage is pivotal to maintaining their longevity. Here are a few preventive tips.
- Good house-keeping – Regularly inspect potential water leakage points like bathroom fixtures, kitchen appliances, and pipes.
- Water-resistant seals – Invest in water-resistant seals for your floor to prevent water from seeping in.
- Cleaning spills – Never let spills sit on the floor for long; clean them immediately.
Please heed the maxim ‘Prevention is better than Cure’. Regular maintenance and inspection of your floors can save you from the need for exhaustive repairs.
• The Popularity of Laminate Flooring
Laminate flooring is increasingly becoming a sought-after alternative to traditional wood flooring. This is primarily due to its affordability which doesn’t compromise its aesthetic appeal.
Additionally, it has been recognized for its role in environmental sustainability, making it a favored choice among eco-conscious consumers.
• Potential Problems with Laminate Flooring
While laminate flooring has numerous advantages, it’s not without its share of potential issues. These can include susceptibility to scratches, dents, floor gaps, and damage from moisture. Although these issues are different, they all require solutions that are simple enough to implement with DIY methods.
• Repairing Scratched Laminate Flooring
For minor scratches, one can fill them in using a wax pencil or repair putty, easily available at convenience stores. However, for more extensive scratches, a repair kit is necessary. These kits usually contain all the tools and materials you’ll need for the procedure.
• Addressing Buckled Laminate and Water Damage
A common issue with laminate flooring is buckling and water damage. In such cases, the affected planks should be replaced immediately, and the source of the water damage addressed. Whether it’s a leak or condensation, ensure that the moisture source is eliminated to prevent further damage.
• Fixing Peeling or Chipping of Laminate Flooring
Wear and tear can sometimes lead to the laminate peeling or chipping. A simple fix to this is using wood filler. It’s crucial to match the color of the filler to the laminate for an invisible repair.
• Resolving Laminate Peaking
Laminate peaking involves replacing the affected planks and filling up the remaining space with wood filler. The filler should be smoothed out and allowed to dry properly to ensure a uniform look.
• Removing Dents in Laminate Flooring
Dents in laminate flooring can be brought back to shape using innovative methods. A steaming method, for instance, can be used for minor dents. However, for deeper dents, a repair kit would be better suited.
• Repairing Soft Spots In Laminate Flooring
Soft spots are usually a result of improper installation or high foot traffic. Fortunately, they can be easily fixed by injecting foam spray underneath the laminate. Afterward, the holes can be filled with wood filler or putty.
• Addressing Laminate Floor Gaps
Gaps in laminate flooring can be easily fixed using a floor gap fixer or wood glue. This is a simple process that usually entails applying the product and wiping away the excess.
• Replacing Damaged Laminate Planks
If laminate planks are severely damaged, they will need to be replaced. This will involve removing the surrounding baseboards and adjacent planks. This, however, should fall as a last resort only when other repair methods do not work.
• Preventing Further Damage
To sustain the beauty and durability of your laminate flooring, there are several preventive measures to take. These include avoiding abrasive tools, cleaning up stains promptly, limiting exposure to water and moisture, and using furniture pads for protection.
• Essential Repair Items
Any owner of laminate floors should arm themselves with a repair kit, wood filler, floor gap fixer, and extra planks. These essential items will help address and repair common issues, ultimately extending the lifespan of your laminate flooring.
Refer here for a detailed guideline on how to repair and maintain your laminate flooring, provided by The Home Depot.
Causes of Bubbling and Swelling in Laminate Flooring
When you first install laminate flooring in your home, you anticipate a day when the flooring may eventually succumb to signs of damage, such as bubbling, swelling, and separation between the planks.
These issues are typically caused by water spills, a high level of moisture caused by environmental conditions, tension between planks, inadequate expansion joints, and poor moisture barrier properties in the laminate material.
• Repairing Swollen Laminate Flooring
Should your laminate flooring experience swelling, rest assured that there are several remedies available. You could, for instance, apply a laminate repair kit to the affected areas, which typically includes all the necessary tools and instructions.
Alternatively, if you notice that a high level of moisture is causing the swelling, consider using a dehumidifier to dry out the area. The United States Environmental Protection Agency provides some guidance on how to maintain your indoor humidity levels properly.
• Remedying Minor Bubbles
Minor laminate flooring bubbles can be fairly straightforward to address. By using a utility knife, you can slit the bubbled area and apply wood glue to the cut. Once the glue has been applied, you’ll want to press down on the area using a fair amount of weight, such as a stack of books or heavy objects.
• Mending Laminate Scratches, Cracks, and Chips
The sight of blemishes on your gorgeous laminate can be disheartening and detract from the overall aesthetic appeal of your room. The good news is any scratches, cracks, or chips that your flooring may acquire can be repaired using a color-matching repair kit.
However, it’s crucial to clean the damaged spot thoroughly before you begin your repair, otherwise, the original color of the laminate may not be a perfect match with the repair kit.
• Repairing Separating Laminate Flooring
Over time, movement and pressure in your home could lead to your laminate flooring separating. An effective way to repair this separation is to apply wood glue directly into the gaps between the planks.
• Replacing Water-Damaged Laminate Planks
Water damage can prove to be one of the more challenging adversaries for laminate flooring. Unfortunately, individual water-damaged planks cannot be repaired, but they certainly can be replaced. Despite what many may think, replacing damaged planks doesn’t necessitate replacing the entire floor.
• Steps for Replacing Severely Damaged Planks
In severe cases where a plank is beyond repair, replacing the entire laminate plank may be the only option. This process would involve removing skirting boards, carefully lifting planks to avoid damaging others, and reassembling the floor and accessories.
It may seem daunting, but with the right tools and techniques, anyone can undertake this task.
• Properly Lifting and Relaying Laminate Flooring
If done properly, lifting and relaying laminate flooring can be achieved without causing significant damage. Having the right tools and techniques could save your floor (and your pocket) in the long run.
• Preventing Laminate Flooring Damage
Prevention is, of course, the best way to maintain the longevity of your flooring. Following a laminate floor maintenance guide will provide detailed information on damage prevention.
From cleaning techniques to control of moisture levels, this guide can serve as your roadmap to a well-preserved laminate floor.
This article is centered on providing practical solutions to common laminate flooring issues which can be easily applied by homeowners. A little knowledge and a willingness to tackle DIY projects can go a long way in extending the lifespan of your laminate flooring and maintaining the overall aesthetic of your home.
• Causes of Laminate Flooring Bubbles
The beauty and durability of laminate flooring can be compromised when seepage and other forms of moisture-related damage occur. A common issue with laminate flooring is swelling and bubbling, which can arise from several factors.
One significant contributor is improper installation. If laminate slabs are set too closely, the lack of space prevents the laminate from expanding and contracting naturally, causing it to swell and bubble. This difficulty underscores the importance of spacing during flooring installation.
The North American Laminate Flooring Association provides a detailed guide on the correct installation of laminate flooring.
• Trapped Air: A Silent Damager
Trapped air is another subtle yet forceful perpetrator of laminate bubbling. When installing a laminate floor, it is crucial to ensure there is no trapped air between planks, as this can lead to bubbling over time.
However, sometimes trapped air pockets can only be discovered when bubbling starts to manifest. Being vigilant about this potential issue during installation can save homeowners from future restoration hassles.
• Simple DIY Solutions for Minor Damages
Now, what if you’ve already noticed some minor swelling or bubbling on your laminate floor? There are a few quick DIY solutions that you can put to use. One of them involves using a heat source, such as a hairdryer or a heater.
Applying the heat directly to the area of concern helps to speed up the drying process of moist, laminate parts, thereby reducing swelling.
Following this, applying pressure to the area can help to burst and repair minor bubbles. A word of caution: Manual bursting should be limited to small, localized bubbles.
Tackling larger or multiple instances may require professional intervention or detailed, careful DIY steps to avoid worsening the situation.
• Replacing Damaged Planks
Sometimes the damage is restricted to just one or two planks. In this scenario, replacing the affected planks would be the most cost-effective solution.
To do this, you would first need to remove the wall molding that intersects with the laminate. Subsequently, you can unlock and replace the affected planks using the locking mechanism of your laminate flooring.
Remember to take appropriate precautions while unlocking the laminate to avoid causing damage to the surrounding planks. The process, while simple, requires gentle and careful maneuvering.
• Professional Assistance for Extensive Damages
In some unfortunate situations, the damage to laminate flooring may be so extensive that it requires complete replacement. An instance of this would be widespread water damage. In such cases, it is advisable to seek professional help.
Professionals have the expertise and tools to carry out the replacement with precision, ensuring that your flooring goes back to looking as good as new without risk of further damage.
The Institute of Inspection, Cleaning, and Restoration Certification (IICRC) is an excellent resource for finding certified professionals applying a high workmanship standard in restoring and maintaining floors.
• Summing Up
As a caretaker of your laminate flooring, always remember that prevention is better than cure. Proper installation and observance of moisture content can prevent swelling, bubbling, and other laminate flooring woes.
But should these problems arise, quick and effective DIY solutions and professional aid can restore the sparkling appearance of your laminate floors. Takes it upon yourself to protect your floor and maintain it in top-notch condition.
Identifying Potential Causes of Water Damage to Laminate Flooring
Laminate flooring is known for its durability and aesthetic appeal. However, like any other type of flooring, it can be susceptible to water damage from a variety of sources.
These can include commonplace incidents such as leaks, spills, and flooding. Equally, persistent high humidity levels within the home can also contribute to the degradation of laminate flooring.
Leaks can occur from a list of sources, including plumbing fixtures, appliances, and even ceilings. Spills, on the other hand, are usually incidental but can cause significant damage to laminate flooring depending on the amount of spillage and the promptness of cleanup.
Flooding is the most detrimental but, fortunately, less common event. Lastly, high humidity levels could lead to a build-up of moisture content over time.
• How to Identify Water Damage to Laminate Flooring
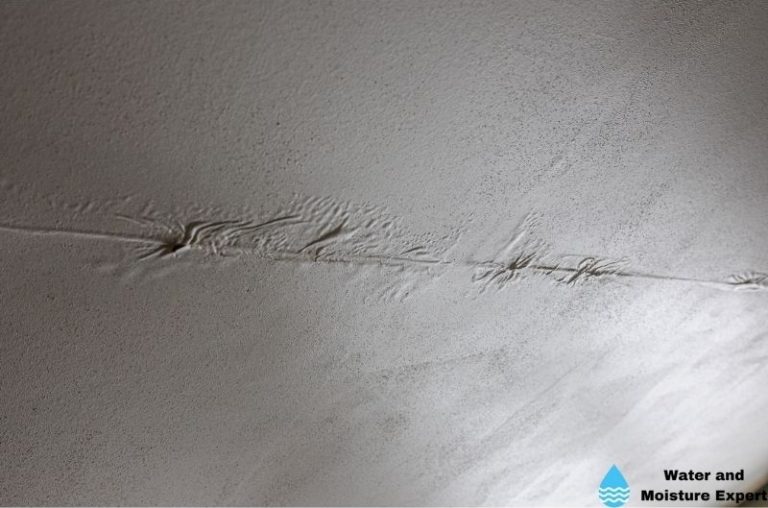
Identifying water damage to laminate flooring is crucial to taking early corrective measures. Some of the primary signs that your laminate floor could be water-damaged include warping, buckling, discoloration, and the presence of a musty odor.
Warping usually occurs when the laminate floorboards absorb water and then dry irregularly, leading to a skewed shape. Buckling is a more severe form of water damage that typically happens following flooding or prolonged exposure to water.
The discoloration is marked by a change in the natural color of the laminate, while a musty odor often indicates the presence of mold or mildew.
• The Importance of Prompt Response to Water Damage
Delaying the response to water damage can escalate the damage and make subsequent repairs more challenging and costly. Water is steadily absorbed by laminate flooring leading to progressive damage.
The longer the water sits on the floor, the more the damage escalates, hence the importance of rapid response.
• Professional Services for Repairing Water Damaged Laminate Flooring
When it comes to repairing water-damaged laminate flooring, professional services often provide the most favorable outcomes. Flooring specialists, like contractors or professionals from reputable flooring companies, have the experience and competence to diagnose the extent of the damage and execute effective repair strategies.
You can find certified professionals through the Institute of Inspection Cleaning and Restoration Certification’s global locator.
• Prevention Tips for Water Damage to Laminate Flooring
Prevention is often the best strategy when dealing with potential water damage to laminate flooring. Some worthwhile practices include the use of area rugs or mats in high-traffic areas to minimize abrasion and immediate cleanup of spills to prevent absorption.
Additionally, controlling the indoor humidity levels using a humidifier or a dehumidifier can be highly beneficial.
• Costs Associated with Repairing Water Damaged Laminate Flooring
The financial implications of repairing or replacing water-damaged laminate flooring can vary based on the extent of the damage, the location, and the chosen repair method. Therefore, it is recommended that homeowners budget carefully and explore cost-effective options.
• The Importance of Proper Maintenance in Preventing Water Damage
Regular cleaning and maintenance of laminate flooring not only preserve the aesthetics of the floor but also significantly reduces the chances of water damage. Utilizing appropriate cleaning products, ideally recommended by flooring manufacturers, and techniques can help maintain the integrity of your laminate floors against potential water damage.
• Potential Health Risks of Water Damaged Laminate Flooring
Water-damaged laminate flooring can also present potential health risks, primarily due to the growth of mold and the potential deterioration in indoor air quality.
According to the US Environmental Protection Agency, exposure to molds can trigger allergic reactions and even asthma attacks. It is, therefore, crucial to either replace or professionally clean any suspect flooring areas promptly.
Causes of Swelling and Bubbling in Laminate Flooring
– Moisture Absorption Leads to Swelling
The main cause of swelling in laminate flooring often stems from moisture absorption. The phrase “water and wood don’t mix” holds particularly true in the case of laminate flooring.
This issue can result from a variety of moist conditions, such as leaky pipes or improper moisture barriers. The water seeps into the laminate planks and causes them to swell and bubble. Anything from a small leak in your sink to a larger flood can be a potential threat to your laminate flooring.
– Delamination: An Installation Error
Another cause of swelling in laminate flooring is delamination. Delamination in laminate flooring is a term used to describe a plank that has been damaged during installation or incorrectly installed.
When this happens, the multiple layers that make up the plank begin to separate or delaminate. This can create a space for moisture to seep in and cause swelling and bubbling.
– The Importance of Space for Expansion
In addition to delamination and moisture absorption, other installation errors, such as the lack of gaps between each plank or the absence of expansion joints in large installations, can lead to swelling.
The laminate flooring needs to have room to expand and contract with changes in temperature and humidity. Without these crucial spaces, the planks can push against each other, leading to swelling, warping, and ultimately damage.
• Repairing Swollen Laminate Flooring
– Handy Repair Tools
There are several options for repairing swollen laminate flooring. One simple method involves using an X-acto knife to remove the swollen portion of the laminate plank.
If the swelling is more severe, epoxy laminate repair kits can be useful resources. The kit fills in the swelled area and smoothens the floor. Another method involves using a 100lb roller to flatten the swollen area.
– Use of Heat
Lastly, some may choose to dry the swollen plank with a heater or hair dryer. This might evaporate some of the excess moisture causing the swelling. However, please note that excessive heat can warp laminate flooring, so this method should be used judiciously and as a last resort.
– Replacing Damaged Planks
When all these methods fail, it might be necessary to replace the damaged plank entirely. This is usually a more drastic step and should only be taken when there is extensive damage to the plank.
• Preventative Measures for Floor Swelling
– Water Retrieval and Cleaning
Preventive measures can go a long way in protecting laminate flooring from swelling or bubbling. Promptly removing water from the laminate surface is crucial.
Any water spills should be cleaned immediately. Moreover, avoid wet mopping that can inundate the floor with water; instead, use damp mopping.
– Controlling Environment
Maintaining proper humidity levels within the house is also important, as fluctuating humidity levels can cause the laminate flooring to absorb moisture and swell.
– Leaving Expansion Space
Leaving sufficient space for expansion and contraction during installation can significantly reduce the risk of swelling and bubbling.
– Moisture Barrier Installation
The use of moisture barriers, especially in areas susceptible to dampness, also aids in protecting the flooring from absorbing water. Moisture barriers can provide a shield against potential moisture seeping into the laminate planks.
– Using Appropriate Cleaning Products
Lastly, using recommended cleaning products is also crucial. Avoid using harsh cleaning products that can cause damage to the laminate flooring.
The University of Connecticut Home and Garden Education Center has an in-depth guide on maintaining different types of flooring, including laminate, which can be found here.
Causes of Swelling in Laminate Flooring
Laminate flooring is renowned for its durability and versatility, but like all types of flooring, it is susceptible to damage.
One of the most common issues is swelling. Often, this issue stems from moisture infiltration, air trapped within the planks, or inadequate expansion or contraction gaps during installation.
• Effects of Moisture on Laminate Flooring
It’s of paramount importance to understand that laminate flooring is largely composed of wood particles, making it susceptible to swelling when exposed to moisture over time. Moisture can infiltrate your flooring due to water leaks from faulty appliances or even excessive humidity within the room.
Whenever you notice swelling in your laminate flooring, it’s essential to identify the source of the moisture promptly. Once the source is identified, whether it’s a leaky washing machine or a damp basement, measures should be taken to resolve the issue.
– Dehumidifiers To the Rescue
In instances where the room is excessively humid, installing a dehumidifier can prove invaluable. By removing excess moisture from the air, dehumidifiers can help prevent further swelling in your laminate flooring.
It’s a recommendation well-proven, in my experience, especially in regions that experience high humidity.
• Ensuring Adequate Expansion and Contraction Gaps
Another common cause of swelling in laminate flooring is the lack of adequate expansion or contraction gaps during installation. Laminate flooring, like many materials, expands and contracts with temperature changes.
When installing laminate flooring, it’s critical to leave sufficient gaps between the planks and walls to accommodate these temperature-related changes. If these gaps are not left, the planks will push against each other during expansion, causing swelling.
• Quick Remedies for Swollen Laminate Flooring
If swelling has already occurred, there are some ways you can attempt to fix it. For instance, a hair dryer can be used to heat the affected parts and remove bubbles. By carefully applying heat, the laminate can be allowed to contract back to its original shape.
Post this. A roller can be used to flatten the affected areas. However, caution must be exercised to not overheat the laminate as it could cause additional damage – a mistake I’ve inadvertently made in the past.
• Addressing Air Trapped Inside Laminate Planks
Sometimes, swelling can occur due to air being trapped inside the laminate planks. To address this issue, small holes can be made in the bubbles using an X-Acto knife to allow the trapped air to escape. This delicate and precise procedure can help restore your laminate flooring.
However, it’s worth noting that this should be a last resort measure as it risks creating potential pathways for moisture to penetrate the flooring in the future.
• Good Cleaning Practices for Laminate Floors
Spills can happen, leading to standing water on your flooring. Avoiding this is paramount, as standing water can seep through the laminate, causing it to swell. Therefore, cleaning spills promptly is essential for maintaining the integrity of the laminate flooring.
In terms of regular cleaning, using a dry mop instead of a wet mop is advisable. Wet mops can leave excess water on the flooring, leading to potential swelling. Additionally, always using laminate-safe cleaning products can help prolong the lifespan and maintain the aesthetic of your laminate flooring.
For more advice on cleaning procedures for laminate flooring, take a look at the US Environmental Protection Agency’s guidelines. They provide in-depth advice to ensure your cleaning practices protect both your flooring and your indoor air quality.
By understanding the causes and remedies of swelling in laminate flooring, we can take proactive measures to prevent damage and prolong the lifespan of our laminate floors.
Damage Commonly Found on Laminate Flooring
Laminate flooring is widely popular due to its aesthetic appeal and durability. However, it can become damaged due to various factors such as water spills, high moisture levels, tension between planks, lack of expansive joints, or a weak moisture barrier. Each type of damage requires a unique solution.
• Repairing Swollen Laminate Flooring
Swelling on laminate flooring often results from water damage or high humidity. A laminate repair kit or a dehumidifier can be used to repair this type of damage. The latter will dry the wet area and help to burst minor bubbles. For additional guidance, refer to this article on how to fix swollen laminate flooring.
• Dealing with Scratches and Chips
Scratches and chips can be a common issue on laminate floors, especially in high traffic areas. Start by thoroughly cleaning the damaged area. Then, use a color-matching repair kit to paint over the scratch or fill in the chip. This simple process can significantly improve the appearance of your floor.
• Resolving Separating Laminate Flooring
The separation between laminate floor planks can potentially cause trips and falls. To resolve this issue, use wood glue to fill the gaps and keep the planks together. Apply the wood glue according to the product instructions, ensuring it sets properly for a secure hold.
• Handling Water Damage on Laminate Flooring
Water damage can be a severe issue for laminate flooring. If left unchecked, it can lead to huge repair costs or complete replacement of the flooring. Any damaged planks need to be replaced immediately.
Before you start the replacement process, ensure the floor is completely dry. This will help prevent additional damage and ensure a successful installation of the new planks.
• Replacing a Whole Laminate Plank
In cases of serious or permanent damage, an entire plank might need to be replaced. Although it’s a task that can be done DIY, it may be a good idea to hire a professional flooring fitter if you’re unfamiliar with the process.
They are highly experienced and can efficiently handle any floor repairs to ensure it’s installed correctly.
• Lifting and Relaying Laminate Flooring
In some scenarios, lifting and relaying laminate flooring may be a suitable solution. This requires the right tools and techniques.
While this task can be done single-handedly, professional assistance is recommended if you’re unsure or lack the necessary tools or skills. Professionals will also ensure that the lift and relay process doesn’t cause any more damage to the floor.
• Preventing Damage to Laminate Flooring
Preventing damage is crucial for the longevity and durability of your laminate flooring. Regular and proper maintenance is key in this aspect. There are many laminate floor maintenance guides available that offer valuable tips.
For instance, this post from DIYNetwork. These guides provide information on how to clean, maintain, and handle minor repairs on your flooring, which ultimately helps prolong its lifespan.
• The Vulnerability of Laminate Flooring to Water Damage
Understanding the nature of laminate flooring is crucial to maintaining its aesthetics and functionality. It becomes vulnerable when exposed to excessive moisture, escalating into warping and swelling.
When moisture infiltrates the laminate, the damage is often severe. You might witness stark changes such as the discoloration of the surface, detachment of layers, or morphing of the flat form into curves and waves.
Water seepage into laminate flooring commonly originates from everyday spillages, improperly sealed regions, water pipe leakages, excessive usage of steam cleaners, and wet mopping.
• The Hazard of Incorrect Installation
Sub-standard installation practices multiply the risk of laminate swelling. For instance, not leaving adequate expansion gaps between the laminate planks may block the room necessary for natural expansion and contraction.
This error ultimately contributes to laminate swelling and other related damage. Regrettably, one of the pitfalls of poorly-done DIY laminate installation is trapped air.
This often results in laminate flooring bubbling, a frustrating issue that makes the surface uneven and causes a distinct annoying sound when walked upon.
• DIY Solutions For Minor Damages
While major defects require professional attention, users can address minor or localized damages independently with basic DIY strategies.
One such method involves expediting the drying process by using a hairdryer or heater. This technique is most effective for swelling caused by temporary moisture exposure.
Burst bubbles can be easily fixed too. This issue requires slicing the bubble open, draining the trapped moisture, and reattaching it using wood glue. Additionally, in the event of plank damage, the homeowner can replace the impaired planks. These are simply removed and replaced with new ones.
Likewise, the University of Florida has published a helpful guide to stain removal, which can be used to address minor damages and spillages on laminate flooring.
• Seeking Professional Help for Extensive Damages
No matter how adept a homeowner is, certain damages are beyond the purview of DIY solutions and merit professional intervention.
In scenarios involving widespread water damage, it is highly recommended to hire a certified professional. They can replace the entire flooring to prevent recurrence and further issues in the future. Opting for professionals saves precious time and ensures the longevity of your investment.
• Conclusion
Taking good care of your laminate flooring guarantees its durability and fresh look. Steer clear of the hazards of moisture and incorrect installation to prolong the life and aesthetics of your laminate floors. In any case, significant damages should always be left to professionals for remedial action.
Dealing with Swollen Laminate Flooring Without Replacing it
Dealing with a swollen laminate floor can be a daunting task, but it doesn’t necessarily require replacing the whole surface. A few clever tricks can help you salvage the situation.
– Using an X-Acto Knife
Firstly, dealing with a small bubble or swell can be effectively handled with the use of an X-acto knife. As an expert, I recommend carefully incising the swollen area. Make sure your cut is shallow; remember, we want to let trapped moisture out, not further damage the laminate.
– Epoxy Laminate Repair Kits
If the swell is on the surface, an epoxy laminate repair kit might be your best bet. These kits are commonly available and easy to use. They tend to provide a great way of fixing superficial laminate damage, leaving your floor looking as good as new.
– Using a 100lb Roller
For larger swollen areas, a 100lb roller can be a useful tool. By rolling over the affected parts, you can even out the laminate surface. This method is less invasive and can help restore your laminate to its original appearance.
– Drying the Damaged Area
In some cases, the laminate flooring might be reacting to a low-level moisture trap beneath it. If the swell is not too severe, and the base isn’t swollen, a hairdryer or heater could help resolve the problem.
Dry the area thoroughly until it goes back to its original shape. Remember, excessive heating might damage the laminate, so control the temperature.
• Tips to Prevent Swelling or Bubbling Laminate Flooring
Maintenance goes a long way in preventing damage to laminate flooring. Here are some valuable expert tips that have worked for me over the years.
– Quick Mopping of Spills
The laminate surface can endure occasional water spills if you clean them right away. A rapid response can avert most potential damage.
– Avoiding Wet Mopping
In personal experience, one common mistake I find is using wet mops on laminate flooring. Wet mopping leads to excess moisture, which the laminate flooring could absorb, leading to swelling.
– Maintaining Humidity Levels
Keeping your indoor humidity levels at 35-65 percent can make a world of difference. Too low or too high can cause damage to your flooring.
– Allow for Expansion and Contraction
Temperature changes cause materials to contract and expand. Leaving a little space when installing laminated flooring allows some room for this natural phenomenon.
– Using a Moisture Barrier
Installing a moisture barrier is a proactive approach. It acts as an additional layer that combats growing humidity levels.
– Air Conditioning in the Summer
Running the air conditioner in the summer helps maintain a conducive environment for your laminate floor. It aids in controlling the temperature and humidity within your home.
– Using Recommended Cleaning Products
Cleaning products designed for laminates don’t harm the protective layer, thus preserving the integrity of the laminate.
– Consulting a Flooring Expert
Finally, consulting a flooring expert oftentimes might help preempt potential issues before they arise. A flooring expert’s advice is invaluable.
• Additional Resources
For further guidance, check out National Wood Flooring Association (.org), a reliable source.
Remember, maintaining a good care regime can mean the difference between replacing your floor or simply enjoying it for a long time.
– Causes of Bubbles in Laminated Flooring
Bubbles and swellings in laminated flooring are primarily a manifestation of moisture or high relative humidity levels in the vicinity where the flooring is installed.
When laminate floors are exposed to excessive moisture, over time, they tend to react and result in visible physical changes known as “bubbles” or “swelling”. These bubbles can, without a doubt, tarnish the aesthetic appeal of laminated flooring.
– Utilizing a Moisture Extractor
A viable first step in rectifying the situation involves the use of a moisture extractor. This machine efficiently extracts moisture that has wended its way into the laminate flooring. The use of a dehumidifier is also recommended to control and regulate humidity levels in the room.
Hence, reducing the likelihood of further bubble formations. However, handle the device cautiously to prevent any damage on the floor.
– Repairing a Single Swollen Plank
In scenarios where swelling is confined to a single plank, a laminate floor repair kit provides a practical solution. These kits, which commonly contain putty-like substances that blend with the floor’s color, can effectively mend the affected area. They are readily available in your local home improvement stores or online platforms.
For useful tips on how to utilize the repair kit, you can visit North Carolina State University’s useful resources on repairing floors.
Early Action is Critical
It cannot be overemphasized that the best approach is to take immediate action once a bubble is noticed. Early intervention prevents the spread of damage to unaffected areas of the flooring, thus saving significant amounts of money and time associated with replacement.
Resorting to Cutting Bubbles
If moisture extraction and the usage of a repair kit fail, consider utilizing the old-fashioned method of cutting. It involves carefully cutting the bubble open, extracting the moisture, and then filling it with wooden resin.
It’s worth noting that this process should be carried out with ultimate caution to avoid causing further damage to the flooring,
Hiding Repaired Bubbles
Undoubtedly, no one fancies having conspicuous repaired areas on their floor. For bubbles that happen to be in corners or those touching sheets, a mat or other decorative items could conveniently be used to camouflage the repaired area. This preserves the aesthetic appeal of the floor, even after repair.
Preventive Measures
The adage “prevention is better than cure” equally applies here. Some useful preventative measures include fixing minor leaks promptly, leaving slight gaps between laminate planks for expansion, and ensuring proper ventilation.
It’s also crucial to protect the flooring from sunlight and potential furniture damage. These measures can effectively keep bubbles at bay, ensuring the durability and longevity of the laminated flooring.
Repair Kits Over Replacement
Given the expenses and inconveniences associated with replacing an entire laminated flooring due to swelling, using repair kits is undeniably a more profitable approach. Not only do they offer solid and long-lasting solutions, but they also help to maintain the original integrity of the floor.
Concealing Marks After Repair
If minor marks persist after using a repair kit, they can easily be hidden using home decor or furniture. This can be an adaptive and affordable means of handling this issue compared to drastic measures like floor replacement.
In conclusion, proper maintenance and attention to laminate flooring are crucial in preventing and addressing issues like bubbles and swelling effectively, saving homeowners unnecessary expenses and hassle.
Understanding Swollen Laminate Flooring
Swollen laminate flooring is a common scenario resulting from fluctuations in temperature and humidity. Exposure to moisture for extended periods causes the laminate to absorb moisture, resulting in swelling. This can lead to various forms of damage, including observable bubbles in the flooring.
• Common Causes of Swollen Laminate Flooring
Several factors contribute to laminate flooring’s tendency to swell. Primarily, as it is a bi-product of wood, this flooring type is not highly water-tolerant. Immediate attention should be given to any leakages from appliances, and water spills must be wiped off promptly to prevent moisture absorption.
High humidity can also lead to floor dampness; when prolonged, it leads to swelling and bubbling of the floor. Through the ‘rising damp’ process, moisture can even seep from beneath the laminate planks.
• Preventive Measures for Swelling in Laminate Flooring
Preemptive steps can go a long way in preventing swelling of laminate flooring. First and foremost, ensure that the planks are well-adjusted to the room’s temperature and humidity prior to and during installation.
By allowing planks to acclimate for at least 48 hours, they are more likely to maintain their shape and prevent separation and gap formation. The installation process can further benefit from using an underlayment with a moisture barrier when set over a wood or concrete subfloor.
• Importance of Ventilation in Preventing Swelling
Proper ventilation plays a crucial role in safeguarding against laminate floor swelling. Efficient air circulation enables rapid evaporation of excess moisture, thus mitigating the chances of swell.
A simple yet effective practice is to leave an inch gap between the flooring and the wall during installation. This provides sufficient space for expansion and negates the possibility of floor swelling due to space crunch.
• Fixing Swollen Laminate Flooring
In the unfortunate event that your laminate flooring does swell, it is optimal to replace the damaged areas entirely with fresh planks. This includes scrapping the affected underlayment, too.
Begin by inspecting the swollen area and removing any mold near the damaged planks, then take off the affected planks and underlayment and clean the subfloor.
Subsequently, bring in the new planks that ideally match the existing ones. Remember to use an underlayment that comes equipped with a moisture barrier during replacement.
• Identifying and Addressing the Underlying Cause
To ensure that swelling does not recur, it is recommended to identify the cause and rectify it before reinstalling the flooring. Often the cause could be leaking faucets or appliances or other persistent sources of moisture. Address them promptly to avert future problems.
• Expert Tip
In my experience, it is advisable to get a professional to inspect your flooring if you suspect dampness in your laminate flooring. Based on their advice, you may even choose to replace the damaged sections.
For more detailed information, you can visit The National Wood Flooring Association’s website, an all-inclusive .org platform that provides relevant, scientifically-backed content on wooden floors, including laminate flooring.