Common Causes of Water Under Floorboards: A Complete Guide
Are you experiencing water seeping under your floorboards and unsure of the cause? You’re not alone.
Many homeowners face this frustrating problem, but the good news is that we have the solution. Let’s discuss the common causes of water under floorboards and how to tackle the issue head-on.
Causes of water under floorboards:
Plumbing issues, poor installation or damage to pipes, household appliances, poor ventilation, and defective foundation or groundwork can cause water under floorboards. Preventative measures include regular inspections, moisture prevention, and using high-quality building materials. Taking these measures can prevent costly and hazardous water damage to both the home and the health of the occupants.
Water under floorboards can cause significant damage if left unchecked. Knowing the causes of this issue is crucial for prevention and quick action.
This article will explore the various reasons for water under floorboards and offer solutions to keep your home safe and dry. Keep reading to learn more.
Contents
- 1 Understanding Water Under Floorboards
- 2 Why is there water under my floorboards?
- 3 Conclusion
- 4 What to Do if Water Gets Under Flooring?
- 5 Hidden Hazards: Water Damage Under Floorboards
- 6 Health Risks Associated with Water Under Floorboards
- 6.1 • Importance of Hiring a Professional Plumber
- 6.2 • Potential Structural Damage to the Home
- 6.3 • The Importance of Regular Maintenance
- 6.4 • Poor Ventilation and Water Accumulation
- 6.5 • Immediate Action to Prevent Health Risks
- 6.6 • Fixing Water Under Floorboards
- 6.7 • Insulation Upgrades to Prevent Water Accumulation
- 6.8 • Addressing Poor Drainage
- 6.9 • Drying Out Affected Areas
- 6.10 • acting Quickly to Prevent Further Damage
- 6.11 • Identifying the Source of the Leak
- 6.12 • Importance of Sealing Gaps in the Floorboards
- 6.13 • Preventing Floorboard Leaks
- 6.14 • Undertaking Water Damage Repair: A Guide for Your Floors
- 6.15 • A Final Word
- 6.16 Assessing Water Damage to Wood Floors
- 6.17 • Time of Water Exposure
- 6.18 • Types of Water and Their Effects
- 6.19 • Detecting Visible Damage
- 6.20 • Timeline For Floor Repairs
- 6.21 • Repair or Replace: The Cost Factor
- 6.22 • Consulting the Experts
- 7 Recognizing Water Damage on Wood Floors
- 8 Risks of Water Damage Under Floorboards
- 9 Hidden Dangers: Leaks Under Concrete or Tiled Floors
- 9.1 • Detecting a Leak Under A Bathroom Floor
- 9.2 • When to Seek Professional Help
- 9.3 • Preemptive Measures to Prevent Leaks
- 9.4 • Consult with Flooring Experts
- 9.5 • A Final Word
- 9.5.1 – Water Damage Under Your Floor and How to Address It
- 9.5.2 – Causes of Water Coming Up Through the Floor
- 9.5.3 – Ceiling Leaks: Identity and Address
- 9.5.4 – Plumbing Leaks: A Critical Issue
- 9.5.5 – Underfloor Heating Systems: Proceed with Caution
- 9.5.6 – Excess Groundwater and Rising Water Table
- 9.5.7 – Leaky Doors and Windows
- 9.5.8 – Drains Problems: Unpleasant Odors and Slow Drainage
- 9.5.9 – Clogged Gutters and Poor Drainage
- 9.5.10 – Quick Actions Post Leaks or Flooding
- 10 Improper Grading Around the Foundation
- 11 Identifying Leaks Under Floorboards
- 12 Water Damage Under Floorboards: Handle with Expertise
- 13 Emerging Damage from Water Seeping Through the Floor
- 13.1 • Knowing the Risks
- 13.2 • Identifying the Causes
- 13.3 • Spotting the Possible Issues
- 13.4 • Detecting Plumbing Leaks with the Water Meter
- 13.5 • Investigating In-Floor Heating System Leaks
- 13.6 • Counteracting Excess Groundwater and Rising Water Table
- 13.7 • Sealing Windows and Doors to Prevent Water Entry
- 13.8 • Addressing Issues with Drains
- 13.9 • Ensuring Proper Gutter Maintenance and Drainage
- 13.10 • Contacting Water Damage Professionals
- 13.11 • Useful References
- 14 Recognizing Water Damage in Wooden and Laminate Floors
- 14.1 • Water Damage Remediation for Wooden Floors
- 14.2 • Managing Board Repairs
- 14.3 • Identifying Water Damage in Concrete or Tiled Floors
- 14.4 • Minimizing Future Leak Damage
- 14.5 • Water Seepage: A Silent Destroyer of Home Foundations
- 14.5.1 – The Dangers of Water Seepage
- 14.5.2 – Ensuring Thorough Foundation Sealant
- 14.5.3 – The Role of Landscaping
- 14.5.4 – Beware of Clogged Gutter Systems
- 14.5.5 – Plumbing Systems and Water Seepage
- 14.5.6 – The Importance of Timely Remediation
- 14.5.7 – Initial Discovery: Kitchen Floor Water Damage
- 14.5.8 – Visual Inspection: A Helpful Commenter’s Suggestion
- 14.5.9 – Possible Issues: Water Pipe or Outside Cladding?
- 14.5.10 – Crawl Space Inspection: A Major Breakthrough
- 14.5.11 – Investigating Previous Owners: A Healthy Suspicion
- 14.5.12 – Advice from a General Contractor: Get It Checked!
- 14.5.13 – Plumbing Leak Detected: My First Major Finding
- 14.5.14 – Fixing the Leak and Drying the Area: Contractor’s Professional Advice
- 14.5.15 – Additional Measures: Insight For Thorough Inspection
- 14.5.16 – Grading Issue or Drain System: Prospective Causes
- 14.5.17 – Contacting the Realty Company: Chasing the Warranty
- 15 Ongoing Troubles: Ceiling Leaks as a Cause of Water Damage Under Floorboards
- 15.1 • The Hidden Dangers: Underfloor Heating Leaks
- 15.2 • Groundwater Intrusion: An Unseen Threat
- 15.3 • Hazards of Water Under Floorboards: Electrical Fire Risk
- 15.4 • Mold Growth: The Undesirable Outcome of Water Damage
- 15.5 • The Ultimate Damage: Structural Compromise
- 15.6 • Strategy for Repair: Removing and Disposing Water-Absorbed Items
- 15.7 • Drying: A Vital Step in Damage Control
- 15.8 • Cleanliness: Preventing Mold Growth
- 15.9 • Ventilation: The Key to Drying the Area
- 15.10 • Call in the Experts: Hiring Water Damage Restoration Services
- 15.11 • Factors Influencing Repair Time
- 15.12 • Prevention: Updating Sealants and Maintaining Plumbing
- 15.13 • Protectors of Floor: Mats and Rugs
- 15.14 • The Right Cleaners for Floor Maintenance
- 15.15 • The Advantages of Hiring a Professional
- 15.16 • Insurance Claims: A Professional Can Assist
- 15.17 • Water Damage in the Chicago Area?
- 16 Importance of Swift Action Against Water Seepage
- 16.1 • Understanding the Problem
- 16.2 • The Behind the Scenes Problems
- 16.3 • The Invisible Foe
- 16.4 • The Groundwater Threat
- 16.5 • Vulnerabilities in Seals
- 16.6 • The Drainage Issue
- 16.7 • Landscape Features That Enable Floods
- 16.8 • The Damage Escalates Quickly
- 16.9 • Clearing the Floor Coverings
- 16.10 • Drying Visible Water
- 16.11 • Initial Cleaning
- 16.12 • Partial Floorboard Removal
- 16.13 • Utilize Fans for Circulation
- 16.14 • Measuring Moisture Content
- 16.15 • Lowering Humidity in the House
- 16.16 • Patience with The Drying Process
- 16.17 • Identifying Leaks Under the Floor
- 16.18 • Identifying Water Damage on Hardwood Floors
- 16.19 • Laminate Floors and Water Leaks
- 16.20 • Removing Moisture from Wooden Floors
- 16.21 • Cleaning Up Mud and Soil
- 16.22 • Using Desiccants for Drying Out the Floor
- 16.23 • Drying Floors in Severe Water Damage Cases
- 16.24 • Using Dehumidifiers
- 16.25 • Checking Moisture Levels
- 16.26 • Repairing the Leak
- 16.27 • Identifying Leaks in Concrete or Tile Floors
- 16.28 • Recognizing and Troubleshooting Leaks
- 16.29 • Preventative Measures for Leaks
- 16.30 • Regular Checks
- 16.31 • Water-Resistant Properties of Laminate Flooring
- 16.32 • Proper Ways of Removing Water from Laminate Flooring
- 16.33 • Boosting the Drying Process Using Fans and Other Appliances
- 16.34 • Addressing Water Damage on Laminate Floor
- 16.35 • Underlayment Cleaning Process
- 16.36 • Replacing Damaged Underlayment
- 16.37 • Cleaning and Sanitization of Removed Floorboards
- 16.38 • Installation of New Underlayment
- 16.39 • Restoring Laminate Flooring
- 16.40 • Using Sealant for Flooring Protection
Understanding Water Under Floorboards
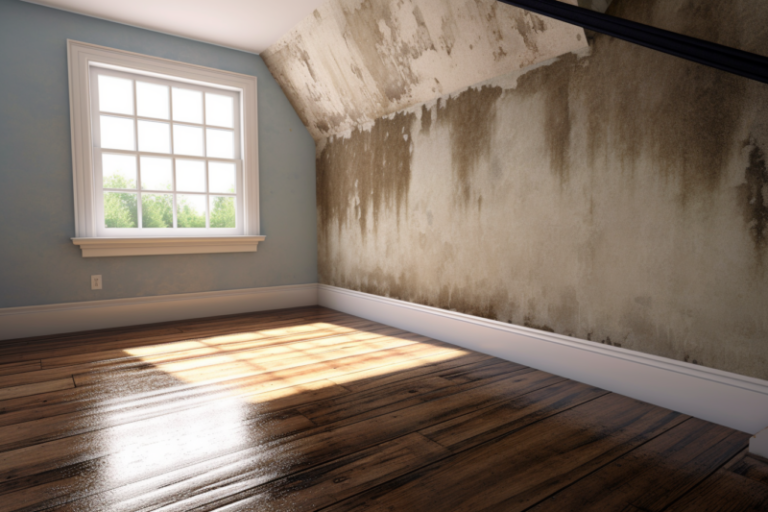
Dealing with water under floorboards can be a frustrating experience and often requires immediate attention.
Water under floorboards not only damages your home but also poses a risk of mold growth, which can impact the health of you and your family.
In this article, we will discuss the causes of water under floorboards and how to avoid it.
• Causes of Water Under Floorboards
There are many reasons why water can get under your floorboards. Here are some of the most common causes:
– Plumbing Issues
Leaks in your home’s water supply or drain pipes can create water under floorboards. A leak in your plumbing system can occur in various ways, such as a burst pipe, a joint, or a fitting that has become corroded over time.
If there’s water damage under your floorboards, the possibility of a plumbing issue should be considered.
– Poor Installation or Damage to a Pipe
If a pipe isn’t correctly installed or is damaged in any way – for instance, by rodents or construction work – you could find water under your floorboards.
Even small leaks or cracks can create a significant problem over time, leading to water damage.
– Household Appliances
Dripping, leaking, or overflowing appliances like the washing machine, dishwasher, and refrigerator can lead to water under your floorboards.
A degraded appliance hose or a damaged connection can lead to water leaks. It’s important to inspect the hoses and connections of your appliances regularly to ensure they’re in good condition.
– Poor Ventilation
Poor ventilation is another reason why water may accumulate under your floorboards. In humid environments or when the temperature changes, moisture can build up under the flooring, leading to water damage.
Proper ventilation in your home is imperative.
– Defective Foundation and Groundwork
A cracked foundation or exposed crawl space can lead to water seeping under your floorboards. This kind of water damage can quickly lead to mold, posing significant health risks.
• Preventing Water Under Floorboards
Prevention is always better than cure, and here are some ways to prevent water from accumulating under your floorboards.
– Regular Inspection
Routine inspection of your plumbing system and household appliances can help catch possible leaks before they become major setbacks.
Regular inspection, alongside proper maintenance, can prevent catastrophic problems, saving time and money.
– Moisture Prevention
As part of keeping your home dry, cleaning gutters, mending roof problems, preparing foundations, and making sure your home is level are all critical concerns that prevent moisture.
By ensuring good drainage, you can prevent water damage under your floorboards.
– High-Quality Building Materials
After a catastrophe or water occasion, switching to superior building materials can reduce additional risk in the future.
Water-resistant materials and building floors on elevated areas are just a few examples of ways to decrease the likelihood of water damage.
• Water Under Floorboards: Final Thoughts
Water under floorboards is a serious problem that can quickly become hazardous, both for your health and your home.
Understanding the potential causes of water storage is critical in maintaining a pleasurable and healthy home.
Regular inspection and preventative maintenance are critical to prevent costly and disruptive water damage beneath your floorboards.
Why is there water under my floorboards?
If you have noticed water under your floorboards, it can be a sign of a significant problem that could lead to considerable damage if not addressed immediately.
Different reasons, including flooding, burst pipes, or leaks could have caused the water damage. In this article, we will explore the various reasons why you might have water under your floorboards and what you can do to fix the issue.
• Common causes of water under floorboards
– Plumbing leaks
If the water under the floorboards comes from a plumbing issue, it could result from leaking pipes or overflowing toilets.
If the plumbing is not fixed, the water can cause structural damage to your home and result in mold growth.
We recommend hiring a professional plumber to inspect your pipes and fix any leaks before the damage worsens.
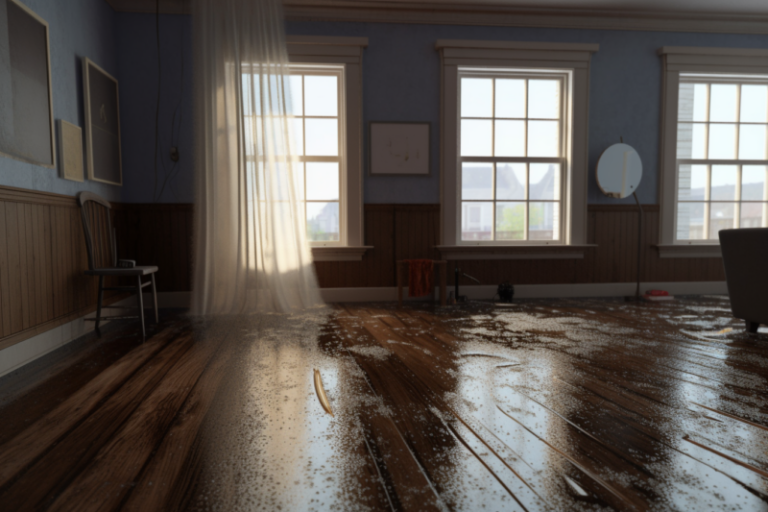
– Floods
Floods caused by heavy rains or natural disasters can also lead to water under floorboards.
The water could have entered through the basement or crawl space and seeped through to the floorboards.
In such a case, you should call a professional flood restoration company to pump out the water and dry the affected areas.
– High humidity
High humidity can cause condensation, leading to moisture buildup and water under the floorboards.
This can result in mold growth, posing a significant health risk. To avoid this, keep your home well-ventilated and invest in a dehumidifier to eliminate excess moisture.
– Poor drainage
If water is pooling around your home’s foundation, it can lead to water under the floorboards. This problem is common in houses built on slopes or areas with heavy rainfall. We recommend that you make sure your gutters and downspouts are clear of debris and are directing water away from your home’s foundation.
– Insufficient insulation
If your home is not adequately insulated, it can result in cold floors and condensation buildup. This can lead to a damp environment that can cause water under the floorboards.
We recommend you consult a professional to evaluate your home’s insulation and make any necessary upgrades.
• How to fix the problem
If you notice water under your floorboards, acting quickly to prevent further damage is essential. Here are some tips on how to fix the problem:
- Identify the cause of water: Before fixing the problem, identify the cause of water under the floorboards. This will help you address the root cause of the problem and prevent further damage.
- Remove the water: If standing water is under the floorboards, use a wet vacuum or pump. Alternatively, you can use towels or a mop to soak up the water.
- Dry out the affected areas: After removing the water, allow the affected areas to dry out completely. You can use heaters or dehumidifiers to speed up the process.
- Fix any plumbing issues: If the water comes from a plumbing issue, hire a professional plumber to fix the problem and prevent further leaks.
- Inspect the insulation: If the problem is caused by insufficient insulation, consult with a professional to evaluate your home’s insulation and make any necessary upgrades.
- Address poor drainage: If water is pooling around your home’s foundation, make sure your gutters and downspouts are clear of debris and are directing water away from your home’s foundation.
• Conclusion
Water under floorboards can indicate a serious problem that requires immediate attention.
Whether it’s caused by plumbing issues, floods, high humidity, poor drainage or insufficient insulation, it’s crucial to identify the root cause of the problem and take action to prevent further damage.
We recommend hiring a professional to fix any plumbing issues and evaluate your home’s insulation and drainage system.
By acting quickly and addressing the issue, you can help prevent costly repairs and potential health risks associated with mold and mildew.
For more information on preventing water damage in your home, visit https://www.ready.gov/floods.
As a plumbing expert, I have seen a lot of cases where homeowners are plagued with leaks under their floorboards.
This can be quite frustrating, especially when the root cause of the problem is not easily identifiable.
• Understanding the Causes of Floorboard Leaks
Before finding a leak under floorboards, it is crucial to have a basic understanding of the common causes of leaks. This will help you better identify where the leak is coming from and how to solve the problem.
- Water Damage – Leaks that result from water damage can be dangerous to your home, both structurally and aesthetically. Water damage may occur as a result of a burst pipe, a leaking faucet, or a previous flood.
- Poorly Installed Flooring – In some instances, the source of a leak may be due to poorly installed flooring. This usually happens in cases where the flooring is not properly leveled or sealed, allowing water to seep through the gaps.
- Damaged Floorboards – Floorboards can also get damaged over time, leading to cracks and gaps that allow water to penetrate through.
• Identifying the Leak
Once you have a basic understanding of the causes of a leak, the next step is to identify the leak. Here are some steps you can take to accomplish this:
Step 1: Check for Visible Signs of Water Damage
The first step in identifying a leak is to look for visible signs of water damage. This could be stains or discoloration on the floor, walls, or ceiling. Watermarks on the walls or skirting boards may indicate the leak is coming from above.
Step 2: Listen for the Sound of Water
Sometimes, a leak may be audible. Listen for any dripping or hissing sounds, especially at night when your home is quiet.
Step 3: Check for Moisture
Check for moisture around the suspected area where the leak is coming from. You can do this by touching the walls or floorboards to check for dampness. You can also use a moisture meter to measure the amount of dampness.
Step 4: Conduct a Smoke Test
If you are unable to identify the source of the leak using the above methods, you can conduct a smoke test. This involves pumping smoke into the plumbing system to determine the leak’s location.
• Fixing the Leak
Once you have identified the source of the leak, it is time to fix it. Depending on the source of the leak, you can adopt the following measures:
Fixing a leaking faucet: In most cases, a leaking faucet is a result of a faulty valve or washer. You can fix this by replacing the faulty valve or washer.
Replacing Damaged Pipes: If the leak comes from a damaged pipe, you may need to replace the pipe. This will require cutting out the damaged section and fitting a new pipe in its place.
Sealing Gaps: If the leak comes from gaps in the floorboards, you can seal the gaps using a suitable sealing material. This will not only help prevent future leaks but also help reduce energy costs by preventing drafts.
• Prevention Measures
Prevention is always better than cure. Here are some ways you can prevent floorboard leaks:
- Regular Maintenance: Conduct regular maintenance checks to identify and repair any plumbing issues before they turn into major leaks.
- Proper Installation: Ensure that your floors are properly installed and leveled to prevent any gaps or cracks.
- Promptly Fix leaks: If you notice any leaks, take immediate action to fix them. This will help prevent further damage to your floors and walls.
Conclusion
Finding a leak under floorboards can be a daunting task, but with the right approach, it is possible to identify and fix the problem.
By understanding the common causes of leaks and adopting preventative measures, you can avoid costly repairs and maintain the integrity of your home.
If you are unable to identify the source of the leak or require professional assistance, do not hesitate to contact a licensed plumber.
For more information on how to find and fix floorboard leaks, check out this guide by the Water Corporation of Western Australia.
What to Do if Water Gets Under Flooring?
Water is the natural enemy of most kinds of flooring, whether it’s hardwood, laminate, vinyl, or carpet. If water does get underneath your flooring, it can cause serious issues such as warping, buckling, and discoloration.
If you’re currently experiencing flooring water damage, don’t panic! This article will guide you through the steps you should take to address the issue and prevent further damage.
• Stop the Water Source
First and foremost, it’s essential to stop the water source immediately. If the reason for the water damage is a burst pipe, shut off the water supply to the affected area. Open all the windows and doors to encourage air circulation and ventilation to help dry out the area.
• Assess the Damage
Once the water source has stopped, assess the extent of water damage. Depending on the amount of water and how long it has been under the flooring, you may be able to handle the situation yourself or need professional help. The amount and time duration of the water affects the steps you need to take.
• Floor Type Matters
The type of flooring you have also affects how you should handle water damage. In the following sections, we highlight the steps you should take for different types of flooring.
– Hardwood Flooring
Hardwood flooring is a popular and beautiful flooring option, but it’s very sensitive to water damage. If you notice water damage on your hardwood floors, acting quickly is crucial. Here’s what to do:
- Immediately remove any standing water with towels, mops, or a wet vacuum, ensuring not to spread the water further.
- Use fans or even a dehumidifier to speed up the drying process. This should be done as soon as the standing water has been removed.
- Use a moisture meter to check the moisture level in the flooring. If the moisture reading is above 12%, you need to remove the affected planks and replace them with new ones.
– Laminate Flooring
Laminate is an excellent choice for flooring that is durable, affordable and comes in various styles. It’s important to note that laminate flooring is made out of fiberboard and can quickly absorb water, causing swelling and other damage.
- If you have laminate flooring, begin by removing as much standing water as possible.
- Use fans or even a dehumidifier to speed up the drying process.
- After thoroughly drying the flooring, check for any signs of warping, cupping, or buckling. If there are any indications of these issues, you need to replace the damaged part of the flooring.
– Vinyl Flooring
Vinyl flooring is one of the most water-resistant flooring types available, and it also looks great. However, if water gets underneath vinyl flooring, it can cause significant damage to the adhesive layer.
- Remove all standing water as soon as possible.
- Use fans or even a dehumidifier to speed up the drying process.
- Check for damage to the adhesive layer. If there is any evidence of damage or instability, you need to replace the affected section.
– Carpet Flooring
Carpet flooring is generally the most susceptible to water damage, and it can take several days to dry completely. Here’s how to remedy the situation:
- Remove all standing water immediately, and use a wet/dry vacuum to remove as much moisture as possible.
- Use fans, dehumidifiers, and even heaters to speed up the drying process. Additionally, make sure that you open windows and doors for proper air circulation.
- Once entirely dry, check for any signs of mold or mildew. If you see any, clean it using a solution of 1 part vinegar and two parts water.
• Contact the Professionals
If you’re unsure about how to handle the water damage, don’t hesitate to contact a professional.
They have specialized equipment and expertise in water damage restoration and can ensure that your flooring is handled correctly.
Additionally, many insurance policies can cover the cost of professional restoration services, so keep that in mind when considering your options.
• Conclusion
Water damage is never a welcome experience, but by following the steps outlined above, you can restore your flooring to its former glory.
Remember to take action quickly, assess the damage, and consider contacting professionals if necessary. Hopefully, this guide has been informative and helpful, giving you the information you need to successfully tackle water damage to your flooring.
For more information on water damage restoration and prevention, the Environmental Protection Agency is an excellent resource.
Hidden Hazards: Water Damage Under Floorboards
Carpeted, wooden, or tiled, our homes’ floors can hide a dangerous secret. Water damage under floorboards can lead to far-reaching consequences that threaten both our property and potentially our health.
What may look like a small, inconsequential puddle can actually be the tip of a hazardous iceberg if not promptly and correctly addressed?
• The Silent Costs of Water Damage
You might be surprised to learn that water damage under your floorboards can lead to electrical damage. This presents itself as yet another hidden hazard within your home.
The nature of having wires and connections under the floor often goes unnoticed, making it even more critical to keep your floors dry.
Most importantly, water lying underneath the floorboards can pose the risk of electrical fires. As most would understand, water and electricity are a lethal combination. Subsequently, poor maintenance of floorboards can unknowingly transform your home into a potential fire hazard.
And then there’s the mold: the most insidious of all. Water damage under floorboards encourages the growth of mold colonies in your house.
These seemingly benign-looking organisms pose significant health risks. You might not even realize they’re there until coughs, skin reactions, or even asthma attacks present themselves. The EPA strongly advises against letting mold grow unchecked in your homes.
The damage isn’t just electrical or biological, either. Water damage can wreak havoc on the structure of your home. Walls, electrical outlets, and appliances located close to the floor can suffer extensive damage due to water seepage. Let’s not forget the obvious – the destruction of your floorings themselves.
• How to Tackle Floorboard Water Damage
Fixing water damage under floorboards doesn’t need to be intimidating. Here are the steps that I would recommend following based on my personal experience:
- Uncover the Damage: Remove whatever coverings you have over your floorboards. Be it carpet, tiles, or a layer of polish – it has to go so you can get to the heart of the damage.
- Dry the Area: To begin, mop up as much as you can. After this, use towels to blot out lingering moisture.
- Dehumidify: A dehumidifier is invaluable in situations like this. It will pull moisture from under the floorboards, speeding up the drying process significantly.
- Clean and Disinfect: Now, the time has come to tackle any potential mold or bacterial colonies. Use a mold-killing solution to clean the area thoroughly.
- Ventilate: To help dry out the area further and, more importantly, to make sure the cleaning fumes don’t become a hazard themselves, it is very important to ventilate the room well.
The Time Factor
The repair time could vary, depending on the size of the property, the floor type, and most importantly, the water source. Depending on the extent of damage, the repairs could realistically take anywhere from a few hours to several days.
• Playing Safe: Preventing Water Damage Under Floorboards
Like most things in life, it is easier and less costly to prevent floorboard water damage than it is to deal with its aftermath. Here are a few tips I recommend for effectively keeping water damage at bay.
Update your sealants: Sealants degrade over time, and water loves to find its way through these weak spots. Make it a habit to regularly inspect and update your sealants.
Maintain your plumbing systems: Leaky pipes are a leading cause of hidden water damage. Regular plumbing maintenance will go a long way in keeping your floorboards dry.
Lookout for leaks: Regularly inspect your property for any signs of water damage or leaks. Tiles that sound hollow, discoloration on walls, a musty smell – these could all potentially be signs of hidden water damage.
Use mats and rugs for extra protection: They’ll soak up any accidental spills and regular foot traffic won’t directly impact the floorboards.
Choose the right floor cleaners: Some types of cleaners can damage the sealants on your floorboards, making them susceptible to water damage. Always be sure to choose non-abrasive and non-acidic cleaning products.
• In Conclusion
The adage “out of sight, out of mind” shouldn’t apply when it comes to the health of our homes. Water damage under floorboards can be catastrophic if left unchecked.
If the appropriate preventative measures are taken and potential issues are promptly addressed, floorboard water damage doesn’t have to be a homeowner’s nightmare.
Health Risks Associated with Water Under Floorboards
One significant issue overlooked in many discussions is the health risks associated with water under floorboards. Prolonged moisture can foster an ideal environment for mold growth.
Mold can negatively impact the occupants’ health, leading to respiratory problems and other adverse effects. You can find more information about mold-related health risks on the Centers for Disease Control and Prevention website.
• Importance of Hiring a Professional Plumber
If there’s water under your floorboards, one possible cause could be plumbing issues. It’s critical to hire a professional plumber to inspect and fix any problems. They have the correct tools and skills to address the issue properly, which DIY attempts can often miss.
• Potential Structural Damage to the Home
If you don’t address the water under your floorboards, it may lead to structural damage. Over time, this can weaken the building’s frame and pose a significant safety risk. Always consult professionals when you first spot signs of water accumulation.
• The Importance of Regular Maintenance
Regular maintenance and inspections are crucial to identify leaks or other issues before they become major problems. By scheduling maintenance and inspections, you can prevent potential damage and save yourself costly repairs.
• Poor Ventilation and Water Accumulation
Poor ventilation can result in water accumulation under the floorboards. Ensuring your home has adequate ventilation, especially in moisture-prone areas like the bathroom and kitchen, can help prevent this problem.
• Immediate Action to Prevent Health Risks
Swift action is necessary when mold growth is noted due to water under the floorboards. The more time it has to grow, the more potential it has to harm the health of occupants, emphasizing the importance of immediate remediation.
• Fixing Water Under Floorboards
Addressing water under floorboards requires a tailored approach depending on the exact cause. It’s advisable to consult with a professional to diagnose the root cause and suggest the best remediation plan.
• Insulation Upgrades to Prevent Water Accumulation
Insufficient insulation could be a reason for water under the floorboards. Consider consulting a professional to evaluate and upgrade your home’s insulation if this is the case.
• Addressing Poor Drainage
Addressing poor drainage around your home’s foundation is crucial in preventing water from seeping under the floorboards. Expert advice can help you optimize your drainage system and avoid potential issues.
• Drying Out Affected Areas
Once you’ve removed the water, it’s imperative to dry out the affected areas properly. Failing to do so can lead to secondary damage, such as mold growth.
• acting Quickly to Prevent Further Damage
Prompt action is needed if water is detected under your floorboards. The quicker you address the issue, the fewer chances there are for costly repairs and health risks.
• Identifying the Source of the Leak
Identifying the source of the leak under the floorboards is usually the first step in the remediation process. A professional can use specialized tools and knowledge to pinpoint the problem and develop a plan for repair.
• Importance of Sealing Gaps in the Floorboards
Sealing gaps in your floorboards can prevent future leaks and drafts. It not only saves money on energy costs but also contributes to a healthier indoor environment by checking water entry points.
• Preventing Floorboard Leaks
Preventing floorboard leaks involves regular maintenance, proper installation, and timely repairs. These practices can extend the lifespan of your floorboards and save you a significant amount of time and money in the long run.
• Undertaking Water Damage Repair: A Guide for Your Floors
When faced with damage to your floors due to water leaks or flooding, timely action is essential. Certainly, minor damages can be resolved through thorough drying and cleaning. However, severe cases might warrant restoration or total replacement.
– Detecting Signs of Water Damage on Floors
Identifying water damage in its early stages can mitigate the severity of the final outcome. Recognizable signs include buckling, crowning, cupping, and warping. Furthermore, spotting discoloration and noticing unusual odors could hint towards water damage.
In more concealed cases, you may observe an unexplained spike in water bills or abrupt changes in the readings of your water meter. This could be an indication of water damage underneath the floors, where it’s harder to spot.
In the view of Cornell University, maintaining vigilance over changes in your home is key in early detection and swift action against various types of property damage, including that caused by water.
– Choosing Between Repairing or Replacing Water Damaged Floors
The decision to repair or replace your damaged floor often hinges on several factors. Chief among them is the extent of the water damage.
If the damage is extensive, replacing the floor might be the best option. Other factors include the type of water involved. For instance, if the damage was caused by black water, which includes sewage and other contaminated water, replacement is the safer option.
Another consideration is whether you can commit to DIY repair or engage a professional. Also, evaluate your available time, as well as the urgency of the situation.
– Replacing vs. Repairing Damaged Floors
There are instances when replacing water-damaged floors is highly recommended. When the structural integrity of the subfloor is at risk or when the flooring is heavily damaged, replacement is the best course of action.
The option for a replacement might also appeal to those desiring a refreshed look for their homes. However, if the subfloor is still intact and the area is effectively dried within 24 to 48 hours of being water-damaged, repairing can still be an option.
It’s crucial to ensure that the root cause of the water damage is resolved before any repairs or replacements are made.
– Choosing the Right Flooring
When making flooring choices for each room, it’s always wise to weigh the likelihood of potential water damage. Doing this ensures that you choose flooring types that offer an optimum level of protection.
– Insurance Coverage for Water Damage
In many cases, your homeowner’s insurance could cover the expenses linked with repair or replacement due to water damage. It’s advisable to familiarize yourself with the specifics of your policy to understand the extent and type of water damage covered.
• A Final Word
In dealing with water damage to your floors, swift action, vigilance, and making informed decisions can save you from escalated damage, thereby saving you time and money. Consulting professionals and understanding your insurance coverage can also be indispensable in navigating such situations.
Assessing Water Damage to Wood Floors
One of the initial steps when faced with water-damaged wood floors is to assess the extent of the damage accurately. Crucially, it’s essential to determine whether the damage can be repaired or if a complete replacement is necessary.
Professionals usually make this assessment. However, homeowners can make an initial evaluation based on a few key points to decide the next steps.
• Time of Water Exposure
One of the essential factors that influence the extent of water damage is the duration the water has been sitting on your wood floors. Extended periods will contribute to more severe damage, making it difficult, and sometimes impossible, to save your wood flooring.
For a more comprehensible understanding of the water sitting duration effect, visit the Institute of Inspection Cleaning and Restoration Certification’s IICRC page about this matter.
• Types of Water and Their Effects
Another critical factor determining the extent of the water damage is the type of water source. Typically, we categorize water into four significant types: clean, greywater, blackwater, and saltwater.
Clean water usually poses relatively small threats to your wood floor if addressed promptly. Greywater contains contaminants and may require more extensive cleaning.
The highest risk comes from blackwater (septic water), which requires immediate professional intervention due to its high contamination. Saltwater can cause more damage due to its corrosive nature.
• Detecting Visible Damage
Visible signs of damage can help assess the level of flood damage. These can range from staining, buckling, or cupping of the wood planks.
Staining could suggest superficial damage and might be easier to repair, depending on the extent. In contrast, buckling and cupping often indicate deeper structural damage, pointing towards a need for replacement.
• Timeline For Floor Repairs
Consideration of repair timelines is another factor that heavily influences whether to repair or replace. Repairing can be time-consuming, especially if the damage is extensive. Replacement might be a quicker alternative, albeit with the high initial costs.
Not forgetting the homeowner’s convenience should also be considered. Some might opt for a quicker professional replacement over self-repairs, even if the costs are higher.
• Repair or Replace: The Cost Factor
Cost is a decisive factor for homeowners deciding whether to repair or replace their floors. You’ll want to consider the direct costs of repair versus replacement. Similarly, factor in long-term costs. For instance, will frequent repairs be more expensive in the long run as opposed to investing in a new floor now?
• Consulting the Experts
I’d strongly recommend seeking a consultation with hardwood floor professionals before arriving at your final decision. Industry experts add an invaluable perspective on whether your wood floors can be salvaged or need replacement.
Their opinion can significantly influence your decision process and ensure you make a choice that is both cost-effective and appropriate to your situation.
Remember, damage to wood floors is a substantial concern for homeowners. But with the right steps, a careful assessment of the damage, and consultation with professionals, you can determine whether repair or replacement is the preferable option.
Recognizing Water Damage on Wood Floors
Water can severely damage wood floors, causing warping and mold growth, which ultimately reduces the property’s value. The top surface of wood floors usually has a treatment that resists water damage.
However, if large volumes of water infiltrate the wood, it can seep between the boards and cause significant damage.
– Indicators of Water Damage
Identifying water damage on wood floors can be simple if you know the signs to look for. An unpleasant odor indicating mildew growth or moisture is a primary indicator.
Other signs include staining, buckling, lifting nails, crowning where the boards are higher in the middle than the sides and visible mold growth. Being able to recognize these early warning signs of water damage can save a significant amount of time and money in reparations.
• Handling Swollen Wood Floors
Swollen wood floors, the result of soaking up excess water, can be fixed, but the approach needs to be careful to prevent further damage. Start by placing thick towels over the affected area to soak up surface water. Following this, a dehumidifier should be used to extract excess moisture from inside the wood.
• Repair Steps for Water Damage on Wood Floors
There are five key steps to address and soften the impact of water damage to wood floors. Start with finding and repairing the source of the water – a leaking pipe, a window letting rain seep in, etc. Remove all wet objects from the floor promptly. These could be soaked carpets, rugs, or furniture.
The next step is drying the floors. Using a dehumidifier is a great option here, but fans and heaters should also be used to speed up the process. Cleanup is next, using a specialized hardwood cleaner that won’t damage the wood.
Lastly, it is crucial to check for mold growth. If there is visible mold, you should consider professional help to remove it safely. EPA offers a reliable resource on mold and moisture management.
• Extra Water-Removal Techniques
Apart from the steps mentioned above, a water vacuum can also assist in water extraction. It sucks up water quickly and efficiently, helping to mitigate the extent of the water damage to wood floors.
• Preventing Water Damage on Wood Floors
Preventive measures can help minimize the risk of water damage. Start by using water-absorbent rugs or mats in spill-prone areas or places with high foot traffic.
Regular inspections are also mandatory to check for leaks, especially in older properties. Lastly, sealing the hardwood every few years contributes significantly to the longevity of wood floors.
• Considerations for Engineered Wood Flooring
If you have engineered wood flooring that got damaged by water, it may be necessary to replace the affected boards. After replacement, refinishing the entire floor ensures a consistent look, making it seem as if no damage had ever occurred.
• The Importance of Immediate Action and Professional Assistance
When dealing with water-damaged wood floors, time is of the essence. The faster you act, the better chance you have to save the floor and minimize costs.
In some cases, professional assistance may be required. They can accurately assess the damage, make the correct repairs, and safely remove any mold that might have started to grow.
• Conclusion
Water damage on wood floors can be a headache for property owners. Still, with the right knowledge, preventive measures, and immediate action, it’s possible to minimize the damage. This can restore the beauty of the wood floors and maintain the overall property value.
Risks of Water Damage Under Floorboards
Water damage lurking under your floorboards can pose numerous threats that may quickly spiral out of control, given its ability to undermine the safety and structural integrity of your home.
Among these risks are the creation of potential electrical hazards and the development of dangerous, health-compromising mold growth.
Severe structural damage is yet another repercussion of untreated water damage under floorboards. This can undermine the very foundations of your home, making it structurally unstable and unsafe for occupation.
• Identification and Repair of Leaks
To successfully fight water damage, the initial phase should be focused on identifying and repairing the exact source of the leaking water. Typically, the culprits behind such leaks are faulty pipes or inadequate insulation, which make water seep under the floor.
• The Broad Repercussions of Water Damage
Beyond floor damage, water can wreak havoc in various parts of the house. Walls absorb water, leading to a weakened structure and increased chances of mold growth. Electrical outlets, when exposed to water, can give rise to potential fire hazards and short circuits.
Appliances and their functioning can get significantly impaired due to water damage. Finally, different types of flooring react differently to water, most often resulting in warping, staining, or cracking.
• Addressing Water Damage Under Floorboards
Addressing water damage involves a series of steps that must be executed in order and with precision. Start by removing and disposing of any soaked floor coverings—endeavor to clean and salvage any floor coverings that may have escaped the worst of the water.
Next, absorb as much excess water as you can with towels, and then mop the area to remove the remaining water. Follow up with a dehumidifier and fans to expedite the drying process of the area.
While these actions may mitigate some of the damage, for a thorough water damage restoration, it is advisable to contact a water damage restoration company. These experts will provide an accurate assessment of the damage and initiate the necessary repairs.
• Water Damage Repair Timelines
The timeline for repairing water damage is contingent on a multitude of factors. These include the size and type of the property, the source of the water damage, the type of room affected, and the diversity of materials involved.
It also depends on whether there’s a need for plumbing repair, as such repairs can add more time to the process.
• Preventing Future Water Damage
The best way to deal with water damage is to prevent it in the first place. Regularly updating the sealant can help prevent water seepage. Ongoing maintenance and prompt repair of plumbing issues nip most water issues in the bud.
Properly maintaining AC systems and heaters also helps maintain a balanced moisture level in the home, reducing the likelihood of water damage. Using appropriate cleaners for specific flooring materials and protective floor coverings are other preventative measures worth adopting.
• The Value of Professional Advice and Assistance
For larger leaks that lead to extensive damage, hiring a professional for water damage repair is crucial. Not only do they possess the necessary tools to handle such repairs, but they also bring their expertise, which is pivotal to a successful water damage restoration.
Experts recommend ServiceMaster of Lake Shore in Chicago for assessing, mitigating, and repairing water damage under floorboards.
This specialized company offers a comprehensive solution for water damage, ensuring all facets of the problem are meticulously handled, from the initial identification of the leak source to the final restoration of the damaged area.
• Conclusion
Remember, water damage is a serious and insidious issue that deserves immediate attention and careful treatment.
By following steps to address immediate damage and taking action to prevent future incidents, homeowners can protect their investments and ensure their homes remain safe and liveable.
Hidden Dangers: Leaks Under Concrete or Tiled Floors
Leaks underneath your bathroom tiles could be causing more damage than you might think. If noticed too late or ignored, they can lead to serious structural problems. Some common signs of a leak underneath your bathroom floor include puddles, mold growth, and loose or broken tiles.
• Detecting a Leak Under A Bathroom Floor
A quick way to detect a leak under your bathroom floor is to start by shutting off the suspected water sources. After you turn off the faucets, observe the water meter. If your water meter shows changes in numbers within a couple of hours, this may indicate a leak underneath your floor.
According to the Environmental Protection Agency, leaks can waste more than 10,000 gallons of water in an average home every year, which is the equivalent of the amount of water needed to wash 270 loads of laundry. The EPA has excellent resources for managing and saving water.
• When to Seek Professional Help
There can be cases when the source of the water is not from your home but rather due to a poorly sealed foundation or a crack in the house’s exterior. This is especially common if you have a toilet leaking under the floor.
In these cases, I strongly recommend you contact a professional to resolve the issue. Not only can they identify the exact source of the leak, but they can also provide a long-lasting solution.
• Preemptive Measures to Prevent Leaks
When laying a new wooden floor, consider leaving access points for plumbing works. It’s also a good idea to install an isolation tap above the floor level. This can make it far easier for you to turn off the water supply in case of leaks, thereby minimizing damage.
Regular inspections of appliances and plumbing systems can also help prevent minor issues from becoming major.
• Consult with Flooring Experts
When it comes to dealing with leaks under the floor, having a professional at your side can make a huge difference. Luckily, flooring experts are available to provide assistance and advice.
If you happen to live in or around North London, consider visiting our flooring showroom during operating hours. Our team members can help you assess your specific needs and provide you with tailor-made solutions.
You can also view and understand the different types of flooring options which might suit your lifestyle the best.
• A Final Word
Leakages under bathroom floors are a common issue many homeowners face. While detection can be difficult, early identification of symptoms such as puddles and mold can prevent further damage.
Regular checks and maintenance of plumbing systems, coupled with expert advice, can go a long way in keeping your home safe and healthy. Remember, preemptive actions can prevent costly consequences.
Take care of your floors, and they will take care of you and your home!
– Water Damage Under Your Floor and How to Address It
I have seen my fair share of water problems over my years in the restoration industry. This includes the worrying issue of water coming up through a home’s floor.
Not only can it lead to a potentially hazardous mold infestation, but it also invites pests into the home. As a restoration expert, let me guide you through the possible causes and ways to resolve this issue effectively.
– Causes of Water Coming Up Through the Floor
When you spot water seeping up through the floor, there could be several sources. This could include leaks from the ceiling, plumbing problems, or an underfloor heating system gone awry.
Other factors include excess groundwater, issues with water flow from doors and windows, or a malfunctioning drain system. Clogged gutters and poor drainage are not uncommon culprits, either.
Each issue deserves a focused approach. Let’s dive into the practical ways to address these potential causes.
– Ceiling Leaks: Identity and Address
Firstly, check for ceiling leaks. If you notice any signs of a leak, it could explain the water coming up through your floor. Use a wet vacuum or mop to clean the water immediately, and place a bucket or tarp underneath to catch additional drips.
From my experience, I strongly recommend hiring a skilled plumber to fix the leak as soon as possible. The American Leak Detection resource can guide you through the steps to effectively spot a leaky ceiling.
– Plumbing Leaks: A Critical Issue
If no ceiling leaks are present, your next step is to check your plumbing system. To do this, turn off all water sources in your house and monitor the water meter. If the meter continues to rise, this is a sure sign that your plumbing has a leak.
– Underfloor Heating Systems: Proceed with Caution
A leaking underfloor heating system can also cause this issue. By using an infrared thermal imaging system, a technician can locate and repair the source of the leak quickly and accurately.
– Excess Groundwater and Rising Water Table
Excess groundwater or rising water table are also potent causes. If you have a basement, checking your sump pump operation is paramount. If your pump isn’t functioning efficiently or if you do not have one, installing an efficient drainage system should be considered.
– Leaky Doors and Windows
Poorly sealed windows and doors can invite water inside. The simple measure to correct this problem is to seal windows with quality caulk. Furthermore, consider replacing older windows or doors that show signs of leakage.
– Drains Problems: Unpleasant Odors and Slow Drainage
Blockages in drain lines can cause water to seep through the floor. Unpleasant odors and slow drainage are tell-tale signs of such an issue. Clearing out the drain lines will rectify this problem.
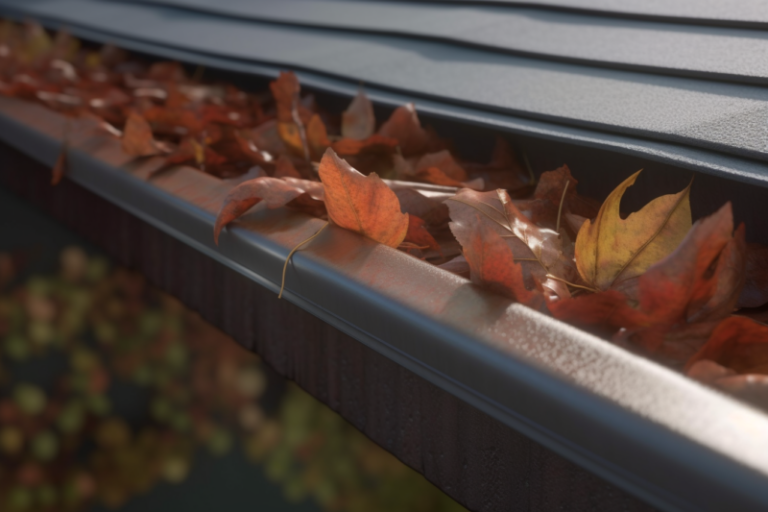
– Clogged Gutters and Poor Drainage
Clogged gutters are another common culprit, contributing to poor drainage. Keeping your gutters clean and checking for proper drainage around your home will significantly reduce the chance of water seeping through your floors.
The EPAs guide on managing runoff is an excellent resource I recommend to homeowners.
– Quick Actions Post Leaks or Flooding
After any leak or flooding episode, act swiftly. Call a water damage restoration professional, open windows for ventilation, use fans, dehumidifiers, and remove wet furniture.
Mold treatment is critical at this stage to prevent further growth. Consider replacing carpet padding, as this is often a hot spot for mold growth.
Don’t let water trouble disrupt your peace of mind. Timely actions and swift rectification measures can ensure that your home remains a healthy and water-free space.
Improper Grading Around the Foundation
One common cause of water seeping through the floor is improper grading around the foundation of your home. If the ground slopes towards your house, it allows water to accumulate around the foundation. Over time, this accumulated water can seep into the floor, causing damage.
Therefore, it’s crucial to maintain proper grading and landscaping to help redirect water away from the foundation. Council Subsidy Programs (https://www.canada.ca/) suggests designing your landscape so that the ground slopes at least six inches within the first 10 feet away from your home.
• Basement Leaks
Another frequent culprit behind water seeping through the floor is basement leaks. Cracks in your basement walls or floor or gaps around windows or doors provide an easy path for water to enter your home. These leaks often cause noticeable puddles or wet patches.
To prevent water infiltration through these weak points, consider waterproofing your basement. When applied correctly, a quality waterproofer can effectively seal gaps and cracks. I recommend opting for professional basement waterproofing services for the best results.
• Malfunctioning Sump Pump
A malfunctioning or overloaded sump pump can be a significant contributor to water seepage. These pumps are designed to remove excess water from your basement or crawl space. But if a sump pump fails or is overloaded, water can accumulate, resulting in seepage through the floor.
I always advise homeowners to schedule regular maintenance and inspections for their sump pumps. This practice can help detect any potential issues early, allowing you to avert water damage.
• Condensation Issues
Condensation can also lead to water seeping under floorboards. In humid environments or when warm air encounters cooler surfaces, moisture can accumulate, causing water damage over time. To counter this problem, it’s crucial to ensure proper insulation and ventilation in your home.
Good insulation can help maintain a consistent indoor temperature, reducing the likelihood of condensation. Meanwhile, an effective ventilation system can help disperse excess moisture, preventing build-up.
• Inadequate Sealing
Inadequate sealing around pipes, vents, or utility penetrations in the floor is another source of water seepage. In my experience, these areas often go overlooked, leading to recurring issues.
It’s important to ensure these spots are properly sealed to prevent water infiltration. You can use good quality sealants available in the market for this purpose.
• Flooding
Finally, flooding from heavy rains or natural disasters is an evident cause of water under floorboards. Taking preventive measures against flood damage can save you considerable distress and expenses.
For instance, installing flood barriers or sealing basement walls can significantly reduce your home’s vulnerability to floods. The U.S. Federal Emergency Management Agency (FEMA) provides an excellent guide on flood-proofing your home (https://www.fema.gov/).
In all cases, identifying the cause of the water seeping is the first step to addressing it effectively. If water leaks persist despite your best efforts, consider consulting an expert to avoid further damage to your home.
Identifying Leaks Under Floorboards
Detecting a water leak nestled underneath floorboards is no easy feat and necessitates both a nuanced understanding of plumbing systems and the application of specific equipment.
Typically, such tasks are best left to professionals who are adept at using devices such as moisture mappers and acoustic detectors tailored for this purpose.
• Specialized Tools for Leak Detection
Professionals bring to bear a slew of techniques and devices to find and fix water leaks below floorboards. This arsenal includes but is not limited to moisture mapping, acoustic leak detection, thermal imaging, tracer gas detection, and pipe detection.
Moisture mapping uses sensitive equipment to detect damp or moist areas underneath the floorboards – these often herald the location of a leak.
Acoustic leak detection is a technique that captures noise generated by water leaks, pinpointing the source of the leak.
On the other hand, thermal imaging captures minute variations in temperature to expose possible leaks. In cases where pipes are hidden or inaccessible, professionals employ a method known as tracer gas detection.
This involves raising the pressure in the pipelines by using an inert gas mixture. The gas will escape from any existing leaks, which detectors can then pick up.
For understanding the layout and position of pipes, pipe detection proves an invaluable tool. Humidity sensors, another piece of equipment in the array of tools, detect any rise in humidity levels in the area, a possible indicator of a leak.
The accurate positioning of these device locations is crucial to assist in pinpointing the exact location of water leakage.
• Importance of Drying Wet Floorboards
Once a leak has been identified and fixed, it’s critical to address the consequences of the leak, a prime one being the dampened floorboards.
Wet floorboards are breeding grounds for mold and mildew, and if left unaddressed, they can affect the structural integrity of the floorboards and release a musty odor.
Professional companies are usually equipped with industrial-grade fans and dehumidifiers to dry the area and prevent mold growth efficiently.
• Risks Involved in Leak Detection and Repair
Identifying and repairing leaks under a floorboard comes with certain hazards, reinforcing the need for professionals. Those include working in confined spaces, evaluating the structural condition of the floor, and potential mold development.
There is also a risk of slipping and tripping over misplaced equipment or wet surfaces. Meddling with the wiring or coming into contact with it inadvertently poses risks of electrical shocks, highlighting the need for specialized knowledge.
Breathing in potentially harmful substances from stale water, dust, or mold is another risk involved. Moreover, older structures may contain asbestos, exposure to which can lead to respiratory issues and even lung cancer.
Manual handling of heavy equipment presents a risk of physical strain, especially under confined or cramped conditions.
• Responsibility for Water Leaks
In domestic scenarios, the property owner or landlord typically bears liability for a water leak under the house. This applies unless the leak’s source lies outside the property boundaries up to the external water meter boundary box.
In such cases, the responsibility falls on the local water company. It’s essential to contact them immediately in these situations.
• Interacting with Insurance Companies and Undertaking Repairs
Once the leak’s source is identified and rectified, there usually needs to be restoration and repair work. Depending on the policy, insurance companies may cover these costs.
Having a professional at hand who can provide proper documentation and establish the necessary communication with the insurance company can speed up the process and make it smoother.
Having thorough documentation of the problem and the steps taken to rectify it, together with clear communication directly with the experts, can make dealing with insurance companies a breeze.
• Final Thoughts
Dealing with leaks under floorboards is a task that calls for professional knowledge and experience. The usage of specified equipment, recognizing the associated risks, understanding legal responsibility, and knowing how to handle insurance are all fascinating aspects of managing such an issue.
It’s always advisable to seek professional help in these matters to ensure that the problem gets fixed correctly without risking personal harm.
Water Damage Under Floorboards: Handle with Expertise
One of the most insidious types of home damage is water damage under floorboards. If not promptly addressed, it can cause electrical wire damage and trigger mold growth.
• Steps to Fix Water Damage Under Floorboards
When it comes to fixing water damage, there’s no one-size-fits-all approach. The repair process typically involves five key steps: uncovering the damage, drying the area, cleaning and disinfecting, ventilating the room, and potentially seeking professional help.
– Uncovering the Damage
This begins with the removal of coverings and the disposal of affected paper products.
– Drying the Area
Once the damaged area is exposed, it’s vital to dry it thoroughly. This process is crucial to preventing further damage and the growth of mold.
– Cleaning and Disinfecting
After drying, clean and disinfect the area thoroughly. Considering the University of Illinois recommends using a bleach solution for disinfection, ensure you have proper protective gear to avoid direct skin or eye contact.
– Ventilating the Room
Proper ventilation is essential to drying out a space and discouraging mold growth. Using fans or dehumidifiers can be particularly effective.
– Seeking Professional Help
In cases of extensive water damage, it’s wise to seek professional help. Experts not only offer their proficiency but also ensure the job is done fast and effectively, saving homeowners from potential hazards and extra costs down the line.
– Time Factor in Water Damage Repair
The length of time to repair water damage varies greatly and chiefly depends on the extent of damage. Addressing a small leak might take just a day, whereas more extensive damage could take a week or longer.
• Protecting Your Floors from Water Damage
It’s always better to prevent water damage than to deal with its aftermath. Consider the following measures to maintain the integrity of your floors:
- Updating Sealants: A fresh coat of sealant can protect surfaces from water infiltration.
- Maintaining Plumbing: Regular plumbing maintenance can prevent leaks in and around your home.
- Watching for Leak Sources: Sometimes, a little vigilance can go a long way in catching leaks early.
- Using Mats and Rugs: These can act as a layer of protection, especially in high-traffic water-prone areas.
- Choosing the Right Cleaners: Certain cleaning products can add a protective layer to floorings, preventing damage from moisture.
• When to Hire Professionals for Water Damage Repair
Water damage can be quite insidious. For minor leaks, homeowners may be able to effect repairs independently. However, larger leaks and extensive damage warrant professional intervention.
Experts can diagnose and address the gravity of the situation more effectively, ensuring the longevity and safety of your home.
If you are in Chicago or nearby suburbs, consider reaching out to ServiceMaster of Lake Shore. With proven expertise, they offer comprehensive solutions to address and resolve water damage issues.
Remember, handling water damage under floorboards requires a careful, methodical approach. Following these guidelines can help ensure your home remains dry, safe, and mold-free.
Emerging Damage from Water Seeping Through the Floor
• Knowing the Risks
Water emerging through the floor is a home hazard that should be swiftly addressed. Left undetected or unattended, this problem can spur the growth of harmful mold and enable an infestation of pests.
The damage can be detrimental and costly to fix if not caught early, resulting in a significant drop in your home’s overall value.
• Identifying the Causes
Several factors can instigate water to surge up through the floor.
These encompass plumbing leaks, ceiling leaks, leakages from in-floor heating systems, elevated groundwater or rising water table, water intrusion from improperly sealed doors and windows, obstructions or breakdowns in drains, and issues with gutters or poor drainage.
• Spotting the Possible Issues
Noticing a wet spot on your floor makes it crucial to investigate for possible leaks. An area above the wet spot on your ceiling is a good place to start due to gravity’s role in water movement. Should you confirm a leak, hiring a professional plumber to diagnose and rectify the problem is a wise choice.
• Detecting Plumbing Leaks with the Water Meter
One valuable tool in locating a plumbing leak is your home’s water meter. By turning off all water sources in your home and observing the water meter for about three hours, you can determine if there’s a plumbing leak.
The principle is simple, a still meter indicates no leak, while a moving meter points to a possibly serious problem. In this instance, a professional contractor’s service becomes essential for immediate repair.
• Investigating In-Floor Heating System Leaks
In-floor heating systems, while providing ample warmth in winter months, also pose potential trouble. If you suspect leakage from this heating system, an infrared thermal camera proves useful in locating the issue.
From here, a trusted flooring contractor or an experienced in-floor heating system specialist can step in to remedy the situation.
• Counteracting Excess Groundwater and Rising Water Table
Problems with excess groundwater or a rising water table often manifest in basement floors. The solution lies in examining the sump pump and tidying up the sump pit. For continued measures, installing a sturdy drainage system can reroute excess water safely away from your home.
• Sealing Windows and Doors to Prevent Water Entry
Windows and doors can often become unsuspected culprits allowing water to invade your home. Ensuring your windows and doors are thoroughly sealed can prevent this problem. If the issue persists, it might be time to consider replacing the old windows or doors with newer, more efficient models.
• Addressing Issues with Drains
Clogged or malfunctioning drains can cause water to seep into your home through the floor. At this juncture, calling a seasoned plumber becomes necessary to promptly address the issue before it escalates into a more severe problem.
• Ensuring Proper Gutter Maintenance and Drainage
Clogged gutters or weak drainage systems can lead to water damage. Regularly ridding your gutters of debris and optimizing your drainage system can significantly reduce the chance of water damage from these sources.
• Contacting Water Damage Professionals
In unfortunate cases where water damage has occurred, your first line of action should be to contact a water damage restoration professional. In addition to completely drying out affected areas, these experts typically take further steps to prevent mold growth, safeguarding your home’s structural integrity.
Based on personal experience, hiring a professional can drastically minimize potential future water damage occurrences.
• Useful References
For more in-depth information on maintaining healthy living environments, consider visiting the United States Environmental Protection Agency’s Guide to Mold, Moisture, and Your Home. This guide contains numerous strategies and recommendations, making it an excellent resource for homeowners.
Recognizing Water Damage in Wooden and Laminate Floors
It’s important to recognize the early signs of water damage to mitigate the expense of repair or replacement. On wooden floors, you can observe signs such as warping, buckling, and blotching. These are indications that water has permeated beneath your wooden floor.
Laminate floors, on the other hand, might show signs such as swelling and discoloration. This is because laminate flooring is designed to resist water, but when subjected to water over time, the protective layers can deteriorate, leading to noticeable damage.
Companies like Lumber Liquidators – source recommend keeping an eye out for these abnormalities.
• Water Damage Remediation for Wooden Floors
Acting quickly is key to minimizing damage. Start by removing any floor coverings over the wooden floors. Then, use a wet vacuum or towels to extract as much excess water as possible from the floor.
Next, introduce fans or dehumidifiers to begin drying the area. In the case of mud or silt, scrub the floor with a non-abrasive brush and detergent. This will disinfect the floor and clean any remaining residues.
In regions with poor ventilation, desiccants can be used. These will help to absorb moisture from the atmosphere, ensuring a faster drying process. Completing the drying process is crucial. Rely on moisture meter devices to ensure the floor is thoroughly dried.
• Managing Board Repairs
Leak repairs on wooden floors can be trickier as they may need you to remove and replace one board at a time. If we talk about tongue and groove boards, they can be re-installed by removing the tongue.
Prudently, plane-edged boards might need cutting and screwing into place, which might necessitate some knowledge of carpentry.
• Identifying Water Damage in Concrete or Tiled Floors
Concrete or tiled floors also have telltale signs of a leak. Widespread puddles, and mold growths are some common signs. Loose or broken tiles might signal leaks beneath the surface.
To check the water leak, turn off suspected water sources, check your water meter if it’s still running, and suspect a leak. Look for leaks seeping down through the ceiling if your bathroom is on a second floor or higher.
Detecting and repairing broken pipes or external water leakage might need an experienced plumber.
• Minimizing Future Leak Damage
When installing new flooring, consider preventative measures as well. For one, remember to leave access points possible in plumbing areas. This ensures you can swiftly handle any future leaks.
Consider installing an isolation tap above the floor level for future leak prevention. Regular checks of appliances and plumbing can shield your flooring from disastrous leaks.
The US Environmental Protection Agency – source recommends regular maintenance to maintain the health of home appliances.
In conclusion, proactively recognizing and addressing potential leaks can minimize damage and save you future costs. Apply these expert tips to safeguard your home from water damage.
• Water Seepage: A Silent Destroyer of Home Foundations
One of the most commonly overlooked threats to your home is water seepage. This silent destroyer can dramatically impact the integrity of your house, leading to an array of unwanted complications, such as pest infestations, mold growth, and potentially severe damage to walls, floors, and furniture.
– The Dangers of Water Seepage
Water seepage is not a benign problem that you can ignore. The constant moisture seeping through the floor has a staggering potential for havoc.
Initially, undetected and untreated seepage can invite pests into your home, fascinated by the newly created damp environment. Additionally, the continuous presence of water in your home forms a perfect breeding ground for mold.
Moreover, the integral structure of walls, floors, and furniture can be severely compromised as the moisture seeping into your home weakens the structural stability. This weakening can lead to massive bills for repair and replacement if not addressed in time.
– Ensuring Thorough Foundation Sealant
The defense begins at the foundation of your house. This is the first line of defense against water penetrating into the home and needs to be treated as such. A properly sealed and protected foundation can significantly decrease the risk of water seepage.
Always remember the strength of a building relies heavily on the firmness of its foundation. I would highly recommend consulting a professional to inspect and ensure that your foundation is thoroughly sealed.
– The Role of Landscaping
Sloped landscaping without proper drainage is a recurring villain in contributing to water seepage. During torrential rainfall or heavy watering, excess water follows the path of least resistance and may end up inside your home.
By incorporating adequate drainage systems in your landscaping design, you can guide this excess water away from your home. For some useful tips on home landscape drainage, consider visiting The University of Tennessee Extension, an educational domain that provides guidelines for proper landscape drainage.
– Beware of Clogged Gutter Systems
Clogged gutter systems are a homeowner’s worst nightmare. When blocked, they lose their ability to direct rainwater away from the house, leading to seepage into the basement, the foundation, or even around windows.
Therefore, it is crucial to regularly check and clean your gutter systems, especially right before the rainy season.
– Plumbing Systems and Water Seepage
Another common culprit causing water seepage is busted or leaking water pipes. These plumbing issues are indisputable in their ability to wreak destruction within your home when unaddressed.
In the case of a major water line break, the situation can rapidly escalate, with water seeping through the floor on a large scale. To manage such a situation, my recommendation is to turn off the main water line immediately and consequently contact your water company to discuss remediation steps.
– The Importance of Timely Remediation
With water seepage, the saying “time is of the essence” cannot be overstated. Immediate attention and acknowledgment of any water seepage issues play a vital role in preventing further damage to your property. Delays can drastically escalate the damage, driving up repair costs and potentially making your home an unhealthy place to live.
An ounce of prevention is indeed worth a pound of cure. It’s better to address seepage problems promptly than to face the ripple effects of ignoring such issues in your home sanctum.
In the realm of homeownership, maintaining a dry, water-seepage-free home is indeed a primary concern that should never be overlooked.
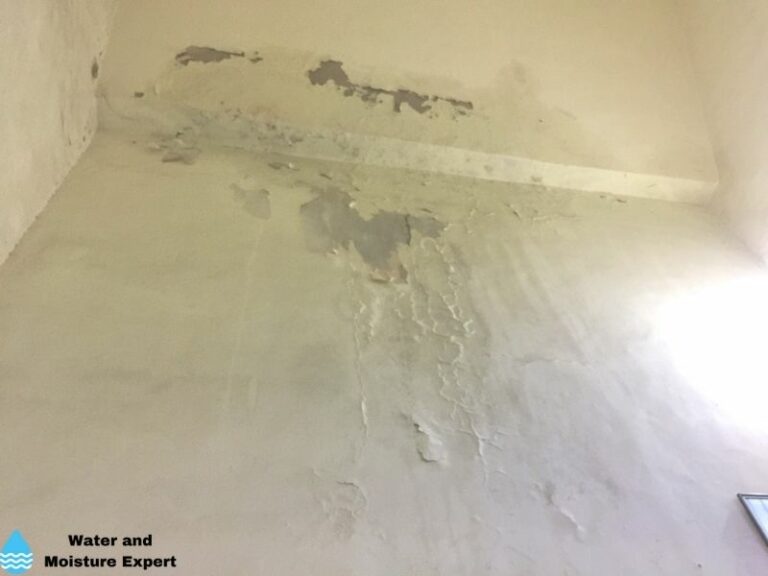
– Initial Discovery: Kitchen Floor Water Damage
I was visibly elated upon the purchase of my first house, but my joy was short-lived. I soon realized that the kitchen floor had been poorly renovated by the realty company. It all started with the floor starting to sag, followed by a squishy sound every time I stepped on it.
The situation took a worse turn when water began to seep from the gaps between the floorboards after the first heavy rain since moving in. It looked like I was going to have a lot on my plate trying to figure out the underlying issue.
– Visual Inspection: A Helpful Commenter’s Suggestion
Upon sharing my predicament in an online community, a helpful commenter proposed doing a visual inspection of the outside of my house, including the roof and soffit/flashing.
He added that this approach often helps to find where the water might be infiltrating the house. So, I promptly did the visual inspection, which gave me some clues about potential infiltration points.
– Possible Issues: Water Pipe or Outside Cladding?
Many other issues were raised by netizens who were following my posting on the forum. Some suggested that a pinhole in a water pipe might be the offender, while others pointed out the possibility of water invading my house through the outside cladding.
This opened up a new perspective and more areas for me to investigate.
– Crawl Space Inspection: A Major Breakthrough
Another commenter suggested investigating the crawl space under my house to see if there were any visible indicators of the water source. This suggestion was beneficial as it gave me another valuable direction in my quest to resolve the water damage issue in my kitchen.
– Investigating Previous Owners: A Healthy Suspicion
Someone also expressed suspicion about the previous owners of the house. They suggested that the previous owners could have known about the water intrusion problem. This propelled me to do some research on permits for renovations done on the house to further mine the issue up to its roots.
– Advice from a General Contractor: Get It Checked!
An experienced general contractor on the forum gave a piece of very pertinent advice. He advised hiring a contractor or a plumber to check the issue as soon as possible. He stressed that the water causing this damage might further degrade the condition of the house if not checked on time.
– Plumbing Leak Detected: My First Major Finding
After much search and investigation, I was able to trace a leak under the sink. This finding explained much about the water damage issue. I needed further guidance on how to handle the situation and reached out again on the forum.
– Fixing the Leak and Drying the Area: Contractor’s Professional Advice
The contractor advised me to fix the detected leak immediately and dry the affected area as much as possible. He emphasized this step as very vital to preventing the growth of mold, which could compound the issue. I followed suit promptly.
– Additional Measures: Insight For Thorough Inspection
Some other commenters suggested more places to inspect, including inside the kitchen cabinets and the outside of the house, for evidence of water pooling around the foundation. I incorporated these inspections into my remedial procedure.
– Grading Issue or Drain System: Prospective Causes
The possibility of a grading issue or a need for a drain system around the house was brought up when I confirmed having a crawl space under the house. The insinuation here was that if the water was seeping upward, a grading issue or a faulty drain system might be the culprit.
– Contacting the Realty Company: Chasing the Warranty
The importance of finding the source of the water was further emphasized. A commenter suggested contacting the realty company to check if their work was covered by a warranty. This led me to explore speaking with the realty company about the issue.
For further assistance on this topic, I recommend visiting the Housing and Urban Development’s guide on eliminating water in your home, available at https://www.hud.gov. This comprehensive guide helped me a great deal in resolving my home’s water issues.
Ongoing Troubles: Ceiling Leaks as a Cause of Water Damage Under Floorboards
Water damage under floorboards often goes unnoticed until it inflicts severe damage. One common cause of such damage is ceiling leaks.
A leak in the ceiling, despite being seemingly innocuous, can lead to considerable water accumulation under the floorboards. Over time, this unwelcome water intrusion can cause substantial damage to your property.
• The Hidden Dangers: Underfloor Heating Leaks
If you have underfloor heating installed in your home or office, there’s a hidden threat that is worth being aware of.
When these heating systems leak, water can quickly and quietly accumulate under your floorboards, leading to unseen water damage. Even minor leaks can cause big problems if left unchecked.
• Groundwater Intrusion: An Unseen Threat
Another potential source of water damage under floorboards is groundwater. Groundwater can sometimes seep into the areas under your floorboards, which, over time, can lead to significant water damage. This silent invader is often difficult to detect before it has already caused substantial damage.
• Hazards of Water Under Floorboards: Electrical Fire Risk
Water accumulating under flooring can be more than just a source of damage to your property. It can also pose an electrical fire hazard. If there are any electrical conduits or outlets in close proximity, the risk is exacerbated. The situation, therefore, necessitates prompt attention.
• Mold Growth: The Undesirable Outcome of Water Damage
The presence of water under your floorboards can also lead to another undesirable outcome mold growth. This sneaky intruder can significantly affect the health of occupants, often causing respiratory issues and other health problems.
The EPA warns of the serious health effects mold can cause, especially in people with allergies and asthma.
• The Ultimate Damage: Structural Compromise
Structural damage is yet another serious consequence of unattended water under floorboards. Over time, the water can rot away the wood and other materials, compromising the structural integrity of your property.
This not only reduces the value of your property but can also lead to dangerous situations if the structure collapses.
• Strategy for Repair: Removing and Disposing Water-Absorbed Items
To address water damage, you must first remove any floor coverings. All paper products, like cardboard boxes or newspapers, that could have absorbed the water, should be discarded immediately.
• Drying: A Vital Step in Damage Control
After the removal of these affected items, the focus should be on drying the area. Using towels and dehumidifiers can help you battle the moisture that has seeped in, reducing further water damage.
• Cleanliness: Preventing Mold Growth
Cleaning and disinfection are vital for preventing mold growth. It’s also a crucial step in maintaining a healthy environment post-water damage. With thorough cleaning, you not only get rid of the existing mold but also remove any spores in the area.
• Ventilation: The Key to Drying the Area
To promote drying, keep your rooms adequately ventilated. The use of fans to circulate air is a beneficial strategy and brings drying under effect rapidly.
• Call in the Experts: Hiring Water Damage Restoration Services
In situations like water damage under floorboards, expert intervention like that of a water damage restoration company such as ServiceMaster of Lake Shore is often needed. With their efficient and effective repair strategies, they can help restore your property to its original condition.
• Factors Influencing Repair Time
The time required to repair water damage under floorboards varies depending on the size of the property or the damaged area and, importantly, the source of the water leak.
• Prevention: Updating Sealants and Maintaining Plumbing
To protect your floors from water damage, consider updating your sealants and conducting regular plumbing maintenance. Having a proactive approach can save you from huge repair costs down the road.
• Protectors of Floor: Mats and Rugs
The use of mats and rugs, especially in areas inclined to water exposure, is another preventive measure. These can catch any water and prevent it from seeping through to the floorboards.
• The Right Cleaners for Floor Maintenance
Choosing the right cleaners is vital. Certain cleaners can help maintain the floor’s integrity and provide resistance to water, thereby helping to prevent and minimize damage.
• The Advantages of Hiring a Professional
Hiring a professional for water damage repair comes with numerous advantages. Not only can they efficiently solve the problem, but they can also identify and address any other underlying issues.
• Insurance Claims: A Professional Can Assist
Professionals can often guide you through insurance claims related to water damage. They typically know the ins and outs of the process, making it much smoother for you.
• Water Damage in the Chicago Area?
For those residing in the Chicago area, if you have water damage, contact ServiceMaster of Lake Shore. They provide professional assistance to mitigate risks and ensure the safety of all occupants. Trusting a professional in such a daunting time can make all the difference.
Importance of Swift Action Against Water Seepage
If you notice water seeping up through your floor, quick action is key. This issue can lead to severe consequences, such as mold growth and pest infestations. Assessing the problem immediately is crucial to prevent these possible outcomes.
• Understanding the Problem
On some occasions, water appearing to rise from the floor is, in fact, trickling down from the ceiling. Damages following heavy rain might leave your ceiling leaking.
These leaks often drip water onto floors, creating the illusion of ground seepage. It would be best if you made a habit of inspecting your ceilings for damage.
• The Behind the Scenes Problems
It’s important to note that seepage issues may not always be visible. Plumbing leaks, hard to notice, often cause water to seep through the floor. In such cases, your water meter can come in handy.
Check it after having all water sources turned off for three hours. If it has moved, there’s a leak somewhere. This useful site by the University of Virginia provides more information on the topic.
• The Invisible Foe
Underfloor heating systems, which are not easily seen, can also be culprits of floor water intrusion. They leak occasionally, causing water to permeate the floor. Expert contractors can use special tools like infrared thermal cameras to trace these hidden leaks.
• The Groundwater Threat
Excess groundwater or a rising water table can also make water seep up through your basement floor. If you’re living in a region prone to heavy rains or flooding, this can be a problem.
In such cases, your sump pump should be your first line of defense. Regularly checking it and replacing it if needed can help alleviate the issue. Further, an adequate drainage system is beneficial in managing this.
• Vulnerabilities in Seals
Seals on windows and doors, when improperly fitted, can let water in, saturating your floors and subfloors. In this regard, it’s recommended to seal-protect these fixtures. Consider caulking windows or replacing them if they are in bad shape.
• The Drainage Issue
Clogged or broken drains can also allow water to seep through your floor. Foreshadowing signs include unpleasant odors or slow-draining sinks. This suggests a drain line problem that needs to be urgently rectified.
• Landscape Features That Enable Floods
In case your gutters are clogged or the drainage on your property is unsatisfactory, water may infiltrate your home. To prevent this, regular gutter cleaning and installation of drains in rain-catchment areas are critical.
• The Damage Escalates Quickly
The consequences are severe once floors, ceilings, or walls get wet. Mold and mildew, hazardous to health, can start growing in as little as 24 to 36 hours after exposure to moisture. Calling a water damage restoration professional should be your immediate action step.
This article is about quick action when water intrusion signs become evident – from understanding the problem, dealing with ‘behind-the-scenes’ leaks, groundwater threats, vulnerabilities in seals, drainage issues, and the speed at which water damage escalates, to preventive measures to keep your home safe and dry.
• Clearing the Floor Coverings
Before you begin your battle against water damage, it’s vital to clear your floor properly. All floor coverings, including rugs and carpets, must be removed.
This is an important step as it allows the underlying wood floor to dry properly without trapped moisture causing potential damage or encouraging the growth of mold.
• Drying Visible Water
Any visible water on the surface should be attended to immediately. Employ simple drying techniques, such as mopping and toweling, to eliminate excess water.
In more severe cases, when the water level is high, use a water pump. This high-power equipment works by sucking water off your floors and shooting it outside your house via a hose.
• Initial Cleaning
Feel free to commence cleaning before your floors have started completely drying. Equip yourself with a brush and detergent; scrubbing the wood is often recommended to disperse embedded dirt and to prep the wood for the drying process.
• Partial Floorboard Removal
It might seem a counter-intuitive approach, but removing a handful of floorboards can actually help in the drying process. This action allows the remaining boards to expand, and it also exposes the subfloor, promoting a faster and more efficient drying process.
• Utilize Fans for Circulation
To speed up the drying process, proper air circulation is vital. Setting up fans will help circulate the air around your home, therefore expediting the drying process. Have the fans direct the air across the surfaces, creating a flow of air that picks up the moisture and carries it away.
• Measuring Moisture Content
Before you rush into refinishing or recovering your wood floors, it’s key to measure the moisture content. Wood naturally absorbs and releases moisture, so don’t be too surprised to find that even ‘dry’ wood isn’t completely devoid of moisture.
A moisture meter, available at home improvement stores, will allow you to measure the moisture content accurately.
• Lowering Humidity in the House
As a homeowner, it’s essential to know some proven methods to lower humidity in your house. It may start by opening your windows and doors for airflow and extend to more specific tactics like pumping out crawl spaces.
Also, if your ducts are flooded, avoid using central air conditioning. Use dehumidifiers and desiccants to remove moisture in enclosed areas. Resources on how to properly use these dehumidification tools can be found on the EPAs website.
• Patience with The Drying Process
Lastly but importantly, patience is the key. Drying wood floors and the subfloor beneath may require a significant amount of time. They may take weeks or even months to fully dry, depending on the severity of the water damage and the weather conditions.
Don’t rush the process; give it time to ensure the longevity and durability of your wood flooring. The key goal is to totally eradicate all dampness to prevent future issues like warping or dangerous mold and mildew growth.
Remember, dealing with water-damaged floors may seem like a daunting task, but with these steps, you’ll be on the right path to restoring your floors to their original beauty. So roll up your sleeves and get started. Your floors are counting on you!
• Identifying Leaks Under the Floor
It’s important to understand that leaks under the floor can occur in any type of house, whether that be a condominium, apartment, or traditional house, and impact all types of flooring.
• Identifying Water Damage on Hardwood Floors
Hardwood floors can exhibit several telling signs of water damage. This could include dark spots, mildew, and mold.
These signs can help quickly identify a potential leak under the floor, allowing you to rectify the issue before it gets worse. Here’s a useful guide on identifying water damage on the University of Florida’s website.
• Laminate Floors and Water Leaks
For laminate flooring, a water leak can cause certain areas to swell and discolor. This can take away from the aesthetic appeal of your floors, in addition to causing structural damage.
• Removing Moisture from Wooden Floors
Once you’ve identified a leak, the focus shifts to damage control. To remove moisture from the wooden floors, homeowners need to first remove any floor coverings trapping the water. Following this, a wet vacuum can be the best method to remove as much water as possible from the floor.
• Cleaning Up Mud and Soil
Next, scrubbing the floor with a non-abrasive stiff brush and a reliable detergent can help in removing any accumulated mud or silt. This process can further aid in preventing long-term water damage.
• Using Desiccants for Drying Out the Floor
In certain situations where air circulation is poor, desiccants can be used to dry out the flooring. Desiccants are substances that have a high affinity towards water and can help absorb moisture. One popular example is silica gel.
• Drying Floors in Severe Water Damage Cases
In extreme cases of water damage, the drying process may take a few days or even weeks. Promoting air circulation using large fans and open windows can aid in drying the floor.
• Using Dehumidifiers
Dehumidifiers can be another effective solution to remove excess moisture from wood floors that may have absorbed water. These devices work by reducing the humidity levels in the air, helping your floors dry quicker.
• Checking Moisture Levels
A reliable way to ensure that your wooden floors are completely dry is to use a moisture meter. Wood floors are considered dry when their moisture levels are below 5%.
• Repairing the Leak
Repairing leaks usually involves removing the affected flooring boards one by one. After the leak is successfully repaired, the missing boards can be replaced with help from local suppliers or by using extra boards from your storage, if available.
• Identifying Leaks in Concrete or Tile Floors
Telltale signs of a leak in concrete or tile floors include puddles, mold, and loose or broken tiles. It’s necessary to take immediate action upon identifying these signs to avoid further damage and increased repair costs.
• Recognizing and Troubleshooting Leaks
Turning off suspected water sources and checking your water meter can help identify if there’s a problem. If the leak isn’t visible, it may be necessary to remove tiles, which can be costly. In such cases, it’s recommended to seek professional assistance to properly diagnose and correct the issue.
• Preventative Measures for Leaks
Mitigating the risk of leaks is possible by taking a couple of preventative measures. One preventive measure is to design your home with access points to your plumbing and install isolation taps above the floor.
• Regular Checks
Lastly, routinely checking your appliances and plumbing is a crucial measure to prevent leaks. You can find more prevention tips on the International Association of Certified Home Inspectors website.
Since leaks can easily go unnoticed in the early stages, regular checks can undoubtedly prevent potential issues from escalating.
Remember, a proactive approach towards maintaining your home’s flooring can save not only money and time but it can also result in a safer, healthier living environment for you and your loved ones.
• Water-Resistant Properties of Laminate Flooring
Laminate flooring is renowned for its beautiful aesthetic and durability, making it a popular choice for many homeowners. While it’s engineered to be water-resistant, it’s essential to understand that it is not completely waterproof. Thus, prolonged exposure to water can result in devastating damage.
• Proper Ways of Removing Water from Laminate Flooring
When water spillage occurs on laminate flooring, it is advisable to remove the water promptly. This can be done using several tools. A dry cloth or towel can be used for immediate absorption of the water.
However, a wet vacuum or water pump proves to be more efficient for larger spills. Handling water spills promptly prevents the water from seeping into the laminate flooring, subsequently preventing damage.
• Boosting the Drying Process Using Fans and Other Appliances
After immediate water removal, drying the area is of utmost importance. This can be achieved by adopting a holistic approach using dehumidifiers, fans, and space heaters.
These appliances will increase air circulation and hasten the evaporation of any lingering moisture, thereby preventing it from seeping into and damaging the laminate flooring.
• Addressing Water Damage on Laminate Floor
In situations where water exposure has been extensive, it may be required to take apart the laminate flooring for in-depth examination and treatment. This includes removing the trim and individual boards. This approach enables thorough assessment and effective action regarding the degree of water damage.
• Underlayment Cleaning Process
The underlayment of the laminate flooring should also be scrutinized. A suitable cleaning method is a solution of water and ammonia-free dish soap. After cleaning, a bleach solution can be used to disinfect the area and eradicate any mold or mildew that exposure to water may have encouraged.
The U.S. Centers for Disease Control and Prevention provides some informative guidance on mold removal post-flooding.
• Replacing Damaged Underlayment
Replacement of damaged underlayment is crucial to prevent any persistent moisture from harming your flooring. Ensuring that your underlayment is in a good state will increase the longevity of your laminate floor and maintain its aesthetic appeal.
• Cleaning and Sanitization of Removed Floorboards
After treating the underlayment, your attention should then be shifted to the individual floorboards. Much like the underlayment, a dish soap solution can be utilized for cleaning, followed by a bleach solution for the purpose of sanitation.
• Installation of New Underlayment
If the previous underlayment was too damaged and had to be disposed of, a new underlayment would have to be laid down before replacing the laminate flooring. It is critical to follow the manufacturer’s instructions for a proper installation.
This ensures the underlayment is installed correctly to maximize its performance and lifespan.
• Restoring Laminate Flooring
Restoring laminate flooring involves replacing the damaged boards. This requires the use of tools such as a pry bar to carefully remove the damaged floorboards and replace them with new ones. Additionally, any trim that was removed during the water damage assessment process should also be reinstalled.
• Using Sealant for Flooring Protection
Sealants are an effective preventative measure against potential water damage. Applying a sealant after restoration can bolster the water resistance of your laminate flooring, insulating it from future water spillage or flooding.
This can be very beneficial when it comes to maintaining the beauty and durability of laminate flooring in heavily trafficked or water-prone areas.
Lastly, remember that while laminate flooring is an excellent choice due to its durability and ease of maintenance, like any flooring, it requires maintenance, especially in the event of water damage.
Protecting your investment begins with prompt water removal, thorough drying, cleaning, sanitization, and an effective restoration process.