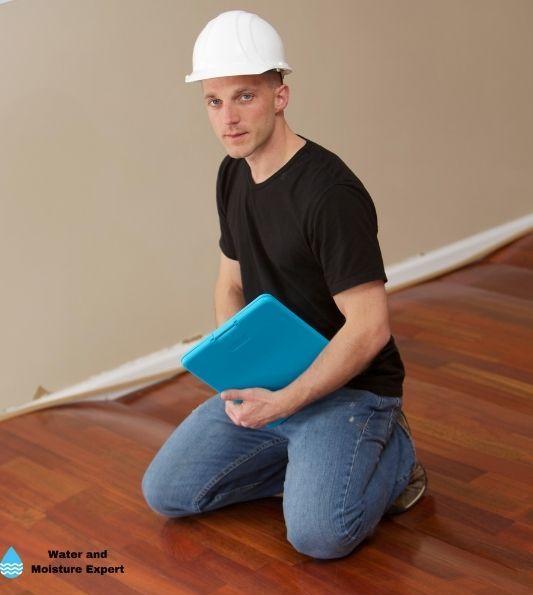
Water Damage Under Your Sink. Tips From Professionals
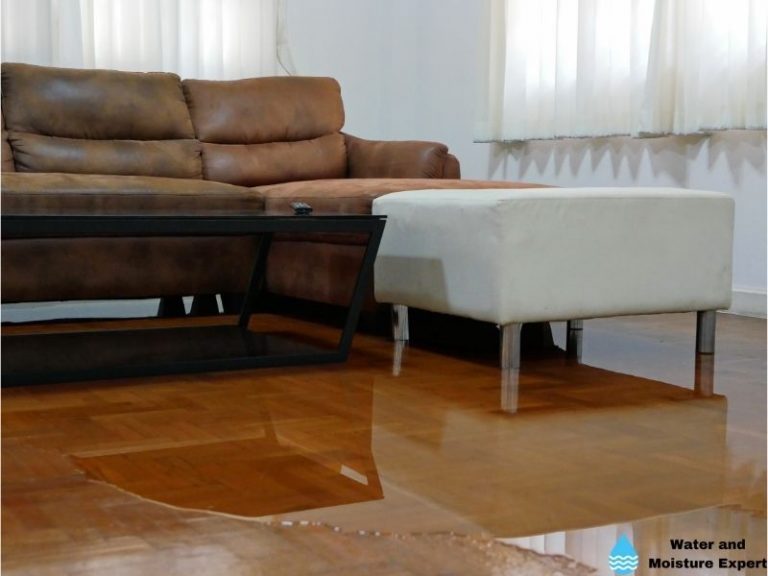
If you’ve experienced water damage under your sink, don’t panic. You can do several things to minimize the damage and get your home back to normal as quickly as possible. Before focussing on the water damage, ensure that you have fixed the water source. Never continue with fixing water damage if the leak is not repaired.
Water Damage Under Your Sink
Before fixing the water damage under your sink, always start with finding the leak that caused it. This can be the sink drain, a faucet connection, the water pipes, or a problem with the filtration system. The next step is to remove the water and moisture. When dry, assess the damage. In many cases, you can sand and repaint. If the material is beyond saving, replace it.
In this blog post, I will look in more detail at the water damage under your kitchen and bathroom sink. What are the potential causes, what can you do, and how can you remove the water quickly? The second part of the article focuses more on fixing the water-damaged kitchen cabinet and wet particle board under the sink.
Contents
Why Is Under My Sink Wet?
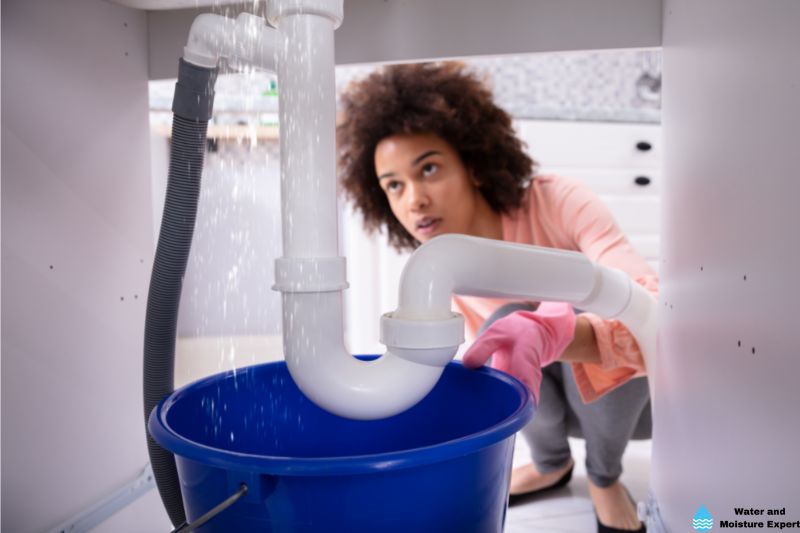
Unsightly water puddles appear under your sink when you open up the cabinet under it. Even though it isn’t unusual to spot water below your sink, you shouldn’t expect to find it here. It usually means that your drain or another piece of plumbing equipment located under your sink has a problem. You can come across this problem for various reasons we will explain in more detail.
If you have a big leak and a lot of water flows, try to find where the water is coming from and close the mains. This gives you time to investigate the problem and clear the area with the water damage.
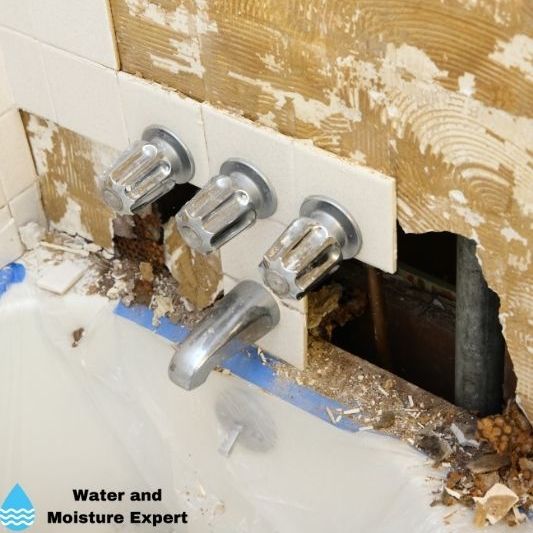
● Leak in Your Sink Drain
A leaking drain is probably the most common reason for finding water beneath your sink. Water that flows down the drain slowly and steadily leaks out due to shifting plumbing lines, worn-out connections, or even pipe corrosion beneath your sink. Clogged sinks are one of the things that encourage this. Clogged drains mean stagnant water sits in your plumbing lines for a long time because they can’t pass through them.
A large amount of water flowing into your plumbing can even put additional stress on the pipes. A small leak occurs due to these fractures or gaps, allowing water that flows down the drain to escape.
The first step is to unclog the drain. You can use a mechanical unclogger or a chemical unclog liquid. But remember that a chemical clog remover can have consequences for the health of your plumbing system for this reason alone. Always check the manual for this.
● Leak in Your Filtration System
A reverse osmosis system is found in some kitchens. These systems usually require little maintenance or attention and offer fresh drinking water. Still, even the tiniest leak can cause water to pour into your cabinet and cause them to wear out.
If you suspect a leak in your reverse osmosis system, check the hoses or lines connecting it to your sink faucet, refrigerator’s water dispenser, or ice maker. If you find a leak there, change the rubber seals to make it water-tight again.
● Leak in Your Faucet Connection
The connection between your kitchen faucet and the main plumbing lines in your home needs to be solid for leaks not to occur. Several things can cause a slow drip or even a tiny trickle of water in your cabinets, like worn seals, rusted hoses, old valves, and many other problems that could cause mold and mildew and damage to the cabinets.
If you think the faucet connection is the problem, change the seals. In most cases, this will fix the issue.
● Plumbing lines under the sink
There will often be one or two water pipes under your sink, the cold and warm water pipes. It is always possible that one of them is leaking at the location where two parts are connected. This can be due to a weak connection or the movement of the pipes when you use your tap.
Check the connections carefully to see if they are leaking. If the leak is small, it can be challenging to spot. In that case, dry the whole area, and add some toilet paper to the various parts. This way, you can spot easier where the leak is.
Turn off the mains and fix the connection if you have found the culprit. If it was soldered before, you can resolder it or use a non-soldering solution.
Water Damage Under Bathroom Sink
Water damage under your sink can be prevented in several ways
It’s the last thing you want to do after having your sink pipes sealed in your kitchen or bathroom. Getting to know your sink pipes is, therefore, a good idea.Getting to know your sink pipes is, therefore, a good idea.
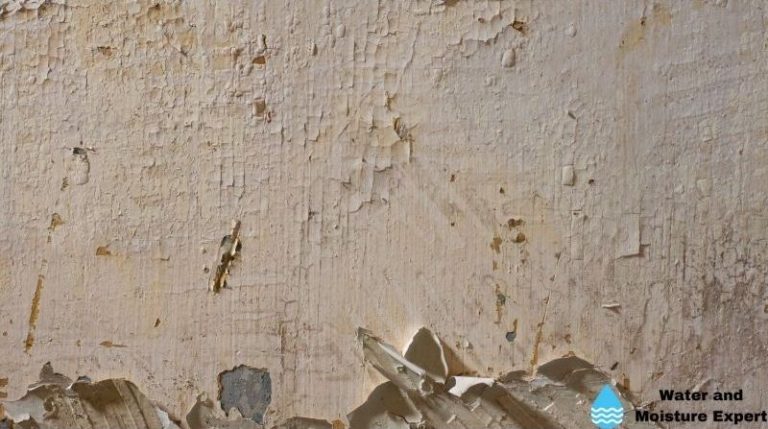
Make sure your pipes are thoroughly cleaned every week or biweekly. Has the caulked seal begun to deteriorate, or are they still secure? Does the pipe itself look like it is in good shape? It is possible that the pipes have hairline cracks.
This damage won’t remain this way forever, even if it’s barely visible now. As soon as you notice, Ensure you turn off the water in the meantime to prevent further damage. A homeowner on a budget will benefit from mitigating the problem early.
How To Clean Water Damage Under Sink
If you need to clean water damage under your sink, follow these steps.
● Step 1 – Dry Visible Water
To solve this problem, you must first absorb pooling water. Any visible water should be soaked up with a sponge or dry cloth.
● Step 2 – Hair Dryer
After soaking up the initial water, your hair dryer can be used to remove even more water. The lowest setting on your hair dryer should be used. Leave it on the wet spots for about three minutes while holding it about 9 inches above them. Following those steps again, move to the next spot. You may be able to dry the entire area more quickly if you use the dryer in strips since it may be more severe than just a few spots.
Tip: If you expect that the water has reached areas you can not reach, use a dehumidifier to remove moisture further. But understand that removing moisture this way can take several days, depending on the size of the location, ventilation, and current weather.
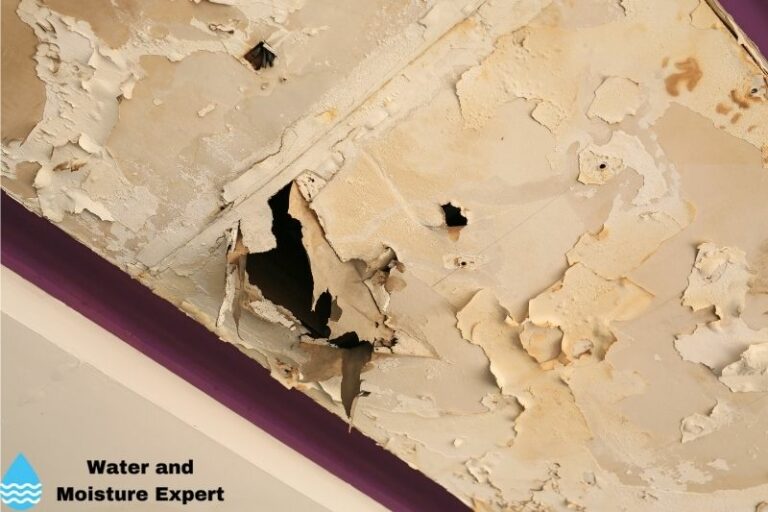
● Step 3 – Dry Mold
Water damage and dry mold may both be problems. Hard scrubbing with bleach and water is the best way to remove this. Scrub the dry mold area with a sponge dampened with bleach and water. In addition to cleaning your dry mold, this also disinfects it, keeping you and your family safe.
● Step 4 – Apply Cleaner
Water damage in your cabinet can be cleaned using several different methods. An extremely common cleaning method is to use ammonia on a cloth. You can rub ammonia into the stains or the entire cabinet with your cloth after applying ammonia. The same method can be used with mayonnaise mixed with cigarette ashes. Put a cloth over the affected areas and apply this paste.
Water damage can also be cleaned with toothpaste and baking soda. Apply a paste of the two items to the affected area by mixing them together. Applying mineral oil to some steel wool can also make those water damage disappear. Once you have tried all other options and cannot find a solution, you should use mineral oil and steel wool.
● Step 5 – Rub Dry
Approximately 20 to 25 minutes after applying the cleaner, you can start removing it. There is no water involved in this process. The paste or cleaner should be removed with a new, dry cloth rubbed in circular motions. The water damage will also hopefully be removed and lifted.
● Step 6 – Rinse and Polish
After your cabinet is repaired, rinse it with cool water. You can polish your cabinet once you’ve rinsed and dried it so it looks new again once again after you’ve polished it.
Hair dryers are useful for drying wet spots. The particleboard can catch fire if you use a heat gun. Leaving the particleboard to dry naturally is an option if you have the time. Another option is to bring in fans that can help you dry the floors faster.
I recommend using a dehumidifier to remove all moisture from the cabinet even faster. You can use a residential dehumidifier, but I always recommend renting commercial dehumidifiers. They can remove a lot more water per hour than a residential dehumidifier.
A dehumidifier pulls in the moisture from the air and dries it out to release dry air back into the room. When used with a fan, this can effectively dry out the sink and other water-damaged parts quickly.
Water Damage Under Kitchen Cabinets
Water damage appears differently on different cabinet materials. For example, let’s take a giveaway for telling if MDF cabinets are water damaged or if they are swollen in some places.
The layers inside these cabinets expand when water seeps into them for an extended period. The bubbled look caused by damage to your cabinets will make them look old and dingy.
A wood cabinet that has been water damaged will lose its color, finish or be lighter or darker than before. The finish of a wood cabinet will fade over time if the water sits on it for a long time, leaving noticeable marks.
Having water sit in one place for too long can cause discoloration of your wooden cabinets. A leaky sink, water entering from the outside, or water splashing across the cabinets over time may be the cause.
Kitchen Cabinet Bottom Panel Replacement
It’s common for the bottom panels of your kitchen cabinet to be damaged if there is a leak. If you have removed the moisture, you can sand and repaint damaged parts in many cases. But if the damage is severe, you have to replace those parts. Here are the steps to follow to repair it.
● Step 1 – Measure the cabinet interior
Measure the interior of your cabinet first. Most base cabinets measure 24 inches deep and 32 inches wide. There is, of course, a slight difference in the size of the floor itself. You only need one piece of 1/2″ plywood to fill this space. Lowes and Home Depot sell plywood by the half-sheet and quarter-sheet. So you save money and hassle by not having to buy a full sheet.
Because the replacement piece is so large, it will be difficult to fit into the cabinet in many cases, making the repair complicated. There’s a problem with the front frame divider. Therefore, the new floor must be installed in two pieces that meet in the middle. Using a measuring tape, start at the left wall and measure to the cabinet’s center. You will use this measurement to determine the width of your first piece.
● Step 2 – Cut the First Panel
The first piece should be cut to length and width with a table or circular saw. Take it into the house and place it inside the cabinet roughly. The back of the cabinet may have plumbing lines that meet this piece. It won’t lie flat right away if that’s the case. As an alternative, you will need to raise it like a ramp. Be sure to hold the piece high from the front. It will point down and touch the pipes in that way.
Make a pencil mark on the panel edge where the plumbing will be located. Each pipe’s center should be marked with a single line. To ensure you’re aligned properly, look directly at the plumbing and be sure your panel is tightly pressed against the side wall. You won’t be able to place the panel correctly if you don’t.
● Step 3 – Cut The Second Panel
The first panel should be placed when you measure it from the other side of the cabinet. Take measurements at the front and back edges of the first panel. Using this method, you can account for a slightly out-of-square cabinet.
Fit the second piece as closely as possible to the existing space. Can you tell me if the cabinet has plumbing on this side? To test fit the second panel in the cabinet, repeat the steps above to create pass-through holes.
Make sure the two panels fit tightly together at the center and front of the cabinet. Sides and backs can have gaps. Caulk or construction adhesive can be used to fill in these gaps later, making them less noticeable.
● Step 4 – Add New Panel
Using construction adhesive, cover the old floor with a thick coat of adhesive after removing both panels from the cabinet. If any areas where the floor seems to have sagged, add big blobs of cement. In the cabinet, reposition the panels carefully.