Water Damage Books. 7 helpful tips
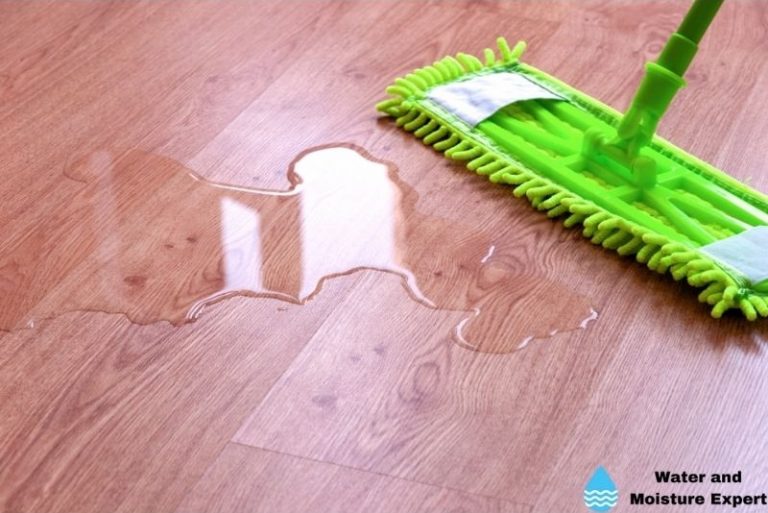
Finding water-damaged books, paper, or a watercolor painting can be upsetting. Before you throw them out, attempt to fix them. Not all books are fixable, but many can be saved if you use the right method.
Water Damage Books
You can still save water-damaged books or paper. If the book is really wet, try to suck up as much water with a towel or paper towels. Separate the pages that are easy to separate. Air-dry the book or paper, and using a fan can be a great help. Be really gentle. Wet paper can rip easily. Air-dry the book on a paper towel. When it gets moist, replace it.
In this blog, I will try to help you restore water-damaged books. In many situations, you can still save them. I will also explain how to flatten water damaged paper
Contents
- 1 Water Damaged Books
- 2 How Do You Fix Water Damaged Paper
- 3 How Do You Flatten Water Damaged Paper?
- 4 How Do You Flatten Pages Of A Book That Got Wet?
- 5 How Do You Flatten Paper Fast?
- 6 How Do You Flatten Watercolor Paper After Painting?
- 7 How Do You Straighten Buckled Watercolor Paper
- 8 Optimal Workspace for Drying Wet Paper
- 8.1 • Gentle Handling of Wet Paper
- 8.2 • Use of an Oscillating Fan
- 8.3 • Quick Drying Using Microwave
- 8.4 • Removing Wrinkles Using Weight
- 8.5 • Dealing with Wet Books or Binders
- 8.6 • Preservation of Wet Papers Using a Freezer
- 8.7 • Salvaging Wet Photos
- 8.8 • Contacting a Photo Restoration Expert
- 8.9 • Managing Antique Photos
- 8.10 • Professional Help for Cherished Papers
- 8.11 • Suggested Paper Restoration Services
- 8.12 • Determining Wrinkle Fixes: Paper Type is Key
- 8.13 • An Innovative Solution: Using Wet Prints and Baking Paper
- 8.14 • A Tried and True Method: Spraying and Wiping Prints
- 8.15 • The Downside of Dampness: Avoiding Discoloration
- 8.16 • Choosing the Right Tool: Harnessing Plant Press Power
- 8.17 • Importance of Quick Intervention in Water-Damage Cases
- 8.18 • Optimal Environment for Drying Wet Paper
- 8.19 • No to Blotting!
- 8.20 • Use of a Low-Speed Oscillating Fan
- 8.21 • Wrinkle Mitigation Techniques
- 8.22 • How to Dry Damp Books or Binders
- 8.23 • Dealing with Water-Damaged Photographs
- 8.24 • When to Seek Professional Help
- 8.25 • Flattening Wrinkles: Pressing and Ironing
- 8.26 • Air Drying After Pressing
- 8.27 • Importance of Knowing Paper Restoration
- 8.28 • Recommendations
- 8.29 • Using a Cinder Block to Flatten Warped Books
- 8.30 • Ironing a Poster Between Two Thick Watercolor Papers
- 8.31 • Potential Risks of Ironing and Weight Method
- 9 Artwork Restoration: How to Mend Damaged Drawings
- 10 Handling Flood-Damaged Books and Papers Safely
- 10.1 • Drying Flood-Damaged Documents Sluggishly
- 10.2 • Sustaining Copies of Critical Documents
- 10.3 • Seeking Valid Restoration Techniques
- 10.4 • Useful Resources for Restoration Techniques
- 10.5 • Making the Right Environment: Best Workspace for Drying Wet Papers
- 10.6 • Rules of Engagement: Handling Wet Paper
- 10.7 • The Next Step: Refining Drying Techniques
- 10.8 • Saving Wet Books and Papers
- 10.9 • Salvaging Wet Photographs
- 11 Book Paper and Its Durability
- 11.1 • Dealing with Water-Damaged Books
- 11.2 • Preventing Book Damage through Proper Storage
- 11.3 • Saving Water-Damaged Paper
- 11.4 • Flattening Water-Damaged Paper
- 11.5 • Rescuing Wet Book Pages
- 11.6 • Quick Methods for Flattening Paper
- 11.7 • Handling Watercolor Paper
- 11.8 • Straightening Buckled Watercolor Paper
- 12 Responding to Water Damage: Save Your Books and Photos
- 12.1 • Act Speedily After Water Damage
- 12.2 • Handling Water-Damaged Photos
- 12.3 • Drying Water-Damaged Photos
- 12.4 • Freezing Water-Damaged Photos as a Temporary Solution
- 12.5 • Addressing Water-Damaged Books and Documents
- 12.6 • Indoor Drying for Water-Damaged Books and Documents
- 12.7 • Managing Waterlogged Books
- 12.8 • Preserving Damaged Documents and Books: Use Freeze Drying
- 12.9 • Seeking Professional Assistance for Water-Damaged Paper Restoration
- 13 Types of Water Damage
- 14 Salvaging Water-Damaged Books: A Step-by-Step Guide
- 14.1 • Step 1: Separating Pages with Paper Towels
- 14.2 • Step 2: Drying and Rotating
- 14.3 • Step 3: Flattening the Dried Book
- 14.4 • Freezing the Book If Immediate Treatment Is Not Possible
- 14.5 • Step 4: Consulting a Conservator
- 14.6 • Available Resources for Book Preservation
- 14.7 • Beginning the Drying Process: Blotting the Wet Pages
- 14.8 • Properly Positioning Your Book for Drying
- 14.9 • Employing Assisted Drying Techniques: Fans and Dehumidifiers
- 14.10 • Flattening Your Book Post Drying
- 14.11 • Utilizing a Book Press
- 14.12 • Letting the Book Rest
- 14.13 • Protecting Pages from Heat Damage
- 14.14 • Ironing Pages for a Smooth Finish
- 14.15 • Realistic Expectations: Fully Restoring the Book’s Readability
- 14.16 • When to Consult a Professional
- 15 Setting Up Your Workspace
- 15.1 • Necessary Supplies
- 15.2 • Cleaning the Book
- 15.3 • Drying the Book
- 15.4 • Handling a Slightly Wet Book
- 15.5 • Managing Mold and Mildew
- 15.6 • Reviving Already Dried Books
- 15.7 • The Importance of Immediate Action
- 15.8 • Dealing with Water Damaged Books: Challenges and Solutions
- 15.8.1 – Ironing: A Simple Solution for Minimal Damage
- 15.8.2 – Pressing: A Technique for Moderately Soaked Books
- 15.8.3 – Blotter Paper: A Tool for Removing Residual Moisture
- 15.8.4 – Weights: The Answer to Wavy Pages
- 15.8.5 – Air Drying: An Overlooked Advantage
- 15.8.6 – Weighted Boxes: An Extension of the Pressing Method
- 15.9 • Wet Book Rescue: Paper Towel Method
- 16 The Importance of Overnight Drying
- 17 Blotting the Wet Book
- 18 Initiating the Book Repair Process Immediately
- 18.1 • Evaluating Professional Book Repair Options
- 18.2 • Temporary Preservation Methods: Freezing the Book
- 18.3 • Removing Moisture Using Paper Towels
- 18.4 • Employing Fan-Assisted Drying Technique
- 18.5 • Using the Pressing Technique to Flatten the Book
- 18.6 • Ensuring proper Air Circulation during the Pressing Process
- 18.7 • Timeframe for Pressing the Book
- 18.8 • Ironing Wavy Pages Post-Drying
- 18.8.1 – Restoring Water-Damaged Books: DIY Methods vs Professional Techniques
- 18.8.2 – Attempting Single Book Restoration at Home
- 18.8.3 – Professional Methods for Book Restoration
- 18.8.4 – DIY Restoration Debunked: The Syracuse Library
- 18.8.5 – Vacuum & Press: A method for quicker drying
- 18.8.6 – Additional Drying Techniques
- 18.8.7 – Replacing instead of restoring: A more practical solution
- 18.8.8 – Responsibility for Book Ownership
- 18.8.9 – A Final Attempt: Air Drying and Weighting
- 18.8.10 – The Pragmatic Solution: Book Replacement
- 18.8.11 – Helpful Resources
- 18.9 • Use of Dehumidifiers in Rescuing Water-Damaged Books and Paper
- 18.10 • Varieties of Paper and Their Resilience to Water Damage
- 18.11 • Keeping Your Hands Clean While Handling Wet Paper
- 18.12 • Use a Hairdryer for Drying Water-Damaged Paper
- 18.13 • Absorbing Excess Moisture with Blotting Paper
- 18.14 • Flattening of Water-Damaged Paper Using Weights
- 18.15 • Utilizing a Low-Steam Iron for Paper Flattening
- 18.16 • Proper Storage of Restored Books and Paper
- 18.17 • Preventing Future Damage with Archival Materials
- 18.18 • Utilizing Vacuum Chambers for Speeding Up the Book Drying Process
Water Damaged Books
Everybody knows that it is best to store your books properly, so they are less likely to be damaged in the event of a floor or a leak. But there is always the chance that something can happen. If your books are damaged by water, these seven tips can help.
- Type of book: Understand the type of paper you are working with. Some paper is much stronger than others. For some books with a leather binding, or when water-soluble ink has been used, I advise asking a professional for help.
- Separate the pages: Separate the easy to separate pages before drying them. If needed, put something in between individual pages. If a page is not easy to separate, you can use a different technique to do so.
- Gentle: Be gentle, so you don’t rip the paper
- Speed: Work quickly to flatten pages before they dry
- Dry completely: Always let the paper dry completely flat. I recommend allowing them to air-dry using a fan. If the book is highly wet, first remove as much water as possible with a towel or paper towels. During the air-dry process, put the book on paper towels. Replace the paper towel if it becomes moist.
- Heavy object: Have heavy objects on hand to keep the papers flat
- Proper storage: Store books on a shelf to prevent spills and water damage
How Do You Fix Water Damaged Paper
If you find that you have a flood or a leak and it has damaged some paper items in your home, you may want to save the paper. The best way to do that is to dry it out and try to make it as flat as possible. Paper can start to dry quickly, so if you plan to shape it in any way, you will need to work quickly. Follow these steps to fix it.
● Step 1: Gently Separate The Sheets Of Paper
If you want each sheet to dry, you will need to pull them apart gently. This may be difficult to do without damaging each sheet. Once you have them pulled apart, lay them flat on a table or counter. Make sure none of the papers are touching or overlapping, or they will dry together. You can also hang them up to prevent them from touching or sticking together.
● Step 2: Dab The Papers With A Towel
Dry out your papers by dabbing them with dry towels. Be very gentle and don’t try to wipe the paper with force as it is very delicate and easily rip. You can also lay the towels on top of the paper and use something heavy to weigh them down. When they absorb the water from the paper and become damp, remove them or switch them out for dry towels.
● Step 3: Use A Fan
If your paper is very wet or if the towels did not remove enough water from them, you may want to use a fan to help dry it. You will need to put something heavy on the paper to hold it down so the fan doesn’t blow it away. You should let the fan aim directly at the paper and leave it on until the paper is completely dry. Turn the fan on to the lowest setting, so you don’t take a chance of ripping the paper.
I also have used a dehumidifier, together with a fan, to ket the moisture level down more quickly.
How Do You Flatten Water Damaged Paper?
Flattening the paper is necessary to ensure it dries flat and can be used properly. There are a couple of different ways you can choose to flatten the water-damaged paper:
● Flatten Water Damaged Paper: Wool
You want to be able to put the wet paper between something that is heavy and dry but will not stick to it or chance ripping it when you remove the paper. Placing it between sheets of wool and then weighing down the wool will help flatten it while it dries.
● Flatten Water Damaged Paper: Books
Another excellent way to keep the paper flat is to place it between the pages of a heavy book. You shouldn’t do this if the paper is wet or has any moisture. Once the paper is no longer wet, you can place it in the books and stack the books.
● Flatten Water Damaged Paper: Cardboard
You can also use heavy and flat pieces of cardboard to help you dry out the paper. Place the paper on a hard surface and add a sheet of cardboard on top of it. You can also add something heavy such as a stack of books, to the paper to hold down the cardboard and make the paper flatter.
How Do You Flatten Pages Of A Book That Got Wet?
It may seem impossible to dry out the pages of a book that has gotten wet, but the process is actually very simple. Put a piece of plain white, unprinted toilet paper between each wet page. Close the book and then put something heavy on top of the book. Check it every other day to see if the pages are dry. Once they are all dry, you can remove the toilet paper and use the book as normal.
How Do You Flatten Paper Fast?
Sometimes you don’t have a lot of time to spend drying the pages of a book or flattening them. It is possible to flatten them quickly. Just try one of these simple options:
● Wet The Paper
If you have wrinkled or crumpled paper, but it isn’t wet, you should lightly spray it with water to make it damp. Then put it between two heavy books for 24 hours. The water will help relax the fibers, so the paper takes a new shape more easily.
● Microwave It
If the paper is very wet and you need to dry it quickly, you can put it in the microwave for a short time. This will pull the moisture out of the paper. Once it is only damp, you can place it between two books and allow it to dry thoroughly.
● Smooth By Hand
If the paper is strong enough, you may be able to smooth it out by hand. You will need to make it damp and then use your hands to push out all the wrinkles and cracks gently. You can continue to smooth the paper until it starts to dry and you notice the wrinkles and creases are gone.
● Use A Steamer
You may be able to steam the paper to smooth it out. You can do this with an actual garment steamer if you have one or even an iron that has a steam setting. You will need to be careful not to get the paper too wet or too hot. You can also take the paper into a steamy bathroom where hot water is running and allow the steam from the shower to make it easier to work with so you can smooth out the wrinkles easily.
How Do You Flatten Watercolor Paper After Painting?
When you use watercolors to paint on paper, the paper can be scrunched up and not as flat as you might prefer. There are some ways you can flatten it after you have painted on it without ruining the colors and the artwork. Follow these steps to do it properly.
● Step 1: Wet The Back Of The Paper
Use a spray bottle with a fine mist to spray the back of your watercolor painting. Only apply a small amount of water as you don’t want to oversaturate it and cause the paint to run.
● Step 2: Stretch It
Gently stretch out the paper on a flat surface. You can use rocks or paperweights to hold down each of the corners. Be very careful not to tear the paper as you stretch it and make sure it is stretched evenly.
● Step 3: Dry It
Allow the paper to air dry while it is stretched. You can also use a hairdryer to speed up the drying process gently. Be careful not to add too much heat to the paper as it may singe or burn and destroy the artwork.
How Do You Straighten Buckled Watercolor Paper
Sometimes your paper can buckle once your watercolor paint dries. This means the middle is flat, but the ends are curved up. When this happens, it can make it hard to display your artwork. Luckily, there are some things you can do to straighten it.
● Step 1: Butcher Paper
Lay a sheet of butcher paper on a completely flat surface. This is where you will flatten your painting while ensuring it is not damaged.
● Step 2: Place The Painting
Put the painting face down on the butcher paper. You want to make sure the side with the paint on it touches the butcher paper and does not face you.
● Step 3: Wet It
Use a spray bottle to wet the back of the painting. Only spray a small amount so it does not bleed through to the other side and cause your colors to run.
● Step 4: Cover It
Use another sheet of butcher paper to cover the back of the painting. This will help flatten both sides and ensure there are no paper wrinkles.
● Step 5: Weigh It Down
Add books or other heavy objects to the top of the second sheet of butcher paper to weigh it down. This will help keep the sheet of paper flat and ensure it doesn’t roll up again.
Optimal Workspace for Drying Wet Paper
To effectively dry wet paper, the first step is choosing an appropriate workspace. From my experience, a warm workspace with low humidity creates the ideal conditions for drying wet paper.
The warmth speeds up the evaporation process, while low humidity prevents the paper from absorbing more moisture from the environment. You can refer to the United States Environmental Protection Agency for more information about maintaining proper indoor humidity levels.
• Gentle Handling of Wet Paper
You might be tempted to blot the wet paper in an attempt to dry it quickly. However, I strongly advise against this, as blotting can cause further damage by tearing the paper or smearing the inks.
• Use of an Oscillating Fan
Next, place the loose pieces of wet paper flat, ideally on a clean, smooth surface. An oscillating fan, set at its lowest setting, comes in handy here. The gentle breeze from the fan helps in drying the paper evenly without causing any unwanted ripples or folds.
• Quick Drying Using Microwave
For faster results, microwaving the wet paper for approximately 15 seconds is a good option. This method helps evaporate some of the water, but be careful in handling it as the paper can become hot.
• Removing Wrinkles Using Weight
Wrinkles on wet paper could become permanent as it dries. To prevent this, place a heavy book or flat object over the surface of the paper. The weight will help smooth out wrinkles while ensuring the paper retains its flatness even after drying.
• Dealing with Wet Books or Binders
Wet books or binders present unique challenges. To absorb water from these, I recommend inserting a paper towel between every ten pages. The paper towel acts as a sponge, absorbing the moisture from the surrounding pages and aiding in the drying process.
• Preservation of Wet Papers Using a Freezer
A freezer can be a handy tool when handling a large stack of wet papers. Tightly seal these papers in a plastic bag and place them in the freezer. This prevents further damage and buys time to plan for a more permanent solution.
• Salvaging Wet Photos
Wet photos need different handling from regular paper. Freezing can prevent them from sticking together and causing irreparable damage. For the drying process, place these photos image-side up on a clean hand towel; however, unlike paper, it’s best not to use a fan for drying wet photos.
• Contacting a Photo Restoration Expert
If you encounter two photographic images stuck together, from my experience, it’s best to contact a photograph restoration expert. They have unique and specialized techniques to separate the photos without damaging the images.
• Managing Antique Photos
Antique or rare photos may curl as they dry. To repair such curling or for any specialized needs that might arise with such valuable items, it’s highly recommended to seek the help of a professional conservator.
• Professional Help for Cherished Papers
Should your efforts to dry out cherished papers prove unsatisfactory, don’t hesitate to engage the expertise of a professional conservator or art restorer.
• Suggested Paper Restoration Services
I’ve personally benefited from the services offered by Prism Specialties. This company performs high-quality and affordable restorations for various paper items. They have locations across the country, and scheduling a paper restoration appointment is as simple as a call or an online booking.
Remember, the key to preserving wet paper items effectively is prompt and gentle action. Implementing these methods can save you from the heartbreak of losing cherished paper items to water damage.
• Determining Wrinkle Fixes: Paper Type is Key
When you’re dealing with wrinkled prints, the type of paper you choose plays a pivotal role. Some materials may yield better results than others, making the process less challenging.
Particular paper types might have a textural quality or thickness that significantly lessens the issue of wrinkles, making them easier to work through. I’d recommend experimenting to figure out which type suits your needs the most.
• An Innovative Solution: Using Wet Prints and Baking Paper
I came across an intriguing method suggested by Reddit user u/Hellodeeries, a seasoned print handler. According to them, stacking wet prints along with pieces of baking paper might prevent the prints from adhering to each other.
This approach allows the moisture to seep out evenly, reducing the chances of wrinkles forming in the prints due to uneven drying. Give it a try next time.
• A Tried and True Method: Spraying and Wiping Prints
Sometimes, pressing the prints alone might not rectify the problem. In such cases, a water technique comes in handy. According to a study undertaken by the American Institute for Conservation (AIC), spraying or wiping the back of the prints with water eases the fibers, making them receptive to pressing.
Make sure you apply a gentle touch for optimal results; remember, we’re looking to relax the prints, not drench them.
• The Downside of Dampness: Avoiding Discoloration
While employing water techniques, vigilance in monitoring dampness levels is essential. If left damp for a prolonged period, prints might start to discolor.
To avoid this, make sure your prints dry in a regulated environment and in a suitable amount of time. Occasional checks for dampness could help avoid unnecessary damage and discoloration.
• Choosing the Right Tool: Harnessing Plant Press Power
Finding the right tool to keep the prints impeccably flat while they’re drying is vital. In my case, I found the most success with a plant press that comes with rigid but open lattice sides. This specific type allowed the prints to maintain their flatness while also making room for the moisture to evaporate out.
You might find similar equipment in craft stores or even online. With the right tools and techniques, fixing wrinkled prints can be a straightforward and rewarding process. Remember to experiment and refine your methods as you learn more over time.
• Importance of Quick Intervention in Water-Damage Cases
Acting swiftly can significantly cut down the potential harm when dealing with water-damaged documents or photographs. The extent of damage can be exponentially increased with each passing minute, making it crucial to intervene as soon as possible.
• Optimal Environment for Drying Wet Paper
Find a comfortable, well-lit, and low-humidity environment, such as a kitchen table or a desk. These conditions are conducive to drying the paper more effectively while retaining its original properties.
• No to Blotting!
Despite the common belief, blotting can be harmful to water-damaged artifacts. The technique might cause further damage to artwork such as drawings, watercolors, and ink. It can result in the smudging of the ink or dislocating the paint from its surface.
• Use of a Low-Speed Oscillating Fan
A low-speed oscillating fan can help enhance the drying process. Place the wet documents in front of it. Not only does it catalyze evaporation, but it also helps prevent the development of wrinkles.
• Wrinkle Mitigation Techniques
Try wrapping the paper with a large, thick book or another flat object to address wrinkles. Reheating it for approximately 15 seconds and pressing it flat against a heavy object can also eliminate creases.
• How to Dry Damp Books or Binders
For damp books or binders, intersperse paper towels every ten pages to absorb excess moisture, promoting quick and uniform drying.
• Dealing with Water-Damaged Photographs
A unique technique for separating photos that have clung together due to water damage is freezing them. This method contracts the emulsion layer and aids in their safe separation.
However, while drying them, avoid using a fan. Instead, lay them image-side up on a fresh hand towel. The air-drying method is preferable to mechanical drying here.
• When to Seek Professional Help
When dealing with old or rare photographs, solicit the help of a professional conservator. These artifacts might require specialized care during restoration due to their historical or monetary value.
• Flattening Wrinkles: Pressing and Ironing
There are two popular methods to iron out wrinkles in paper pressing and ironing. To press paper, lightly mist it with water and place it between two paper towels. Then weigh it down using heavy books.
For the ‘ironing’ technique, lay a cloth on the water-damaged paper and iron it at the lowest temperature. The cloth acts as a protective barrier, circumventing direct heat contact.
• Air Drying After Pressing
Once you’ve pressed the paper, let it air dry for several hours or, ideally, overnight. This period allows the moisture to slowly and completely evaporate, further ensuring that your paper remains undamaged and flat.
• Importance of Knowing Paper Restoration
As a homeowner, knowing how to restore water-damaged paper can prove extremely beneficial. It not only saves costs but also helps in preventing the loss of valuable and sometimes irreplaceable documents or photos.
• Recommendations
I strongly recommend treating each artifact distinctly, acknowledging that the condition, quality, and age of the paper require different handling methods. Moreover, patience during the air-drying process is key to preventing further damage to your documents or photos.
For further reading, take a look at the recommendations by the Library Of Congress – a comprehensive guide on handling water-damaged materials.
• Using a Cinder Block to Flatten Warped Books
Over time, paperback and hardback books could develop curved or warped pages from exposure to different elements or improper storage. Having encountered this problem quite often, I’ve unearthed an effective and efficient method of restoring them to their flat glory using a common item in many households – cinder blocks.
Cinder blocks, attributable to their weight, apply consistent pressure on pages, effectively reducing the warped appearance. To maintain the quality of the book while using this method, it’s crucial to ensure the book is completely dry and free from moisture before the application of the cinder block.
Position the book on a flat and solid surface, carefully aligning the pages to ensure even pressure from the cinder block, then place the cinder block on top of it.
The method requires time, so patience is key. Depending on the degree of warping, it might take days, sometimes weeks, for the pages to regain their flatness. Throughout this period, frequently check on the progress. You might need to readjust the book or the block to ensure even pressure.
• Ironing a Poster Between Two Thick Watercolor Papers
Another often-faced challenge is dealing with a wrinkled poster. Here, ironing comes to the rescue, not the usual ironing you might imagine, but a more refined way requiring a pair of thick watercolor papers.
First, place the poster in the middle of the two watercolor sheets. The thick paper prevents any potential direct heat damage to the poster and evenly distributes the heat from the iron.
Begin ironing at a low heat setting. Gradually increase the temperature only if necessary, and always keep the iron in motion to prevent heat spots that could damage the poster.
It’s essential to remain focused during the entire process and avoid leaving the iron in a single location for too long, as it will leave a burn mark or cause ink darkening.
• Potential Risks of Ironing and Weight Method
While these are effective methods of flattening warped books and wrinkled posters, several potential risks should be cautiously taken into account. For instance, carelessly implementing these methods could result in additional warping, creasing of the paper, burn marks, or darkening of the ink.
Always ensure the items (books or posters) are completely dry before attempting either method, as exposure to heat or pressure while damp can exacerbate warping or creasing.
Additionally, always begin at low heat when ironing and gradually increase the temperature if necessary while continuously moving the iron helps in preventing burn marks or ink darkening.
Avoid using this method on items of high value or irreplaceable items, as the potential risks may outweigh the benefits.
For additional reading on preservation techniques for paper-based items, consider consulting the resources offered by the Library of Congress’s preservation department (libraryofcongress.gov).
Their detailed guides provide extensive insight into a variety of techniques and considerations when handling paper-based materials.
With practice and careful attention, these methods can save your items from warping and wrinkles. However, keep in mind that each case and item is unique, and the results may differ accordingly. Therefore, your dedicated efforts and patience are key to achieving the desired results.
Artwork Restoration: How to Mend Damaged Drawings
As an experienced artist, it’s disappointing to see perfections marred by an unfortunate spill, be it ink, water, or juice.
As much as I’d wish to give you a magic solution for reviving the colors of your damaged art, sadly, that’s not within my power. However, I recommend a simple technique to smooth out wrinkled, dampened paper to lessen the damage.
• Preparation and Required Equipment
The procedure I propose requires a few household essentials.
Here is a list of what you will need: – 4 to 6 sheets of thin printing paper – A reel of spare fabric – Iron – A heavy book
• Steps to Flatten Paper
Firstly, choose a flat surface and carefully place two sheets of your printing paper on it, wide enough to encompass your damaged artwork. On top of these, place your crumpled or distorted artwork and follow it with another two sheets of printing paper. Make sure everything is aligned properly.
• Fabric and Ironing
Lay your spare fabric evenly on top of the papers. Ensure the fabric covers everything smoothly, with no creases. The fabric will act as a barrier, preventing any direct contact between the iron and the artwork.
Thoroughly press the iron over the entire fabric area. The steam from the iron would go through the fabric, reaching the papers underneath. The fabric helps in absorbing any condensation resulting from the steam, and the two sheets of paper sandwiching the artwork provide much-needed protection from heat.
• Post-Ironing Steps
Once the ironing is done, place a heavy book atop the fabric and the papers. This step aids in maintaining the pressure on the artwork facilitating more flattening.
Now, patience is key. Allow it to sit under the weight of the book for a while for the best results.
• Testing the Method
Before diving right into treating that beloved piece of art, I recommend testing the method. Practice on a standard sheet of paper first. This way, you’ll be more prepared when it comes to the actual task of uncurling your invaluable artwork.
• Further Recommendations
It’s also worth noting that some enthusiasts in the comments suggest spritzing the paper with water lightly before starting the process. However, remember to spray the water on the backside of the paper.
According to Smithsonian’s Guide for conserving artwork, this can minimize harm to the artwork, particularly for watercolor painting, ensuring the longevity of the artwork.
• Personal Remarks
I am grateful for the love and recognition I’ve received from you all on this platform. As I move forward, exploring bigger and grander ventures, I shall not forget the priceless experience this account provided me.
Even when the canvas expands, there will always be appreciation for the textures of my past that shaped me.
Remember: Every artwork is an extension of the artist. So, even when blotched or skewed, it holds a story. Treat it carefully, and restore it lovingly.
Handling Flood-Damaged Books and Papers Safely
When being in a situation where you observe flood-damaged books and papers, it is important to protect your own safety first. In doing this, donning gloves is a crucial step.
It not only guards your skin from coming into contact with potentially harmful substances but also pathogens that are commonly present in floodwater.
• Drying Flood-Damaged Documents Sluggishly
The hallmark of treating flood-damaged books and papers lies in the drying process; it should be performed slowly. This approach curbs further damage that may be incurred and effectively prevents the growth of mold – an unwelcome guest to your valuable materials.
A hasty drying process could reduce the chances of successful restoration while fostering a suitable breeding ground for mold spores.
• Sustaining Copies of Critical Documents
In a flood-ridden environment, your key documents can face severe damage to the point they are irreparable.
As a preventive measure, it is pivotal to ensure that you have made copies of essential documents. This way, even if the original papers cannot be fully reconditioned, you still have a backup to fall back on.
• Seeking Valid Restoration Techniques
Handling flood-damaged books and papers must be done with care and expertise. It is best suggested to seek guidance from reliable sources who are well-experienced in their field of restoration.
Trusted guidance helps to perform efficient and effective restoration, minimizing harm and maximizing the possibility of restoration.
• Useful Resources for Restoration Techniques
The World Wide Web is a veritable trove of resources when it comes to proper restoration techniques.
Various institutions and academia have provided guides like “Caring for Important Papers after a Flood” or “Drying Flood-Damaged Books and Family Papers” that provide professional insights on salvaging and preserving affected materials.
For instance, resources such as the “Drying Books and Family Papers” guide by the University of Florida provides a more comprehensive set of instructions for the specifics of dealing with flooded books and family papers.
Similarly, the “Emergency Response Tips for Wet and Damaged Objects” by the State of Georgia Archives goes over step-by-step processes to restore wet books and objects.
Reading extensive guides like “Caring for Important Papers Steps to Take Before and After a Flood” and “Drying Flood-Damaged Books and Family Papers: the University of Minnesota Extension Service” can provide a wealth of knowledge on pre and post-flood procedures and managing damaged documents.
On a different note, if you are looking for condensed yet valuable insights, “Tips for Saving Water Damaged Papers and Books” is an excellent quick guide.
Remember to navigate these resources in a way that best suits your needs and the extent of damage you’re dealing with.
• Making the Right Environment: Best Workspace for Drying Wet Papers
In my experience dealing with wet papers, it has been crucial to establish a warm workspace characterized by low humidity. Before approaching any wet paper, ensure to set up such an environment, as this favorable condition accelerates the drying process and aids the paper’s preservation.
You can learn more about environmental conditions perfect for preserving artifacts at the National Archives website [^1^].
• Rules of Engagement: Handling Wet Paper
When dealing with a wet page, especially artwork like drawings, watercolors, or ink sketches, blotting the paper should be circumvented. I’ve experienced incidents where blotting further damaged these delicate artworks, ruining their aesthetic quality.
Should you encounter loose pieces of wet paper, my advice is to calmly lay them flat in the direction of an oscillating fan operating on its lowest setting. This technique allows for a minimal disturbance to the wet media while ensuring an evenly distributed airflow.
• The Next Step: Refining Drying Techniques
As the paper’s moisture decreases, eventually reaching just a damp state, one effective technique I often use involves pressing out remaining wrinkles by covering the paper with a large, heavy book or a flat object. This method works wonders in maintaining the shape and texture of the paper.
If the dampness persists, consider microwaving the paper for 15 seconds as this facilitates the evaporation of residual water. This procedure requires caution due to the device’s high temperature.
• Saving Wet Books and Papers
Finding an entire book or binder full of wet paper can present a challenge. To successfully tackle this issue, I have often resorted to sandwiching a paper towel between every ten pages to help absorb the water.
If a stack of wet papers requires immediate attention but circumstances prevent this, one technique I’ve used is to seal them in a plastic bag and pop them into the freezer. This action halts further deterioration.
• Salvaging Wet Photographs
Dealing with wet photographs can be a delicate affair, particularly if they are stuck together. In the past, I’ve mitigated this issue by freezing the photos, thus easing their separation.
While drying, a wet photograph should be placed on an immaculate hand towel with the image side facing up. This step prevents damage to the photograph’s image quality.
However, unlike drying wet paper, avoid using fans to dry photos. The strong air currents may not favor photographic surfaces and images.
For antique or rare photos, address any curling that may occur during the drying process by consulting a conservator. It’s a practice that has helped me maintain the value and quality of the images.
– Professional Assistance: When to Call in the Experts
Sometimes, despite our best efforts, our at-home fixes do not yield satisfactory results. When this happens, I highly recommend seeking professional assistance, particularly from a professional conservator.
They possess specialized techniques and equipment that not only salvage cherished papers but also prolong their lifespan.
[^1^]: National Archives
Book Paper and Its Durability
Books are made of various types of paper, with some being more durable than others. For instance, should you be handling books primarily made of a leather binding or using water-soluble ink, do exercise caution.
I recommend seeking professional help when handling these types of books to circumvent any likely damages. You can refer to the American Library Association for guidance in these circumstances.
• Dealing with Water-Damaged Books
Should books succumb to water damage, it’s critical to act quickly. Prioritize separating pages that are easy to detach. Work swiftly to flatten these before they dry to prevent irreversible damage.
• Preventing Book Damage through Proper Storage
To further prevent the risk of water damage, consider the method of storage. Proper shelving of books helps impede any chances of spills occurring. It aids in avoiding water damage and extends the longevity of your book collection.
• Saving Water-Damaged Paper
Water-damaged paper can still be salvaged. However, it requires a gentle and careful approach due to its delicate state. Begin by slowly separating sheets assiduously, and dab excess water with a towel when necessary. Accelerate the drying process by using a fan or a dehumidifier.
• Flattening Water-Damaged Paper
Successfully flattening water-damaged paper can be achieved through various methods. Place the damp paper between sheets of wool, or use heavy books as a weight. Alternatively, flat pieces of cardboard can act as an auxiliary tool in maintaining the paper’s flatness.
• Rescuing Wet Book Pages
For wet book pages, there’s a simple water damage alleviation trick. Place a piece of plain white, unprinted toilet paper between each wet page. Applying pressure on it using a heavy object aids in water absorption whilst keeping the page flat.
• Quick Methods for Flattening Paper
Flattening paper can also be achieved promptly via different methods. Lightly spray the crumpled paper with water and place it between heavy books. Alternatively, microwave damp paper and place it between books, smooth it out by hand, or use a garment steamer to relax the fibers.
• Handling Watercolor Paper
For artists, there is a way to flatten watercolor paper while retaining its artistic integrity. Wet the back of the paper, stretch it gently on a flat surface, and let it air dry. This method ensures the paper remains flat throughout.
• Straightening Buckled Watercolor Paper
Buckled watercolor paper can also be straightened quite easily. Wet the back of the painting with a spray bottle, place it face down on butcher paper, cover the back with another sheet of butcher paper, and weigh it down.
This method effectively flattens your precious watercolor piece without damaging the artwork.
Remember, caring for books and paper art does not need to be complex. All it takes is a little patience and effort to ensure their longevity.
Responding to Water Damage: Save Your Books and Photos
• Act Speedily After Water Damage
The key to managing water-damaged books and paper lies in the urgency of response. Ideally, you should act within two days to prevent mold formation and deterioration. Time is a valuable ally in salvaging items from water damage, and rapid action often yields the best outcomes.
• Handling Water-Damaged Photos
If your photos are trapped in water-damaged frames, you can opt to rinse them carefully. Try to extricate them while they’re still wet to minimize the risk of additional damage. Professionals should certainly be consulted when dealing with old photos of high value.
Visit American Institute for Conservation for more guidance from experts regarding the conservation of cherished photographs.
• Drying Water-Damaged Photos
Once the photos are out of the frames, rinse them again to remove any clinging dirt. Set them on a sturdy surface with the image side up, then lay them on blotting paper for drying indoors.
I recommend changing paper towels regularly while drying to expedite the process. Newspapers are not the best choice because the ink can smear onto your photos.
• Freezing Water-Damaged Photos as a Temporary Solution
Freezing may not be the first thing you associate with photos, but it can offer a lifeline for water-damaged photos. If you can’t dry your photos immediately, rinsing and then storing them between sheets of wax paper in the freezer can be a temporary holding solution.
• Addressing Water-Damaged Books and Documents
Books and documents can also suffer greatly from water damage. When you retrieve them from the water, the rule of thumb is to do so gently and rinse them. For drying, use print-free paper towels, as printed ones may leave ink residue. Regularly change out the towels to keep your drying efforts efficient.
• Indoor Drying for Water-Damaged Books and Documents
Despite the temptation, robust sunlight is not your friend when it comes to drying books or documents. Outdoor drying could lead to sun and wind curling your paper goods. Instead, find a good space indoors for air-drying. If you have the advantage of a fan, use it to speed up the drying process.
• Managing Waterlogged Books
For books that soaked up too much water, you can intersperse absorbent paper every 20 to 50 pages. Lay the books flat to dry together by shifting the blotting paper regularly. Should your books have the structural strength for vertical positioning, fan out the pages and allow the airflow to aid in drying.
• Preserving Damaged Documents and Books: Use Freeze Drying
Don’t rush the drying if your timeline doesn’t allow. Store your paper documents or books inside zippered plastic bags and freeze them. This tactic prevents mold in the interim while you plan for restoration.
Once dried, if a musty smell lingers, position your salvaged goods in an open box inside a container with baking soda. Mind you, baking soda should not physically touch your books or papers.
• Seeking Professional Assistance for Water-Damaged Paper Restoration
Overall, while these step-by-step guidelines equip you with the know-how to salvage water-damaged photos and books, it’s often less risky to hire a document and photo restoration professional. They possess the necessary array of tools and have honed their expertise with multiple restorations.
Types of Water Damage
In my longstanding career dealing with water damage, I’ve encountered various types. The most usual are flooding, leaks, and high humidity. Each comes with its distinct set of issues and requires unique approaches to mitigate.
– Impact of Water Damage on Paper Items
Water poses a significant threat to paper items such as books and essential documents. It’s important to bear in mind that one doesn’t need to directly expose these items to water for them to end up damaged. Even high humidity in the environment can harm them.
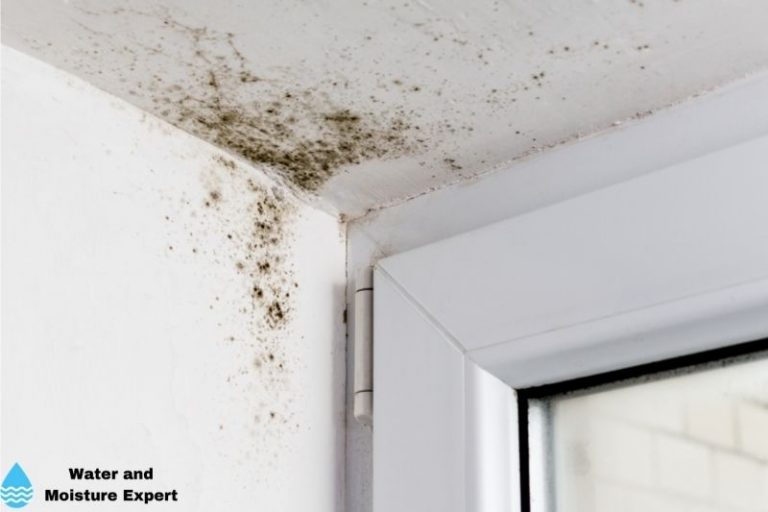
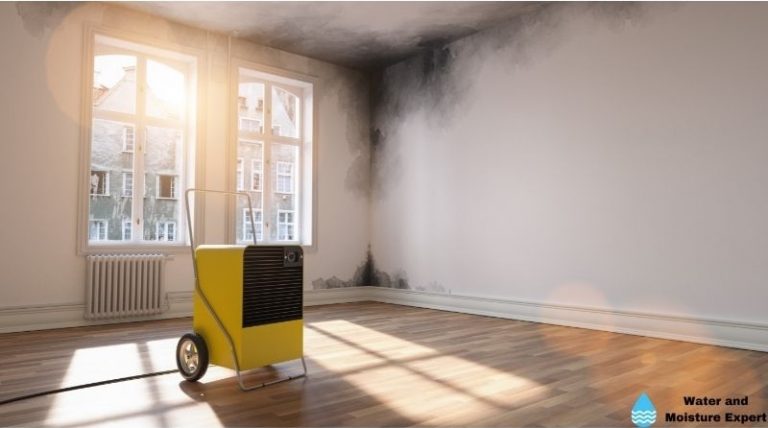
• Growth of Mold
Once water damage occurs, mold isn’t far behind. This fungal menace starts growing within 24 to 48 hours post the incident. The presence and spread of mold can make the damage worse and can lead to potential health risks.
– The Importance of Quick Action
Immediately after detecting water damage, swift action is invaluable. Promptly addressing the damage can significantly boost the chances of a successful recovery. Moreover, this will also optimize cost-effectiveness.
– Recovering from Water Damage: Air Drying and Dehumidification
To repair environmental conditions after water damage, I’d recommend two primary methods: air drying and dehumidification. Air drying is a naturally occurring process that simply involves exposing items to air.
On the other hand, dehumidification requires specific equipment: a dehumidifier. This device controls humidity levels, creating a dry environment that aids in reducing the overall damage.
– The Salvage Power of Freezing
For dealing with water-damaged paper products, freezing can be an effective measure. This technique is especially beneficial as a preliminary step to stop further deterioration.
– Choosing the Right Cleaning Method
The choice of cleaning method one adapts relies mainly on two critical elements. First, the type of water causing the damage could either be clean or contaminated. Second, the importance and value of the items in question. Prioritizing salvage efforts according to these factors can yield fruitful results.
– Removing Musty Odors
After drying the affected items and surroundings, musty odors may persist. To eliminate these residual smells, I suggest ramping up air circulation. If this isn’t sufficient, using baking soda can be an effective solution.
– Additional Resources
For in-depth knowledge, I would encourage further reading on related topics. Websites like the American Institute for Conservation offer a plethora of articles and guides on the preservation and maintenance of items against environmental hazards like water damage.
To sum it up, facing water damage can indeed feel overwhelming. But a proactive approach, backed by ample knowledge and the right methods, can help reduce its impact and ensure a successful recovery.
Salvaging Water-Damaged Books: A Step-by-Step Guide
Water damage to books can seem like a disaster. But worry not! The University Libraries have provided an informative video tutorial with tips on how to handle such situations.
• Step 1: Separating Pages with Paper Towels
As soon as the water damages a book, immediately intervene by separating the wet pages with plain paper towels. This step is crucial in ensuring there is no sticking of the pages during the drying process. The paper towels serve as absorbents, soaking the excess water while allowing the pages to breathe.
• Step 2: Drying and Rotating
Once the pages are separated, the next best step is to dry them under a fan. The circulation of air from the fan helps expedite the drying process. Moreover, it ensures that there’s an even distribution of air, reducing the chance of damp patches or moisture accumulation.
I highly recommend periodic rotation of the book to make sure every part is evenly exposed to air circulation. This helps the book dry thoroughly and uniformly.
• Step 3: Flattening the Dried Book
After drying, the pages of your book might look wrinkled or warped. This is where flattening the book comes into play. Start by placing your thoroughly dried book under a heavy object, such as a dictionary, to flatten it. This will help in restoring the book’s shape and even out the wrinkles.
• Freezing the Book If Immediate Treatment Is Not Possible
There can be situations where immediate treatment is not possible. In such times, The University Libraries suggest storing the wet book in a water-tight bag and placing it in the freezer. This prevents the possibility of mold growth, a common issue with water-damaged papers.
• Step 4: Consulting a Conservator
Regardless of how well we intervene, we might still have circumstances where a book does not flatten enough, pages stick together or the paper gets torn.
The expertise of a conservator comes highly suggested, particularly for those books that hold sentimental or historical value. They are skilled professionals who specialize in restoring damaged books.
• Available Resources for Book Preservation
The University Libraries also offer you additional resources on book preservation and conservation care, particularly for personal collections. You can easily access these resources online for further information.
Just remember, a water-damaged book is not necessarily a lost cause. With quick action and the right steps, it can be salvaged.
It also helps to educate yourself further on how to care for your personal book collections. If you haven’t already, I highly recommend visiting resources like ALA’s Preservation, which offers great information on library collection preservation.
Remember, each book saved from damage is a piece of knowledge preserved. Happy Reading!• Initial Response to Water Damage. When dealing with a water-damaged book, immediate action is key to preventing further issues such as mold.
If you are unable to start the repair process immediately, I recommend placing the book in a plastic bag and storing it in your freezer. This icy environment serves as a temporary stasis, halting the growth of mold and further degradation.
• Beginning the Drying Process: Blotting the Wet Pages
Transitioning from the freezing stage to the drying stage, remove the book from your freezer. With a clean paper towel, blot the wet pages gently. This process removes excess water, making the subsequent drying process more effective.
• Properly Positioning Your Book for Drying
It’s vital to position the book correctly to allow airflow to all wet pages. Open the book at a 45-degree angle. Subsequently, use a clean towel or a paperweight to keep the pages fanned out effectively throughout the drying process.
• Employing Assisted Drying Techniques: Fans and Dehumidifiers
To facilitate the drying process, point a fan at the pages overnight. This encourages airflow, speeding up the evaporation process. Consider using a dehumidifier if one is conveniently available.
It shelters the book from atmospheric humidity, further accelerating the drying process. This guide from the Library of Congress offers a detailed insight into the benefits of using fans and dehumidifiers in the document drying process.
• Flattening Your Book Post Drying
Sandwiching the dried book between two boards provides an effective way to restore its shape. Provided even more pressure to flatten the book by placing heavy objects such as bricks or cinder blocks atop these boards.
• Utilizing a Book Press
If you can access a book press, it can yield tremendous benefits. It imparts even pressure across the book, aiding in the flattening process.
Enhance its effectiveness by pointing a fan or dehumidifier towards the book while it is in the press. This helps eliminate any residual moisture during the pressing process.
• Letting the Book Rest
Allow the book to rest in the flattened position for 1 to 2 days, or even longer if noticed necessary. This resting period lets the book adapt to its new condition and ensures that the pages are fully dry.
• Protecting Pages from Heat Damage
Before proceeding to the ironing process, it is essential to protect the pages from heat damage. Lightly spray the pages with water to dampen them, creating a safety barrier between the heat source and the paper fibers.
• Ironing Pages for a Smooth Finish
Set your iron to a no-steam setting. Use plain tissue paper or white copy paper to cover each page. This step is crucial in preventing direct contact between the iron and the page.
Swiftly swipe the iron in circular motions over the tissue or paper for about 3 seconds per page. Be cautious and attentive; leaving the iron on the page for too long could cause irreversible heat damage.
• Realistic Expectations: Fully Restoring the Book’s Readability
While these steps can significantly restore readability, keep in mind that it may not return the book to its original pre-damaged condition. If the book is valuable or of sentimental value, it might be advisable to consult a professional restorer to prevent further damage inadvertently.
• When to Consult a Professional
If the water-damaged book is old, valuable, or an antique, I highly recommend seeking help from a professional book restoration shop. Libraries often employ or can recommend professional preservationists.
This EPA guide ^ provides an excellent starting point for understanding professional remediation of mold damage, which can be a concern with water-damaged books.
Setting Up Your Workspace
When it comes to restoring water-damaged books, your workspace is crucial. I recommend using a large table space, such as a dining room table or a folding card table.
This provides ample room for your book to dry. It’s essential that you cover your table with a drying medium. This could be parchment paper, towels, or any other absorbent material. This will aid in taking in any excess moisture from the book.
• Necessary Supplies
Beyond the space and absorbent material, the process will also require copy paper and tin foil. Both of these items play a crucial part in the later stages of the restoration process.
I also advise wearing nitrile or rubber gloves when handling a book damaged by contaminated water. This will protect both you and the book.
• Cleaning the Book
To begin the cleaning process, run the book under clean water. This should be done in your kitchen sink to remove any surface dirt. Make sure to remove the dust jacket and place it flat on your drying surface.
• Drying the Book
To dry the book, stand it on end to allow water to drain, much like a dish rack allows dishes to drip dry. Next, lay it on its back to check for any cover color bleeding. If bleeding is present, sheets of tinfoil should be put between the covers and the book’s contents, known as the text block.
Tip: Using a fan to circulate air in the room will speed up the drying process.
The drying medium under the book will need to be changed every hour. Continue this process until the book is no longer saturated.
• Handling a Slightly Wet Book
When dealing with a book that’s wet but not soaked, the interleaving process comes in handy. This involves inserting pieces of drying material between every 10 to 20 pages of the book. Much like before, this drying medium will need to be replaced each hour.
Once the book reaches a damp condition and is not fully wet, stand it up on its end again. Now start fanning the pages out. Continue to circulate air around the book using the fan for the next 24 hours.
• Managing Mold and Mildew
Water damage can lead to mold and mildew, something any book lover or librarian dreads. To slow the growth of several water-damaged books that need to be restored, consider the freezer. The books should be dried to the wet stage, placed in freezer bags with drying material, and stored in the freezer.
PubMed Central, a service of the U.S. National Institutes of Health, recommends this freezer method as well. You can read about it here.
• Reviving Already Dried Books
What if you encounter books that have already dried out but are wrinkled or warped due to water damage?
In these cases, spray a fine mist from a water bottle and iron the pages using a no-steam setting on a clothes iron. The paper should be placed flat with a piece of parchment paper used as a protective backing.
If the pages are severely warped, further measures may be necessary. Consider using a shop press for pressure and a hairdryer for mild heat. These tools can assist in smoothing out the pages.
• The Importance of Immediate Action
Time is of the essence when it comes to water damage. It’s necessary to take immediate action. Professional services are available to handle book restoration.
However, these steps above can help you manage smaller-scale or personal collection disasters. It’s crucial to strike a balance between taking swift actions and ensuring you are preserving the integrity of the book.
• Dealing with Water Damaged Books: Challenges and Solutions
There’s no question that libraries often discard water-damaged books. The reason for this is simple: these books are notoriously difficult to salvage.
However, it doesn’t mean that they are impossible to save. Numerous methods can be notoriously used to bring these books back to life, and this article will cover some of these strategies.
– Ironing: A Simple Solution for Minimal Damage
My first recommendation comes into play when dealing with lightly damaged books. Ironing the pages may seem strange, but trust me, it works!
All you need to do is iron the wet pages in between sheets of parchment paper. This method helps to dry out the wet pages while also maintaining the smooth texture and readability of the text.
– Pressing: A Technique for Moderately Soaked Books
If your book is more than just ‘lightly’ damaged, pressing could be your best bet. After blotting the soggy pages and fanning them open, leave the book pressed for 24-48 hours.
This method is quite effective as it helps the pages to regain their original flat form. Understand that the pressing phase is delicate and needs your utmost attention.
– Blotter Paper: A Tool for Removing Residual Moisture
I must say, blotter paper is a wonderful fabric that is created to be highly absorbent. This means it can effectively soak up residual moisture from your water-damaged books.
Just strategically place the blotter paper between pages to fast-track the drying process. Here’s an excellent link to further comprehend how blotter paper works.
– Weights: The Answer to Wavy Pages
Even after deploying all the aforementioned methods, you still might notice wavy pages. Don’t worry; simply place your book under a heavy weight like a cinder block.
For the sake of your book’s cover, I suggest that you wrap the cinder block in a towel for protection. This method facilitates the leveling of the pages.
– Air Drying: An Overlooked Advantage
After applying weight to your book, allow it to stand upright, leaving it open. Doing this provides adequate exposure to air, which assists remarkably in leveling out the waves in the pages of your book.
– Weighted Boxes: An Extension of the Pressing Method
If the waves persist, don’t lose hope. You can leave your book under a box of heavyweight in a bookcase. This slow but steady method can improve the condition of your book over time.
Restoring water-damaged books is a painstaking process, requiring patience and perseverance. But the satisfaction derived from successfully accomplishing this herculean task is immense.
So next time you stumble upon a water-damaged book, remember it isn’t a lost cause. Instead, grab your iron, blotter paper, and weights, and put these recommended tips into action.
• Wet Book Rescue: Paper Towel Method
– Drying Pages with Paper Towels
When you first discover a water-damaged book, quick and efficient action is essential to limit further damage. An effective method is to use dry paper towels to absorb any residual moisture on the pages.
Place a paper towel every 10 or 20 pages. Not only will this keep the pages from sticking together, but it will also help to absorb the remaining moisture.
– Air-drying the Pages
Once the paper towels are in place, the next step is to carefully prop up the book in front of a large fan. Try to make sure the fan is set to a low setting, as this will provide gentle and consistent air circulation around the book.
This uniform drying approach will ensure that all pages will dry evenly at the same time, which is critical to prevent mold growth.
The Importance of Overnight Drying
Leaving the book in the propped-up position with the fan blowing on it should take place overnight. This will give it a sufficient amount of time to dry completely, a crucial measure for the book’s long-term preservation.
The University of Delaware Library suggests that lengthy drying periods are more beneficial, yielding better results for book restoration.
Flattening the Pages
After the book has completely dried, it might seem a bit puffed up due to water swelling the pages. To restore the book to its original appearance, it is necessary to flatten it.
Place it between two flat boards and add some weight atop, like a pile of books, for instance. The pressure applied by the heavy objects helps to revert any warping incurred during the drying process. Leave it under the weight for up to 48 hours for best results.
Freezing the Wet Book
In instances whereby immediate attention cannot be given to the wet book, freezing can be a viable option. Enclose the book in a plastic bag, and place it in the freezer.
The freezing process, as recommended by the Northeast Document Conservation Center (NEDCC), inhibits further damage by suspending the water activity within the book and prevents the onset of mold.
As soon as you’re able, attend to the book by following the previously mentioned procedures to restore its condition.
• Final Notes
Returning a book to its normal state from water damage requires attention to detail and great care.
Following the steps described above, from drying the pages with paper towels, air drying, letting them sit overnight for thorough drying, flattening the pages, and resorting to freezing when immediate action is impossible, can potentially restore your water-damaged books to their original condition.
Remember that time is crucial, as delays can lead to irreversible damage.
Blotting the Wet Book
From my experience, when a book becomes damp or wet, one convenient method of initial intervention involves blotting the book with absorbent paper towels. This is better than wiping them, as this can cause the pulp fibers to shred or break down.
Maintain a gentle touch while blotting so as not to damage the pages further. During this process, it’s important to cover both the outer cover and the pages within, as leaving any wet spots untreated could encourage mold growth.
• Pressing the Damp Book
After you have blotted as much excess water as possible, your next step should be to lay the book down on its cover on a solid surface, then press on it firmly.
This helps to squeeze out any extra water caught within the pages and aids in maintaining the book’s original form. From my experience, this step is essential to reestablish the initial structure of the book.
• Air Drying the Book
Subsequently, once the paper towels cease capturing moisture, it’s time for air drying. To properly execute this, place the book upright, ensure that the pages are fanned out, and leave it in this position in an adequately lit and well-ventilated location.
Based on my experience, this step might take several days, but it’s crucial for thorough and even drying.
• Intense Drying for Stubborn Moisture
For a more comprehensive drying process, either air dry the book upright or let it air dry for some time, then once it’s mostly dry, lay it flat and open it to a wet page. I’ve found this process is particularly helpful in treating stubborn moisture that’s resistant to the initial air drying.
• Ironing the Wet Page
Here’s a useful technique I’ve developed for these lingering damp spots: first, place a tissue over the wet page, then gently press a warm iron onto the tissue. Do this for each wet page. It’s imperative to ensure the iron is set to a low temperature to avoid causing any heat damage to the page.
• Post-Ironing Steps for Completeness
Once you’ve finished ironing, your priority should be to allow the bookbinding to dry completely. This can be achieved by letting the book stand upright and open for a few more days. Remember, preserving the binding’s longevity is as crucial as saving the pages, and this step aids in ensuring just that.
• Smoothing Out Warped Pages
Having air-dried pages can sometimes result in them becoming slightly warped or distorted. The previous ironing method can also be employed here to solve this problem. I’ve found this dual-purpose ironing method significantly beneficial over time.
• Consulting Preservation Experts
I would recommend that if the book in question holds considerable financial or sentimental value, it’s wise to consult an archival preservation expert.
Experts from institutions like the Northeast Document Conservation Center (nedcc.org) are proficient in handling valuable books and can help guide you on the best conservation methods.
In conclusion, these are the methods I would recommend based on my experience in dealing with wet books. While these steps can be carried out relatively easily, do remember that careful handling is pivotal for the successful recovery and preservation of your book.
Initiating the Book Repair Process Immediately
The moment you notice a damaged book, I recommend starting the repair process immediately. Early intervention can go a long way toward preventing further damage and achieving better results. Indeed, it can make the difference between a book that’s lost forever and one that’s restored to its former glory.
• Evaluating Professional Book Repair Options
In case you’re dealing with old or precious books that hold immense value, consider taking them to a professional book repair store.
These experts have the tools and knowledge to handle rare and valuable books and can ensure they are restored to their best possible condition. This option is especially practical when you don’t have the right skills or techniques to handle the repair process.
• Temporary Preservation Methods: Freezing the Book
If immediate repair isn’t possible or practical, one interim preservation strategy you can adopt is to use a plastic bag and freeze the book.
This will halt any ongoing deterioration until such a time when repair is possible. Simply place the book in a plastic bag and then freeze it. Remember, this isn’t a permanent solution but a stop-gap measure until you can set aside time for repair.
• Removing Moisture Using Paper Towels
If your book has been exposed to water or other liquids, blotting the pages with paper towels can help. This is a simple, efficient way of removing residual moisture without potential damage to the paper. Gently press the paper towel against the wet pages allowing it to absorb as much moisture as possible.
• Employing Fan-Assisted Drying Technique
For further drying, set up your book at a 45-degree angle on a towel. Aim a fan at the pages and let it run for anywhere between 8 to 12 hours. This airflow helps speed up the drying process and reduces the chances of mold development.
• Using the Pressing Technique to Flatten the Book
After the book is dried out, the next step is flattening the pages. Sandwich the book between two strong boards. You can then either place heavy items on the top or make use of a book press. This helps in aligning the pages and restoring their flatness.
• Ensuring proper Air Circulation during the Pressing Process
During the pressing process, it’s important to create an environment with dry, circulating air. This can be achieved either using a fan or a dehumidifier. Such a controlled environment helps prevent any moisture build-up and aids in thorough drying.
• Timeframe for Pressing the Book
Once the book is pressed flat, it should be left undisturbed for a minimum of 1 to 2 days. Depending on the extent of moisture damage, this may need to be extended. Only remove the book from the press once you are sure it’s completely dried out.
• Ironing Wavy Pages Post-Drying
Sometimes, after drying, pages can still appear wavy. If this is the case, you can dampen them lightly with a fine mist of water. Then, using a tissue or plain white paper as a buffer, iron the pages on the no-steam setting.
Here is a link to the Northeast Document Conservation Center, where you can delve further into the mechanics of book preservation.
Their expert knowledge can help to make your undertaking of book repair a success. Remember, patience and delicacy are the keys to successful book repair. Happy preserving!
– Restoring Water-Damaged Books: DIY Methods vs Professional Techniques
Restoring water-damaged books can be a challenging and costly endeavor. It’s a process that requires careful and patient effort. Sometimes, attempting it at home might result in disappointing results.
Other times, it can breathe new life into your precious books, saving you from the heartbreak of letting them go.
– Attempting Single Book Restoration at Home
An approach such as ironing can, at times, restore a single piece of paper. To do this, you’ll have to use a no-steam setting and be sure to place a barrier piece of scrap paper in between the iron and the water-damaged paper.
However, this method is not recommended for entire books. The risk involved is substantial and often outweighs the potential benefit. It’s advisable to seek professional help or other less risky methods.
– Professional Methods for Book Restoration
Professional archivists have more advanced methods for dealing with water-damaged books. These techniques, however, are mostly reserved for rare and valuable books.
They require a level of expertise that may not be easily replicated at home. More importantly, these methods usually require special equipment and supplies, which can be expensive.
– DIY Restoration Debunked: The Syracuse Library
In a world where DIY is revered, an interesting method from Syracuse Library comes to light. A YouTube video from Syracuse Library demonstrates a method involving blotting the pages with paper towels, fanning them to dry, and pressing them for 24-48 hours.
While this method can certainly aid in the drying process, the results may still leave some to be desired.
– Vacuum & Press: A method for quicker drying
Another method involves the use of a vacuum chamber. The vacuum can help speed up the drying process for water-damaged books. While this method carries potential, it’s imperative to note that vacuum chambers are not commonly available in most households.
– Additional Drying Techniques
Blotter paper can be a useful tool in dealing with water-damaged books. Inserting it between the pages helps to remove residual moisture. Pressing the book after drying is also a good follow-up to further aid in the drying process. However, these methods may not provide significant results in a short time.
– Replacing instead of restoring: A more practical solution
Given the challenges associated with restoring water-damaged books, it’s generally recommended to find a replacement instead. Online options may provide a more economical solution, as they often offer cheaper alternatives to purchasing new books from physical bookstores.
– Responsibility for Book Ownership
Owning a book comes with the onus of taking care of it. The person who owns the book has to shoulder the responsibility for any damage to it. Since textbooks, in particular, can be expensive, it’s in the best interest of the owner to protect their books from water damage.
– A Final Attempt: Air Drying and Weighting
Air drying the book, followed by placing it under some weight, may result in slight improvement. It might not restore the book to its pristine condition but it can visibly reduce the effects of water damage.
– The Pragmatic Solution: Book Replacement
In the end, despite the amount of effort invested, restoring water-damaged books to their original condition is a daunting and sometimes impossible task.
The most practical solution often ends up being replacing the book. All things considered, the time, effort, and resources needed for restoration might be better spent on acquiring a new copy of the book.
– Helpful Resources
For further reading and professional guidance on this topic, you can visit the American Institute for Conservation’s website. This resource provides a broad overview of common conservation issues and directs you toward professional service providers if needed.
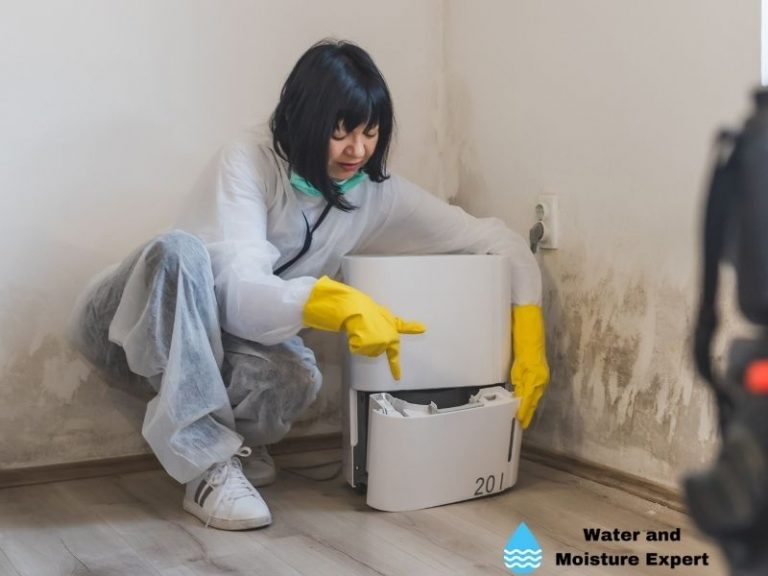
• Use of Dehumidifiers in Rescuing Water-Damaged Books and Paper
Dehumidifiers can play a critical role in the restoration efforts of water-damaged books or paper. These machines work by reducing the level of humidity in the surrounding environment, effectively speeding up the drying process.
When dealing with water-damaged paper, remember not to overuse the dehumidifier, as it may cause your books and paper to become overly dry and brittle.
Relative humidity of 30% to 50% is most desirable for this purpose. It’s also worth noting that dehumidifiers work particularly well in closed spaces, such as a small room or a damage recovery chamber.
• Varieties of Paper and Their Resilience to Water Damage
Interestingly, not all papers are created equal when it comes to their resilience to water damage. Coated and uncoated paper react differently when immersed in water.
Coated papers, commonly used in magazines and art books, tend to adhere together when wet and are consequently more challenging to salvage.
In contrast, uncoated papers, like office and photocopier paper, while losing some mechanical strength when wet, can still be separated and dried without causing further damage. Knowing the type of paper you are dealing with can significantly influence your recovery strategy.
• Keeping Your Hands Clean While Handling Wet Paper
Water damage restoration becomes even more challenging when combined with the biological risks associated with dirty hands.
When handling wet books and paper, ensure your hands are as clean as possible. This action will prevent further contamination and potential weakening of the paper, further ensuring the longevity of your restored items.
• Use a Hairdryer for Drying Water-Damaged Paper
A quick method of drying water-damaged books and paper is by using a hairdryer. It is crucial to use the lowest heat setting to prevent overheating and subsequent damage.
Hold the dryer sufficiently far from the paper to allow room for heat dispersal. While being a very accessible tool, be mindful that the hairdryer method may not be suitable for all varieties of paper.
• Absorbing Excess Moisture with Blotting Paper
Blotting paper or absorbent cloth can be effective in extracting excess water from damaged books or paper.
The method is simple: place the blotting page or cloth against the wet paper, applying light pressure to aid absorption. Repeat this process with a replacement blotter or cloth until the book or document is adequately dehydrated.
• Flattening of Water-Damaged Paper Using Weights
Post-water damage, paper tends to ripple and wrinkle. However, this can be counteracted by pressing the pages gently using weights, ensuring they dry flat.
Stack books or papers, place absorbent materials between them, and place a board on top. Add the weight for uniform pressure distribution, ensuring no portion of the paper gets overly compressed.
• Utilizing a Low-Steam Iron for Paper Flattening
Another technique for flattening water-damaged paper is the judicious use of a low-steam iron. Ensure the paper is dry to touch before starting.
Place a clean cloth over the page, then gently apply the steam iron over it without creating undue pressure. The steaming helps to flatten and shape the paper, restoring it to its original form.
• Proper Storage of Restored Books and Paper
For books and papers that have undergone recovery from water damage, it’s essential to store them correctly to prevent further harm.
Store them in a cool, dark place with a consistently low level of humidity, preferably in an environment with a temperature of around 30C and relative humidity of around 40 to 50 percent.
• Preventing Future Damage with Archival Materials
Using archival materials, such as acid-free paper or acid-free folders, can prevent future water damage to books and papers.
They resist the damaging effects of environmental factors like moisture, ensuring the longevity of stored items while also giving your collection a professional look. Resources related to archival materials and their use can be found on the Library of Congress website (Click Here).
• Utilizing Vacuum Chambers for Speeding Up the Book Drying Process
– Understanding Water-Damaged Books
Water-damaged books can be a nightmare for librarians, archivists, or collectors. This nightmare scenario occurs when unforeseen circumstances, such as a pipe burst or flooding, inundate stacks.
The Library of Congress provides comprehensive guidance on measures to prevent and rescue water-damaged books. However, it’s essential to discuss an effective yet often overlooked method.
– Introducing Vacuum Chambers – An Overlooked Solution
Using a vacuum chamber for book drying is a novel approach that has potential yet has been underexplored so far in the literature.
The workings of this process entail placing the water-damaged book in a vacuum chamber. This helps draw out moisture from the book without resorting to heat, which could potentially damage the paper.
– Benefits of Vacuum Chambers in Handling Water-Damaged Books
The application of vacuum chambers in book drying has significant benefits, situating it as a viable alternative to traditional methods.
Faster Drying Times: Vacuum chambers excel at attracting moisture, hastening the drying process substantially. Fellow colleagues have reported reduced drying times by up to 60-70%, depending on the book’s condition. This makes for faster restoration times.
Better Preservation Value: Traditional drying methods can cause pages to wrinkle or warp, compromising the book’s integrity.
Vacuum chamber drying, however, maintains the microscopic structure of the paper, ensuring better preservation of the original form, reducing wrinkles, and mitigating paper yellowing.
Enables Servicing of Multiple Books: Vacuum chambers come in an array of sizes. Larger units can simultaneously dry several books, offering an efficient solution for catastrophic water incidents involving a large number of items.
– Process of Vacuum Drying Books
Here’s a simplistic step-by-step guide to using vacuum chambers for drying books.
- Prepare the Books: Remove dirt or other foreign elements from the book, and mildly blot the book’s surface with a soft, absorbent cloth to remove excess water.
- Prepare the Chamber: Position silica gel packets inside the vacuum chamber before placing the book. These help in absorbing moisture.
- Place the Book in the Chamber: Arrange the book for optimal effect. Open the book to a reasonable extent without causing stress to the binding.
- Start the Drying Stage: Initiate the vacuum cycling based on the machine’s guidelines. This usually starts at lower levels, gradually increasing to establish the appropriate vacuum.
- Retrieving the Book: Allow the chamber to release the vacuum slowly before opening the lid and gently taking out the book.
This process typically continues until the moisture content in the book reaches acceptable levels.
– Challenges and Precautions in Vacuum Drying
While vacuum drying offers many advantages, it should be approached with care. It may not be the right solution for every book, particularly when dealing with books that involve delicate papers or bindings.
Another consideration is cost, as vacuum chambers and personnel training represent a significant investment.
In conclusion, in my expert opinion, I recommend vacuum chambers as an innovative, speedy, and efficient solution for drying water-damaged books.
A careful examination of each situation will determine when this method is appropriate. Adopting this technology can lead to better preservation practices and restoration of precious collections.