Water Damage On Baseboards. Tips From Professionals
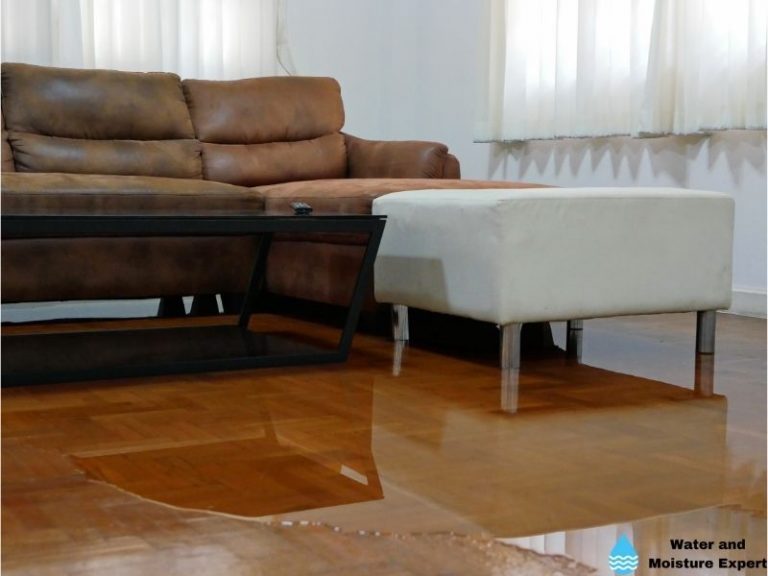
Sometimes only certain parts of a room or home get damaged in a flood or leak. The baseboards may get stained or swell up if they absorb too much water. It’s usually easy to recognize water damage on baseboards, but they can be tricky to repair. If you aren’t sure if you want to replace them, repairing them is the only other option. If you are unable to repair them or if they are too damaged to be repaired, you may need to replace them instead.
Water Damage On Baseboards
If the damage is limited, first clean the baseboards. Sand parts that are swelling. If the baseboard is level, use a suitable primer. When the primer has been added and is dry, you can start painting. If the baseboard is used in a more moist area, use a suitable sealer.
This blog post will further show how to fix a water-damaged baseboard. I will also show how to cover up water stains on a baseboard and how to fix swollen baseboards.
Contents
- 1 Water Damage On Baseboards
- 2 How to Repair a Water Damaged Baseboard
- 3 How To Cover Up Water Stains On Baseboards
- 4 Brown Spots On Baseboards
- 5 Water Damage Baseboard Bathroom
- 5.1 ● Step 1: Remove The Old Baseboards
- 5.2 ● Step 2: Check For Mold
- 5.3 ● Step 3: Remove Nails
- 5.4 ● Step 4: Cut The New Baseboards To Size
- 5.5 ● Step 5: Install The New Baseboards
- 5.6 MDF Baseboard Water Damage
- 5.7 How To Fix Swollen Baseboards
- 5.8 ● Step 1: Fix the Leak and Dry the Baseboards
- 5.9 ● Step 2: Sand The Baseboard
- 5.10 ● Step 3: Paint Them
- 6 Baseboard Pulling From Wall Moisture
- 7 Water Coming From Baseboard When It Rains
- 8 Baseboard Swelling
- 9 Potential Health Risks Associated with Water Damage Behind Walls
- 9.0.1 – Importance of Identifying and Fixing Water Damage Source
- 9.0.2 – Hiring a Professional Water Damage Specialist
- 9.0.3 – Consider Adding Base Shoe Molding
- 9.0.4 – Procedure for Replacing Water-damaged Baseboards
- 9.0.5 – Contact Information for 1-Tom-Plumber
- 9.0.5.1 Recognizing Water Damage on Baseboards
- 9.0.5.2 Root Cause: Leaking Pipes Behind Walls
- 9.0.5.3 Identifying the Problem: Peeling Paint or Wallpaper
- 9.0.5.4 Dangerous Consequences: Visible Stains and Mold Growth
- 9.0.5.5 Symptoms of Damage: Loss of Contact Between Baseboards and Wall
- 9.0.5.6 Addressing the Damage: Steps to Repair
- 9.0.5.7 The Role of Professionals: Secure Your Home from Mold and Water Damage
- 9.0.5.8 My Personal Recommendation
- 9.1 • Identifying the Sources of Water Damage on Baseboards
- 9.2 • Detecting Signs of Water Damage on Baseboards
- 9.3 • Preparing for Baseboard Repair
- 9.4 • Repair Process: Cleaning and Checking
- 9.5 • Replacement: Measuring and Purchasing
- 9.6 • Painting and Fitting the New Baseboard
- 9.7 • Seeking Professional Intervention in Baseboard Repairs
- 9.7.1 – Understanding the Effects of Water Damage on Baseboards
- 9.7.2 – The Health Risks of Hidden Mold Growth
- 9.7.3 – Prompt Action Prevents Further Damage
- 9.7.4 – The Hidden Menace Behind the Walls
- 9.7.5 – Different Responses from Different Baseboards
- 9.7.6 – Telltale Signs of Water Damage
- 9.7.7 – Recognizing and Managing Mold Stains
- 9.7.8 – Repair or Replace: A Crucial Decision
- 9.7.9 – Addressing the Source of the Leak
- 9.7.10 – Making a Long-term Plan
- 9.8 • Addressing Water Damage Immediately
- 9.9 • Recognizing Baseboard Water Damage
- 9.10 • Tools for Fixing Water-Damaged Baseboards
- 9.11 • Handling Wall Moisture Before Baseboard Replacement
- 9.12 • Enlisting Professional Help for Water Stains
- 9.13 • Role of Restoration Specialists in Water Damage Restoration
- 9.14 • Dry Force Water Mitigation Services
- 9.15 • In Conclusion
- 10 Addressing Water Damage on Baseboards
- 10.1 • Importance of Prompt Address of Water Damage on Baseboards
- 10.2 • Recognizing the Signs of Baseboard Water Damage
- 10.3 • Evaluating Repair Versus Replacement
- 10.4 • Identify the Water Source
- 10.5 • Calling in the Experts
- 10.6 • Steps to Replacing Your Water-Damaged Baseboards
- 10.7 • Dealing with Significant Water Damage
- 10.8 • The Implications of Water Damage on Baseboards
- 10.9 • The Dampness Problem: Water and Drywall
- 10.10 • Baseboard Swelling: It’s More Than Meets the Eye
- 10.11 • Behind the Wall: Where Water Likes to Hide
- 10.12 • Discoloration above Baseboards: A Red Flag
- 10.13 • Mold Stains: An Underscored Health Risk
- 10.14 • Warping Walls: The Quiet Culprit
- 10.15 • Nipping the Problem in the Bud: Fixing the Leak
- 10.16 • Salvaging or Replacing Baseboards
- 10.17 • Seeking Expert Assistance: When and Why
- 11 Identifying the Source of Water Damage on Baseboards
- 12 Recognizing and Preventing Water Damage in Baseboards
- 12.1 • Causes of Water Damage in Baseboards
- 12.2 • Risk of Water Damage in Different Baseboard Materials
- 12.3 • Practical Insights on Safeguarding Baseboards from Water Damage
- 12.4 • Link to Additional Resource
- 12.5 • In Summary
- 12.6 • Understanding the Nature of MDF Baseboards
- 12.7 • Salvaging Water-Damaged MDF Baseboards
- 12.8 • Making the Decision to Replace MDF Baseboards
- 12.9 • Trusting in Expert Services like Appleby Cleaning and Restoration
- 12.10 • Considering Real Wood Baseboards in Water-Prone Areas
- 12.11 • The Value of Pre-Painting Baseboards
- 13 Understanding Slab Leaks and Their Causes
- 13.1 • Identifying Slab Leaks
- 13.2 • Leak Detection Techniques
- 13.3 • Fixing Slab Leaks
- 13.4 • Importance of Professional Assistance
- 13.5 • Detecting Possible Sources of Indoor Moisture:
- 13.6 • Assessing Roof Condition:
- 13.7 • Evaluating the Need for Internal Wall Investigation:
- 13.8 • Enlisting Professional Assistance:
- 13.9 • Examining the Installation of Windows:
- 13.10 • The Impact of Improper House Wrap:
- 13.11 • Inspecting the Sill Plate:
- 14 Understanding Concrete Cracks in Home Improvement
- 14.1 • Cracked Bathroom Grout Repair Techniques
- 14.2 • Components of a Home’s Foundation
- 14.3 • Eco-Friendly Features in Home Construction
- 14.4 • Home Design Trends of 2016
- 14.5 • Suspended Sculptures in Home Decor
- 14.6 • Strategies for Low Water Gardens
- 14.7 • Case Study: Designer Apartment Makeover under $10,000
- 14.8 • Showcasing Unique Homes in Remote Locations
- 14.9 • Water Conservation: Not just a Suggestion, but a Necessity
- 14.10 • Water-Wise Tips for Homeowners
- 15 Recognizing and Repairing Water Damaged Baseboards
- 15.1 • Causes of Water Damage on Baseboards
- 15.2 • Detecting Signs of Water Damage
- 15.3 • The Process of Repairing Water Damaged Baseboards
- 15.4 • The Role of Professionals in Repairing Water Damage on Baseboards
- 15.5 • Additional Resources
- 15.5.1 – Dealing with Damp Insulation
- 15.5.2 – The Risk of Mold Development
- 15.5.3 – Identifying the Source of Water Infiltration
- 15.5.4 – Signs of Water Damage
- 15.5.5 – Drywall and Wall Cavity Maintenance
- 15.5.6 – Preventing Water Infiltration through Proper Building Practices
- 15.5.7 – Importance of Waterproofing and Installation of Sump Pump
- 15.5.8 – Redirecting Surface Rainwater
- 15.5.9 – Redesigning Outdoor Features to Keep Water at Bay
- 15.5.10 – Utilizing Downspouts for Water Distribution
- 16 The Consequences of Ignoring Slab Leaks
- 16.1 • Recognizing the Indicators of a Slab Leak
- 16.2 • How to Find Slab Leaks Without Disrupting Your Home
- 16.3 • Repairing Slab Leaks Using Epoxy Restoration
- 16.4 • When It’s Time to Install New Piping
- 16.5 • The Importance of Expertise in Addressing Slab Leaks
- 16.6 • Causes Of Concrete Cracking
- 16.7 • Combating Shrinkage Cracking
- 16.8 • Utilizing Control Joints
- 16.9 • Addressing Temperature-Related Cracking
- 16.10 • Preventing Uneven Settling
- 16.11 • The importance of Reinforcement
- 17 Water Damage on Baseboards as a Symptom of Larger Problems
- 17.1 • Primary Causes of Water Damage on Baseboards
- 17.2 • Peeling Paint or Wallpaper: A Warning Sign
- 17.3 • Visible Stains and Potential Mold Growth
- 17.4 • Loss of Contact: An Unmistakable Sign
- 17.5 • Steps to Repair Water Damaged Baseboards
- 17.6 • When Baseboards Should Be Replaced
- 17.7 • Calling in The Professionals
- 17.8 • Rainwater and the Rec Room Issue
- 17.9 • Suspected Source of the Leak and Its Problematic Effects
- 17.10 • Mold: The Invisible Threat
- 17.11 • Detecting the Intrusion Source
- 17.12 • Unseen Intruders: The Cove and Soft Soil
- 17.13 • Building Code Prescriptions and Their Inadequacy
- 17.14 • Approaching a Final Solution: Waterproofing and Drainage
- 18 Identifying Water Damage on Baseboards
- 19 Identifying the Source of Water Damage
- 20 Managing Water Damage on Baseboards
- 20.1 • Identifying and Addressing Mold Growth
- 20.2 • Addressing MDF Baseboards
- 20.3 • Tracing the Source of Excess Moisture
- 20.4 • Fixing Leaks During Rain
- 20.5 • Preventing Future Baseboard Swelling
- 20.6 • Recognizing and Addressing Water Damage on Baseboards
- 20.7 • Identifying and Rectifying the Source of Water Leakage
- 20.8 • Repair or Replace? A Useful Guide
- 21 The Impact of Water Damage on Residential Properties
- 21.1 • Recognizing Signs of Water Damage
- 21.2 • DIY Fix for Water-Damaged Baseboards
- 21.3 • Preparing for Baseboard Replacement
- 21.4 • Addressing Severe Water Damage
- 21.5 • Salvaging Existing Base Shoe
- 21.6 • Measuring and Cutting New Baseboards
- 21.7 • Installing the Replacement Baseboards
- 21.8 • Attachment of Base Shoe Molding
- 21.9 • Seeking Professional Help
- 21.10 • Emergency Services for Water Damage
Water Damage On Baseboards
If you notice that your baseboards are damaged and you are thinking about repairing them or replacing them, it’s always best to assess the damage and be sure you can handle the project on your own. If you need help or aren’t handy, it may be better to call a handyman or a professional to make the repairs for you. If you are confident that you can make the repairs on your own, be sure to consider these tips from professionals.
How to Repair a Water Damaged Baseboard
If your home has flooded or if there has been a leak, you may notice that your baseboards are damaged. You have the option of replacing them or repairing them. If the damage is large, replacing is probably the best option. If the damage is less extended, you can use the following steps to fix the baseboards:
● Step 1: Clean The Baseboards
The first step before starting with the repair is to clean off your baseboards. There may be dust, dirt, grime, or residue on them. Use a damp cloth or sponge to wipe them down. If they need a deeper clean, you can use dish soap or an all-purpose cleaner.
● Step 2: Sand Them
If the boards show any signs of swelling, you will need to sand them down to make them even. Be sure to sand carefully, so you do not take off too much or affect the not swollen areas. You will also want to wipe down the baseboards one more time after you have sanded them, to remove the dust from the sanding process.
● Step 3: Apply Primer
If your baseboards are damaged, they may show signs of staining. You can cover the stains and make it easier for the paint to stick to the baseboards. You may need to apply more than one coat if there was significant staining or if a lot of sanding was required.
● Step 4: Paint
Paint or stain your baseboards the desired color. You should apply one coat at a time and let it dry thoroughly before applying the next coat.
● Step 5: Seal It
If you are repairing the baseboards in a room with a lot of moisture, such as a bathroom or laundry room, you may want to apply a water-repellent or sealant to help keep the water out of the baseboard so it will not swell or absorb moisture in the air.
How To Cover Up Water Stains On Baseboards
If you aren’t ready to replace your baseboards, or if only a small section is stained with water, you may prefer to cover them up. Follow these steps to get the best results.
● Step 1: Clean The Baseboards
Your baseboards may have dust and dirt sticking to them and will need to be wiped down. Use a damp cloth to wipe all baseboard areas and allow them to dry completely.
● Step 2: Primer
Using a primer will help prevent the stains from bleeding through after you paint. Make sure you apply the primer and allow it to dry completely. If you can still see the stains or if they are very dark, you can add a second layer of primer.
● Step 3: Paint
Paint the baseboards the desired color. The primer should make it easy to cover up the stains and hide them. If you can still see the stains faintly, you may need to add another coat or choose a dark color paint.
Brown Spots On Baseboards
If you see brown spots on your baseboards, it could be a sign of water damage. Many things can allow water to leak onto your baseboards and stain them. Some of those things include,
- Leaking windows
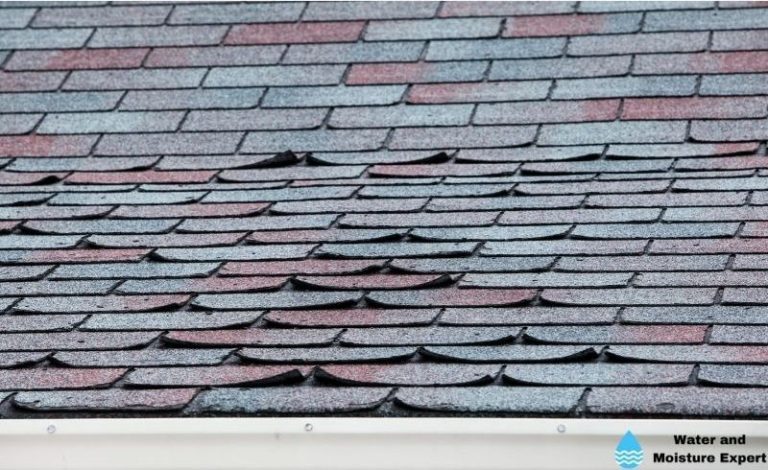
- Leaking roof
- Air conditioner leaks
- Flood
- Busted pipes
- Leaking fish tanks
- Leaking sinks
- Overflowing toilets
Water Damage Baseboard Bathroom
If you notice the baseboards in your bathroom are water damaged, you can either fix or replace them. Generally, bathrooms hold a lot of moisture and are likely to leak. Follow these steps to replace them properly:
● Step 1: Remove The Old Baseboards
Remove the old baseboards from the bathroom. If you are planning to replace all the baseboards, you can remove them all. If you are going to replace only the damaged ones, you will need to find replacements that match them.
● Step 2: Check For Mold
While you have the baseboards removed, you should check for signs of mold. Mold can grow in bathrooms due to moisture and flooding. If you find mold, you will need to have a mold remediation expert remove it for you before you can continue your repairs.
● Step 3: Remove Nails
If any nails or staples are sticking out that held the old baseboards in place, you will need to remove them or pound them flat. This will make it easier to install the new baseboards.
● Step 4: Cut The New Baseboards To Size
Measure and cut your new baseboards. You want each piece to fit closely to the next without any gaps. If you are only replacing a small section of the baseboard, you may only need to cut out a small piece and measure to replace it properly.
● Step 5: Install The New Baseboards
Use a nail gun or a rubber mallet and small nails to install the new baseboards. Gently tap them into place. Please make sure they are straight and even when you finish. You can paint over the nails or putty them and then paint them to hide them better.
MDF Baseboard Water Damage
MDF baseboards are more vulnerable to water damage than solid wood baseboards. MDF is a type of particle board that can swell and breaks down when it gets wet. Signs for MDF baseboard water damage include,
- Broken baseboards
- Swollen baseboards
- Stains on the baseboards
- Loose baseboards
- Damp baseboards
How To Fix Swollen Baseboards
If you notice your baseboards are swollen and feel that you can repair them rather than replace them, be sure to follow these steps:
● Step 1: Fix the Leak and Dry the Baseboards
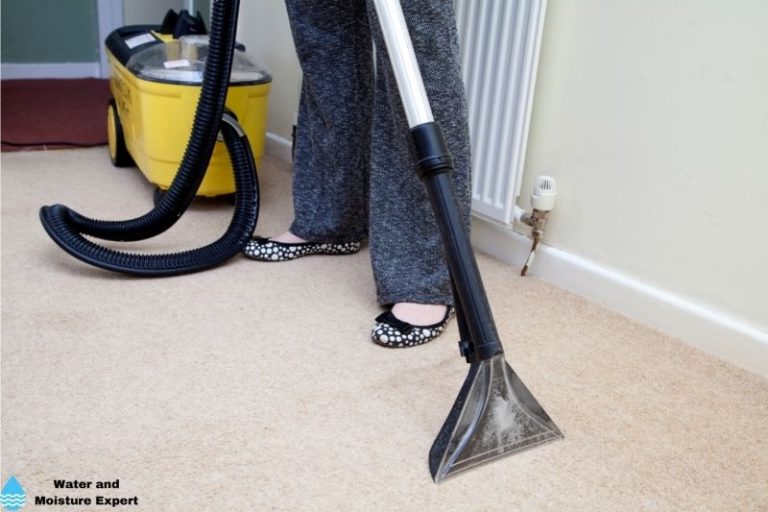
You can’t work on wet baseboards, so make sure the source of the leak or water damage is repaired. Next, use a towel or fan to dry the baseboards completely.
To speed up the drying process, you can use a dehumidifier. I always recommend renting a commercial dehumidifier, they can remove a lot more water per hour than a residential dehumidifier. A dehumidifier pulls in the moisture from the air and dries it out to release dry air back into the room. When used with a fan, this can be highly effective at drying out the drywall quickly.
● Step 2: Sand The Baseboard
Use fine-grit sandpaper to sand down the baseboards. Focus on the swollen part and work gently to bring the swollen portion to the same level as the rest of the baseboards. Be careful not to sand too hard or too much, as you could sand it down too far or sand the other baseboard parts that don’t need it. Be sure to sweep and wipe down the baseboards once you have finished sanding to remove the dust that may have spread while you were sanding.
● Step 3: Paint Them
Once you have sanded down the baseboards, you will need to paint them or stain them. You can touch up the paint or cover the entire baseboard to ensure the paint blends in well.
Baseboard Pulling From Wall Moisture
Most walls have moisture, and if there is a leak in your home or a lot of humidity, there may be excess water moisture in your walls. Your baseboards may pull this extra moisture from your walls. You can look for these signs
- Swollen baseboards
- Baseboards falling off the wall
- Wet spots on baseboards
- Stain on the baseboards
- Condensation on baseboards
- Water dripping from baseboards
If you see these signs, I recommend carefully checking for a leak. If the issue is due to high humidity only, try to do something about this. Generally, better ventilation will be beneficial. If the humidity is high during long periods, use a dehumidifier or air conditioning system.
Water Coming From Baseboard When It Rains
If you notice there is water coming from your baseboards when it rains, it means you have a leak somewhere. Check for a leak near the windows or at the bottom of the wall. If you don’t find any leaks on the ground or windows, your roof could be the culprit. Sometimes rainwater can leak down into the roof and behind the walls, and from there, it may run out through your baseboards. This can lead to more water damage to other parts of your home.
Any time you see water coming through your baseboards, you should immediately look for a leak in your home. But if the leak is small, it may take a short while to be visible. And if it does not rain for long, it can even be dry outside.
Baseboard Swelling
If you notice your baseboards swelling and are looking for a way to prevent it from happening again, there are a few different things you can do. Here are some of them:
- Windows: Make sure all windows are secure and sealed
- Appliances: Check appliances for signs of leaks
- Pipes: Check pipes and fixtures for leaks
- Clean up: Clean up water in the bathroom immediately
- Dry: Dry flooded areas quickly
- Moisture: Reduce moisture in your home. Improve ventilation, or use a dehumidifier or air conditioning system.
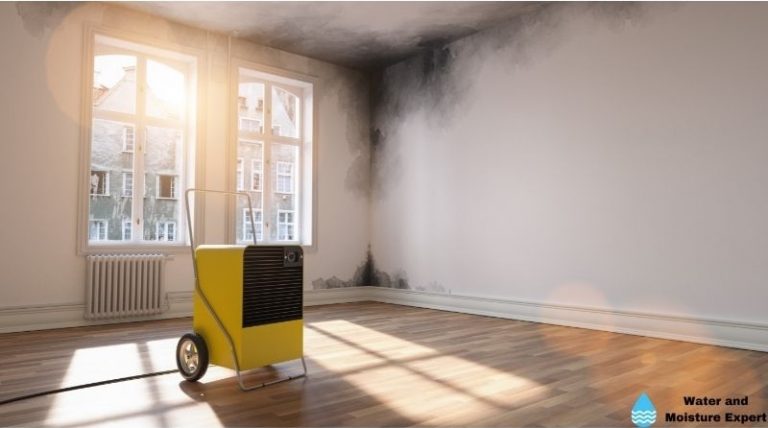
Potential Health Risks Associated with Water Damage Behind Walls
One of the most significant challenges with water damage is the potential health risks it poses. Regardless of the cause, be it leaks or floods, the outcome can be the same – the growth of bacteria, mold, and other microorganisms.
These organisms are known to aggravate certain health conditions like asthma and other respiratory issues [CDC]. Besides, they can also lead to allergic reactions and skin irritations, among other health problems.
– Importance of Identifying and Fixing Water Damage Source
Identifying the source of water damage is like finding the root of a malady. It’s critical to halt further spread and damage.
I highly recommend starting by tracing the path of the water spread or looking for any visible signs like water-stained walls or ceilings. Piping issues or roof leaks are common culprits.
Ignorance could lead to a recurrence, even after replacing the baseboards. And needless to say, this would mean a waste of time, money, and resources. So, before you start with any repair work, be doubly sure that the source of the water damage has been detected and fixed appropriately.
– Hiring a Professional Water Damage Specialist
Water damage upkeep might seem like a DIY task for some. But if you wish to ensure a thorough and professional job, consider hiring a water damage specialist.
Not only can they assess the extent of moisture damage, but professionals are also capable of identifying and treating any mold problem.
Additionally, they have the necessary equipment and experience to salvage what’s possible and replace what’s beyond repair. Therefore, consulting a water damage specialist is often a smarter alternative.
– Consider Adding Base Shoe Molding
Severe floor unevenness can pose a challenge while replacing the baseboards. Here, adding a base shoe or quarter-round molding can come to your rescue. It not only protects the baseboards from chipping or breaking due to uneven flooring but also accommodates any minor floor undulations.
I can’t stress enough the visual benefits of adding a base shoe molding. It provides an elegant finish, enriching the space’s overall charm. Moreover, remember to choose a similar or contrasting color to your baseboards for an impressive detailing effect.
– Procedure for Replacing Water-damaged Baseboards
Here is a step-by-step guide to replacing water-damaged baseboards:
- Protection: First, protect the adjacent wall and floor surfaces with painter’s tape or an equivalent material.
- Removal: With the help of a pry bar, slowly detach the damaged baseboard from the wall, ensuring you do not damage the wall plaster.
- Purchases: Buy a new baseboard of the same style as the old one or one that matches your home decor.
- Cutting: Measure the length required and cut the new baseboard.
- Installation: Attach the new baseboard using nails or adhesive. You can use a leveler to ensure it’s fitted straight.
- Painting: Once fixed, paint or finish the baseboard as desired.
Although the process might seem easy, do remember to keep all safety precautions in mind, especially while cutting the baseboard or using any sharp instrument.
– Contact Information for 1-Tom-Plumber
If you are grappling with water damage issues, there’s always professional help available. 1-Tom-Plumber is a reliable service provider specializing in emergency plumbing, drain cleaning, and water damage services.
No matter the extent of the damage, 1-Tom-Plumber is adept at handling it all. From diagnosing the issue at its source to ensuring seamless repairs, this service provider is known for its quality services.
Remember, the severity of water damage is not to be underestimated. Long-term or untreated water damage can have devastating effects on your health and property. So at the first sign of leakage or water damage, get in touch with a professional.
Recognizing Water Damage on Baseboards
Water damage on baseboards is often an overlooked aspect when it comes to home repairs. However, it warrants special attention as it can often be a sign of greater underlying issues, such as hidden flooding or leaks within your home.
This kind of damage is more than just a simple aesthetic concern. When neglected, it can lead to serious consequences that pose risks not only to your property’s structural integrity but also to your health.
Root Cause: Leaking Pipes Behind Walls
One of the most common culprits causing water damage on baseboards is leaking pipes situated behind the walls of your home. These leaks may seem innocuous initially, but over time, they can cause considerable water damage.
This can lead to the growth of mold, which can be harmful to both your home’s structure and your health, especially for individuals with asthma or allergies.
Identifying the Problem: Peeling Paint or Wallpaper
Not all signs of water damage are as overt as visibly soaked baseboards or puddles on the floor. Sometimes the indicators can be more subtle. Peeling paint or wallpaper on baseboards serves as a strong indication of water damage.
This may point to the issue of wet drywall, which will require immediate replacement to prevent further escalation and expense.
You can refer to the US Environmental Protection Agency’s guidelines on mold and moisture to learn more about handling these issues.
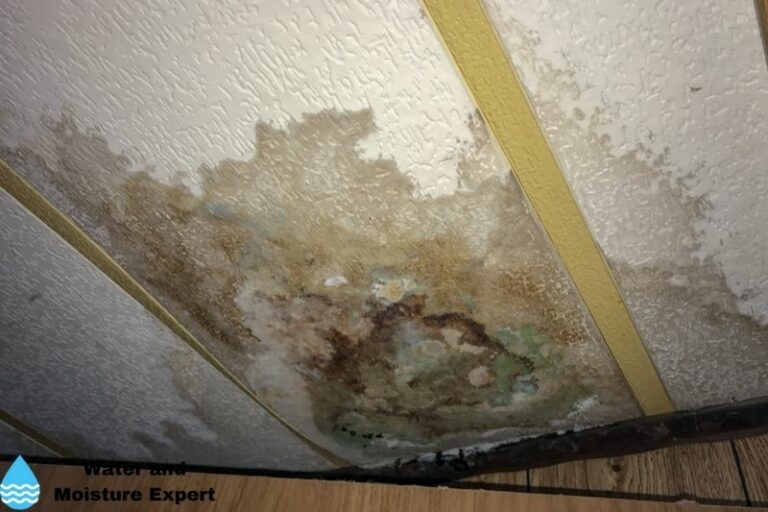
Dangerous Consequences: Visible Stains and Mold Growth
Visible stains on baseboards can be another conspicuous indicator of water damage. Aside from being an eyesore, these stains often signify mold growth in unseen areas behind walls.
Mold, being a microscopic fungus, can rapidly spread across damp surfaces and may become detrimental to your home’s internal environment if not tackled at the right time.
Symptoms of Damage: Loss of Contact Between Baseboards and Wall
Water damage can drastically affect the state of your baseboards. The impact of excessive water can lead to what’s referred to as baseboard swelling or warping.
This, in turn, causes a loss in contact between the baseboards and the wall, a clear sign of serious water damage that requires a prompt response.
Addressing the Damage: Steps to Repair
When dealing with water damage on baseboards, it is paramount to address the root cause first before moving to aesthetic repairs or replacements. Consequently, it’s crucial that ongoing leaks and damaged drywalls are effectively dealt with.
Ignoring these critical steps may just cover up the issue temporarily and you may find yourself dealing with the same problem again in the future.
The Role of Professionals: Secure Your Home from Mold and Water Damage
While minor water damage can be addressed with common household tools and a trip to the hardware store, significant damage often calls for professional intervention. Consulting professionals such as Revere Construction and Roofing are highly recommended.
These companies are equipped with skilled professionals who can accurately assess the damage and provide bespoke solutions that ensure your baseboards are fixed properly, thereby eliminating potential mold growth.
My Personal Recommendation
Based on my experience, tackling water damage is not a DIY task. It’s always best to consult professional services at the earliest sign of water damage to prevent further issues.
Professionals are trained in best practices and have access to specialized tools that homeowners might not. Moreover, they can provide advice on maintenance and avoidance of future damages.
In a nutshell, understanding and addressing water damage isn’t something to be put on the back burner. Persistent vigilance, quick actions, and the right intervention can save money, reduce headaches, and, most importantly, increase the longevity of your beloved home.
Remember, “A stitch in time saves nine!”
• Identifying the Sources of Water Damage on Baseboards
Water damage on your baseboards can come from several sources, with the most common ones being leaks, clogged gutters, destructive weather patterns, faulty appliances, or HVAC complications. Leaks can range from small drips from poorly sealed windows to large flows caused by damaged pipes.
Clogged gutters can cause overflow, directing water towards the foundation of your house and potentially soaking baseboards from the outside in. A similar situation can arise due to severe weather like heavy rains or floods.
Appliances like dishwashers and washing machines, if malfunctioning, can cause considerable water leaks. Lastly, issues with HVAC units, specifically the condensation line, can lead to water damage on baseboards.
• Detecting Signs of Water Damage on Baseboards
Detecting water damage early can prevent further destruction and higher repair costs. The most common signs of water damage on baseboards include moisture stains or dark patches, mold growth, warping, peeling paint, and a sometimes noticeable dripping sound.
According to the Centers for Disease Control and Prevention, mold can cause health problems; hence, its presence not only signifies water damage but also a health risk.
• Preparing for Baseboard Repair
Upon detecting water damage, your first course of action should be to identify the source of the damage. It is crucial to address this source prior to embarking on the repair process to prevent recurrence.
Once done, gather the necessary tools for the repair. A pry bar, paintbrush, drill, hammer, utility knife, and sealant are mostly needed. If the baseboards are made of wood, wood, glue, and filler might be required for the repair.
• Repair Process: Cleaning and Checking
Start by cleaning up any residue where the baseboard was removed using the utility knife. The cleaning process should be thorough to allow for a smooth installation of the new baseboard.
Once cleaned up, the surrounding drywall should be meticulously checked for any other damp or wet spots. Addressing these spots is necessary before continuing with the repair to prevent future water damage.
• Replacement: Measuring and Purchasing
The replacement baseboard must match the old one. With the damaged section as your guide, measure the replacement. Always purchase a slightly longer board, as this allows for trimming to fit perfectly. Remember, a properly fitted baseboard can forestall future instances of water damage.
• Painting and Fitting the New Baseboard
A crucial step before fitting the new baseboard is painting it. This should ensure its color matches the wall, providing a pleasing and seamless decor. While fitting the new baseboard, apply caulk to the back first before carefully nailing it to the wall.
A secure fit is an integral part of the process; it helps bar water from getting in and causing the same problem again.
• Seeking Professional Intervention in Baseboard Repairs
While DIY repairs can save costs, the procedure may not be easy for everyone. If you are uncertain about your ability to repair water damage on your baseboards effectively, I strongly recommend seeking services from professional baseboard repair agencies.
These experts possess a wealth of experience dealing with water damage and can provide efficient, lasting solutions, saving you from potential future repair costs.
Remember, the entire process of detecting, assessing, and repairing water-damaged baseboards requires careful attention. By adhering to these steps, you not only repair the damage but also protect your home against future instances of such damage.
– Understanding the Effects of Water Damage on Baseboards
Water damage on baseboards can have multiple detrimental effects on your home, one of which is leading to scuffed walls. The onslaught of encroaching water can damage the finish on your walls, cause the paint to peel off, and result in unsightly stains.
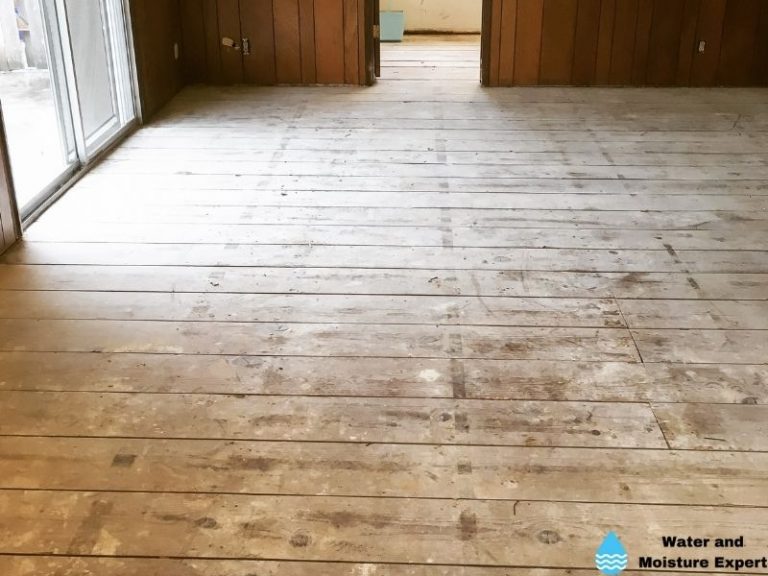
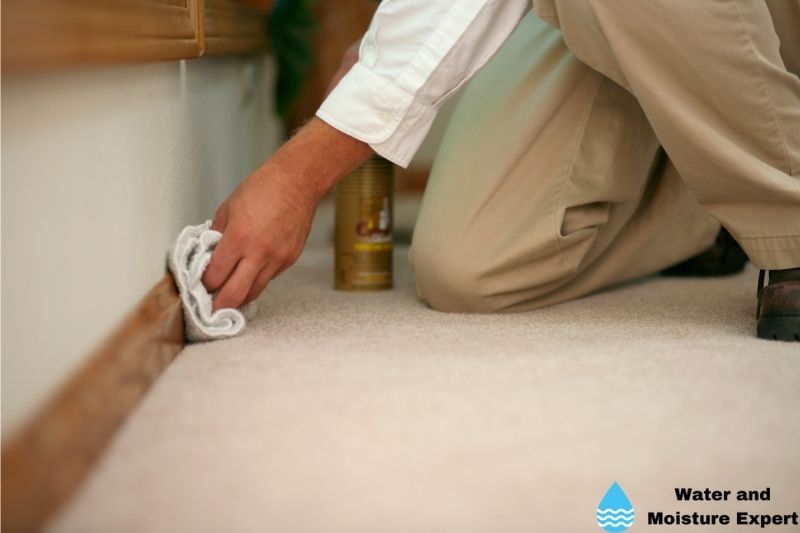
The intersection between the carpet and wall is notably vulnerable to this damage, as it directly meets the baseboard. In extreme cases, water can seep into the carpet, leading to unpleasant odors and potentially lasting damage.
– The Health Risks of Hidden Mold Growth
One often overlooked consequence of water damage on baseboards is mold growth that can occur as a result. This particularly happens when the drywall behind the baseboards absorbs water, creating a moist environment that is ideal for mold to flourish.
Mold proliferation can be damaging not only to the structural components of your home but also to your health.
According to the Centers for Disease Control and Prevention, exposure to damp and moldy environments can cause nasal stuffiness, throat irritation, coughing, and, in some cases, skin irritation.
– Prompt Action Prevents Further Damage
The importance of addressing water damage on baseboards promptly cannot be stressed enough. If not managed promptly, water damage can lead to bigger issues, escalating from an aesthetic concern to a health hazard.
– The Hidden Menace Behind the Walls
Often, this water damage isn’t only confined to the baseboards. It can dampen the drywall behind them and accumulate in the space behind the wall. This unseen, slow-building odium cultivates mold and leads to structural issues such as baseboard swelling due to water pooling.
– Different Responses from Different Baseboards
The absorption and subsequent damage caused by water on baseboards can vary based on the baseboard type. For instance, baseboards made out of MDF or particleboard tend to absorb moisture readily, leading to quicker deterioration.
Whereas solid wood and PVC are more water-resistant and stronger, showing less visible damage.
– Telltale Signs of Water Damage
Peeling paint and discolored wallpaper are indicators of water damage. Discoloration above the baseboards should not be ignored, as it can suggest ongoing leaks that need prompt attention to prevent further damage.
On suspecting any signs of water damage, a thorough examination of the wall and baseboards should be done.
– Recognizing and Managing Mold Stains
Mold stains above water-damaged baseboards should be addressed immediately by contacting a professional restoration company. Mold not only harms the structural integrity of your home but can also pose serious health risks.
– Repair or Replace: A Crucial Decision
Whether damaged baseboards should be repaired or replaced depends on their condition post-recovery. Unsalvageable baseboards must be replaced, whereas minor damages might be fixed with some repairs.
– Addressing the Source of the Leak
Before repairing or replacing water-damaged baseboards, identifying and addressing the source of the leak is vital. Damaged pipes, roof leaks, or ill-fitting windows could be potent sources. Without stopping the leak source, any repairs to the visible damage may end up ineffectual and repeating.
– Making a Long-term Plan
If the damage is severe, replacing the baseboards is often the better long-term solution. I would recommend using solid wood baseboards for replacement, given their superior strength and increased durability.
Tough times necessitate tough measures, and this is no different when dealing with water-damaged baseboards.
• Addressing Water Damage Immediately
Water damage can wreak havoc on your home’s structure if left unchecked. The damage might appear negligible at first; however, the long-term effects can be devastating both physically and financially.
From structural impairment to mold growth, water damage spawns numerous subsequent issues that add unnecessary expenses. The first step to mitigate this is to address and rectify water-related problems as soon as they are spotted.
• Recognizing Baseboard Water Damage
Baseboard water damage is one such sneaky issue that homeowners often overlook. A few signs to watch out for are discoloration, peeling, stains, and loose paint. The damage might not be plainly visible at first.
So, if you notice discoloration or peeling on your baseboards, do not disregard it. It can be a telltale sign that there is water infiltration behind the scenes causing potential damage.
• Tools for Fixing Water-Damaged Baseboards
If water-damaged baseboards are neglected, they can foster an environment suitable for mold growth, making the situation dire. Therefore, fixing the damaged baseboards becomes imperative.
While professional help is always a good idea if you prefer to take a DIY approach, ensure to have these tools at your disposal: a putty knife, hammer, pliers, a backsaw, and finish nails. These are essential to rectify the water-damaged baseboards effectively.
• Handling Wall Moisture Before Baseboard Replacement
Before you replace any water-damaged baseboard, make sure to examine the wall behind it thoroughly. This is a critical step as the root cause of the water damage must be addressed first.
Ensure that the wall is completely dry with no signs of moisture, dampness, or leakage. Doing so will prevent future instances of water damage, aiding in the longevity of your baseboard replacements.
• Enlisting Professional Help for Water Stains
Despite your best efforts, there may be instances when the water damage is beyond the scope of a DIY fix. If you notice water stains on your baseboards, it’s an indication that the water has managed to penetrate deeper into the infrastructure of your home.
This is where professionals can step in with their years of experience and expertise.
• Role of Restoration Specialists in Water Damage Restoration
Restoration specialists, including mold remediation experts and water damage restoration services, can be incredibly beneficial in such situations. They possess the technical knowledge and specialized equipment to diagnose and tackle the intricacies of extensive water damage.
The University of Florida’s IFAS Extension is a great resource that explains why their expertise is often indispensable in dealing with these types of situations.
• Dry Force Water Mitigation Services
Speaking of dependable professionals, Dry Force Water Mitigation services are a top-tier option for those experiencing water damage. Offering round-the-clock, 24/7 emergency services, they can provide immediate assistance reducing the chances of further damage.
Additionally, they can assist you with insurance claims helping to ease the financial burden that often comes with water damage restoration.
• In Conclusion
Being aware of the earliest signs of water damage and understanding the necessity to act quickly can protect your home from long-term damage. Whether you choose a DIY approach or professional help, the key is to act promptly without discounting any signs of baseboard water damage.
Addressing Water Damage on Baseboards
• Importance of Prompt Address of Water Damage on Baseboards
Water damage can cause substantial structural damage to your home’s baseboards. Immediate attention prevents escalation of the damage and prohibits the potential health risks associated.
Baseboards are primarily made up of wood, a material offering a conducive environment for mold proliferation. Treating water intrusion promptly curbs the development of mold resulting in health issues such as allergies and even asthma.
• Recognizing the Signs of Baseboard Water Damage
Some indicators of water pervasion in your baseboards include discoloration, staining, peeling, swelling, warping, or even a persistent musty smell. With discoloration and staining, you will observe that your once flawless baseboards are now plagued with either dark or light patches.
Peeling implies the paint chipping off, while warping suggests a distortion in shape. The swelling of the baseboards is a result of the wood absorbing excessive water.
• Evaluating Repair Versus Replacement
If the damage isn’t significant and the structural integrity of the baseboard is intact, you may choose to repair it. In cases where there’s extensive damage, consider replacing the baseboards.
Repairing them may seem cost-effective, but in the long run, it could lead to more expenses, especially if mold has started to blossom behind that baseboard.
• Identify the Water Source
Before embarking on any repairs or plans to replace the ruined baseboards, identify and eliminate the water source creating the damage; the problem could range from leaks in your plumbing to seepage from outdoors. If you don’t address it, you’ll merely be handling the same issue in the future.
• Calling in the Experts
After the water source has been deemed and fixed, it’s best to hire a professional to inspect for residual damage. This includes moisture damage or potential mold growth behind the walls. You can visit the United States Environmental Protection Agency to understand the risks of mold and how professionals handle this issue.
• Steps to Replacing Your Water-Damaged Baseboards
Replacing a water-damaged baseboard is quite meticulous, especially if you plan to do it yourself. Here are a few steps:
– Ensure the Wall Is Dry
Before the onset of any repair, confirm that your wall is dry. Wait for a couple of days post fixing the leaks to commence your repairs. The drying time would be dependent on the extent of the water damage.
– Measure and Cut New Baseboards
Ensure to measure the dimensions precisely to get the perfect fit for your baseboards. Cut the new baseboards in correspondence with your metrics.
– Attach the New Baseboards to the Wall
Utilize nails or wood glue to attach your new baseboards accurately in position. Remember, precision results in a seamless finish!
• Dealing with Significant Water Damage
In cases of substantial water damage and potential mold, my personal recommendation would be to seek professional help. The expertise of professionals ensures to avert additional damage and potential health hazards.
Expert success tends to offer a more permanent solution as compared to the temporary reprieve achieved from quick, inadequate repairs.
With Professionals taking the lead, you’ll have peace of mind knowing that your baseboards will have returned to their best aesthetic and functional state, as well as become free from mold growth.
• The Implications of Water Damage on Baseboards
The underlying effects of water damage on baseboards are often more severe than what the naked eye can initially perceive. Without prompt attention, baseboards can suffer from extensive deterioration, posing threats to both the integrity of your property and your health.
• The Dampness Problem: Water and Drywall
A common problem with water-damaged baseboards is the dampness infiltrating the drywall behind the baseboards. This dampness can lead to the pooling of water behind the wall, a harbor for mold growth.
Mold not only discolors your beautiful walls but also presents a plethora of health risks. Like all mold-related issues, early detection and treatment are key to handling this challenge effectively.
• Baseboard Swelling: It’s More Than Meets the Eye
When baseboards soak up water, they can start to swell, which can lead to warping or detachment from the wall. This effect is more noticeable with fiberboard baseboards, given their higher susceptibility to moisture absorption compared to wood baseboards.
Notably, these signs of water damage can signify a need for expert intervention before the problem worsens.
• Behind the Wall: Where Water Likes to Hide
When water pools behind the walls, signs such as peeling paint or wallpaper often appear, indicating that your walls have been compromised by water.
Unfortunately, wet drywall can’t be salvaged and must be promptly replaced. Thus, signs of water damage should never be overlooked; these issues demand immediate action.
• Discoloration above Baseboards: A Red Flag
Discoloration above the baseboards is another troublesome signal of water damage. This discoloration often indicates an ongoing leak, necessitating professional assistance to diagnose and resolve the problem accurately.
It’s vital to consider that what may appear as a simple aesthetic problem might denote a severe underlying issue.
• Mold Stains: An Underscored Health Risk
Mold stains manifesting above water-damaged baseboards increase health risks, necessitating swift action. Mold builds up behind the baseboard, feeding off the damp and warm environment. It is vital to call a water damage restoration expert the moment such signs of mold become evident.
• Warping Walls: The Quiet Culprit
As water damage seeps into the wall behind the baseboards, the walls can warp, requiring extensive repair or replacement. To avoid escalating property repair costs and potential health risks, it is advisable to pursue an expert’s guidance on damage control and swift remediations.
• Nipping the Problem in the Bud: Fixing the Leak
A crucial step in dealing with water damage on baseboards is identifying and fixing the source of the leak. Any remediation of the ensuing damages will bear little long-term effectiveness if the leak remains unresolved.
• Salvaging or Replacing Baseboards
Salvaging water-damaged baseboards is a viable option in some scenarios, depending largely on the degree of water damage incurred. In more severe cases, replacement may be the more sensible choice, as water damage often leaves baseboards beyond repair.
• Seeking Expert Assistance: When and Why
Water damage on baseboards often signs of more significant problems like mold or leaks behind the wall. Make sure to reach out to a water damage restoration expert to thoroughly investigate the issue.
In particular, ER Contracting offers water damage restoration services, so feel free to reach out for a free estimate.
At the end of the day, would you rather bear the costs of preventive maintenance or heavy repair and replacement? Be alert to the signs detailed in this article, and heed your house’s silent screams for help before it’s too late.
For more information on the impact of water damage on homes, visit the University of Florida’s page on Flood Damage Recovery. It provides important insights into understanding and preventing water damage.
Identifying the Source of Water Damage on Baseboards
If you notice water damage on your baseboards, it could be a symptom of an underlying problem in your home. The culprits behind such damage can be diverse and include leaks, severe weather, malfunctioning appliances, HVAC issues, and even clogged gutters.
To identify and fix this issue, it is crucial to locate its source first. Examine the affected areas closely. Are there any visible signs of moisture stains, mold growth, warping, peeling paint, or even dripping sounds?
These are clear indications of water damage and can provide crucial clues as to the source of the problem.
• Importance of Prompt Action
Repairing water damage immediately is not just vital for maintaining the aesthetics of your home but also for preventing wider structural damage and potential health risks.
Mold, for instance, poses serious health hazards, especially for people with allergies or respiratory problems. Additionally, water can weaken the structure of baseboards over time, causing them to warp or rot.
• Tools and Materials Required for Repair
Before you start, please ensure that you are equipped with the necessary tools and materials for the repair.
These would include a pry bar, paintbrush, drill, hammer, utility knife, sealables such as caulk or wood glue, and any required filler. A few of these items can be easily sourced from local home improvement stores or even online.
• Process: Removing the Damaged Baseboard
With the right tools in hand, the next step is to carefully remove the damaged area of the baseboard using a pry bar. Patience and precision are required at this point to ensure that the surrounding areas and the drywall behind the baseboard remain intact and undamaged.
Any remaining caulk or glue residue on the wall should be cleanly scraped off with the utility knife. Also, sand down any rough spots for a smoother surface.
• Replacing the Baseboard
Having carefully removed the affected piece, the next order of business is to measure and purchase a replacement baseboard of a similar size.
While it is not a strict requirement, it is recommended to paint the replacement baseboard before fitting it to the wall. This allows for an easier application and a cleaner finish.
• Fixing the Replacement Baseboard
With the baseboard painted and dried, it’s time to fit it back onto the wall. Use the caulk and hammer the nails in carefully to securely fix the baseboard in place. Ensure the caulk is evenly applied and the nails are driven in straight to ensure a clean finish.
• When to Seek Professional Help
Not everyone is comfortable with DIY repairs, and that’s perfectly okay! Repairing water damage on baseboards can be a complex task, especially if it involves dealing with mold growth or extensive damage.
If you feel unsure or overwhelmed at any point during the process, it would be advisable to seek professional assistance. Experienced professionals can ensure that the damage is fully repaired, leaving your baseboards looking as good as new.
For more information about handling water damage and resources for professional assistance, take a look at the comprehensive guide on the EPA website.
Recognizing and Preventing Water Damage in Baseboards
• Causes of Water Damage in Baseboards
Water damage can significantly depreciate the aesthetic and market value of your baseboards; this damage may stem from leaking windows, a leaking roof, air conditioner leaks, flooding, burst pipes, leaking fish tanks, or overflows in sinks or toilets.
Moreover, baseboards pulling away from the wall may indicate an excess of moisture within the walls. Notably, during the rainy season, you may notice water signs along the baseboards, suggesting a possible leak near windows or the roof.
• Risk of Water Damage in Different Baseboard Materials
The type of baseboard material greatly influences the durability and vulnerability to water damage. Particularly, Medium Density Fiberboard (MDF) baseboards are more prone to water damage compared to their solid wood counterparts. This difference is due to the nature of their material compositions.
• Practical Insights on Safeguarding Baseboards from Water Damage
It is possible to protect your baseboards from water damage. The leading strategy involves ensuring your windows are secure and sealed, thereby preventing any possibility of water siphage that may swell the baseboards.
Further, proactive checks for appliances, pipes, and other fixture leaks can save you future costs of repairing or replacing your baseboards.
Significantly, water in the bathroom should be cleaned immediately to prevent it from seeping into the baseboards. Similarly, areas affected by floods should be swiftly dried to keep the baseboards from absorbing water and swelling.
Lastly, reducing the humidity levels in your home can protect your baseboards from absorbing moisture from the air. You can achieve this through improved ventilation or by using dehumidifiers or air conditioning systems which help control indoor humidity levels.
• Link to Additional Resource
For more detailed information on preventing and fixing water damage on different baseboard materials, check this comprehensive guide from a non-commercial source at the University of Florida’s Housing and Residence Education site.
• In Summary
Understanding the common sources of water damage on baseboards and the vulnerability of different baseboard materials aids in formulating effective protective strategies.
Simple practices, including securing window seals, checking appliances for leaks, instant cleanups, and managing indoor humidity, can help preserve the life and quality of your baseboards. I recommend regular checks for possible sources of water and timely remediations for any detected leaks.
• Understanding the Nature of MDF Baseboards
Among the numerous materials for constructing baseboards, Medium Density Fiberboard, commonly known as MDF, has firmly established its popularity due to its high affordability and ease of installation.
This versatile product is composed of a mixture of sawdust and resin, offering a smooth and clean finish that offers an aesthetic appeal to any space.
Notwithstanding its many advantages, MDF baseboards are not without their challenges. This product’s essential component of sawdust can have an unwelcome reaction with water, leading to swelling and bubbling.
This renders the baseboard unattractive and less functional by impairing the fit and finish of the board.
• Salvaging Water-Damaged MDF Baseboards
Die-hard homeowners may wish to salvage their damaged MDF baseboards. This is not an impossibility. MDF boards that have been mildly exposed to water can be reclaimed through a process of drying, sanding, and repainting.
To begin, the affected MDF board has to be properly aired out and dried. This could take several days, depending on the extent of the damage. Next, meticulously sand the swollen portions.
These restored MDF baseboards are then given a fresh coat of paint, effectively masking the water damage and providing additional protection against future exposure.
However, this salvage process has its limitations. In situations where the MDF baseboards have extensively soaked up water, it’s advisable to consider a total replacement.
• Making the Decision to Replace MDF Baseboards
For MDF baseboards severely affected by water damage, replacement is a practical option. This involves removing the entire length of the affected board and replacing it with a new one.
Doing so ensures that the baseboard remains in peak structural form, serving its protective function and maintaining its aesthetic value.
However, the replacement process is not a simple DIY; it requires expertise and craftsmanship for proper execution. That’s where reliable companies like Appleby Cleaning and Restoration come in.
• Trusting in Expert Services like Appleby Cleaning and Restoration
Appleby Cleaning and Restoration is a reputable company renowned for effectively addressing MDF baseboard issues caused by water damage. They are fully licensed, bonded, and insured, offering tremendous peace of mind to homeowners.
Hiring such seasoned professionals can save you from the stress and uncertainty of DIY repairs. They apply their extensive experience and technical know-how in assessing the viability of salvaging or replacing your MDF baseboards.
• Considering Real Wood Baseboards in Water-Prone Areas
In residential and commercial buildings where certain areas are prone to water exposure, such as kitchens and bathrooms, it’s advisable to consider using real wood baseboards.
Wood, especially hardwoods like oak and cherry, are more resistant to water damage, making them an optimal choice for such areas.
• The Value of Pre-Painting Baseboards
Another critical point to consider in the war against water-damaged baseboards is painting the bottom side of baseboards before their installation. It’s a preventive measure that forms a protective barrier that repels water, enhancing the lifespan of your baseboards, whether they are MDF or real wood.
According to an article by the University of Massachusetts, painting on a dry surface promotes better adhesion and forms an effective seal against moisture infiltration. Just remember to choose water-resistant paint for the task.
Remember, prevention is the best strategy against water damage. But when the need arises, expert services like Appleby Cleaning and Restoration are your ideal solution for salvaging or replacing water-damaged MDF baseboards.
Understanding Slab Leaks and Their Causes
A substantial portion of home repair nightmares stem from water-related issues, and one of the most troublesome is the slab leak. When water seeps into your property from pipes that lie beneath the home’s foundation, the resulting damage to the slab can be severe.
Various factors could contribute to this phenomenon. The most prevalent causes usually involve your piping and environmental factors.
Lesser quality pipe wrapping can sometimes lead to slab leaks. When pipes under the slab are inadequately wrapped, moisture from the soil can impact the pipes adversely.
Over time, this can result in leaks. Moreover, the natural settling and shifting of the earth beneath your home can cause movement in the hard foundation that may lead to leaky pipes.
Another factor that cannot be ignored is the chemical reaction that sometimes occurs between the pipe material and the minerals present in the surrounding soil.
As time progresses, these reactions can cause significant damage to the water lines leading to slab leaks. Additional pressure on water lines may also lead to inevitable leaks, especially if these lines have become weakened over time.
• Identifying Slab Leaks
Detection is key when dealing with slab leaks. The sooner you can identify a potential slab leak, the quicker you can act to minimize the resulting aftermath. Several telltale signs can indicate the presence of a slab leak in your home.
A sudden spike in your water bill, despite a normal water usage pattern, is one of the first red flags. Paired with this, you may also notice unexplained damp spots in your carpet or wet baseboards.
Spend time inspecting any such areas, as they could indicate areas where water is seeping up from below the ground.
Mold and mildew growth is another potential sign of a slab leak. These microscopic organisms thrive in damp environments, so their presence could indicate an underlying water problem.
Additionally, unexpectedly warm spots on your flooring can also suggest the presence of a slab leak. Lastly, any instance of unexplained pooling of water near the foundation of your home may require immediate attention.
• Leak Detection Techniques
Thankfully, there are several non-invasive testing options available that can assist in identifying the location of a slab leak without causing damage to your building’s foundation.
Techniques such as hydrostatic testing, electronic amplification, and electromagnetic pipeline locators are excellent examples.
Hydrostatic testing involves pressurizing a pipe system with water to check for leaks, while electronic amplification and electromagnetic pipeline locators pinpoint the source of the leak by detecting the sound waves produced by leaking water or the magnetic field of the pipe, respectively.
For more information on these processes, check this informative link from the University of Maryland.
• Fixing Slab Leaks
Epoxy restoration is a common method employed to mend slab leaks. This process usually involves the drilling of small holes to reach the leaking pipe, which is then repaired. This method is effective as it targets the leak directly without causing unnecessary destruction to the foundation.
However, if your piping system has sustained multiple leaks in the rare case, installing new pipes may become necessary. This action would, in essence, eliminate the issue from its root and provide a more long-term solution.
• Importance of Professional Assistance
Managing slab leaks can prove to be a daunting task, and it is always recommended to consult with experienced professionals in such cases. The technical know-how and skill required to fix slab leaks efficiently are vast, and attempting to take such tasks on yourself might result in further damage.
A well-equipped professional can carry out the necessary tests, identify the most viable solution, and repair your slab leak before it becomes a major, more expensive issue.
As a homeowner, your priority should be to keep your home in the best possible condition, and seeking expert help when necessary is an integral part of that.
• Detecting Possible Sources of Indoor Moisture:
Signs of moisture within a room can often be an inscrutable problem since its source remains relatively hidden. It is noted that this room, in particular, does not appear to be in any location that is inherently prone to dampness.
The room is not below grade, signifying that ground moisture should not be a high probability. Moreover, even externally, the vicinity of the room doesn’t show any concentrations of water puddles along the adjacent walls. Puddle presence could otherwise indicate water seepage from the outside.
• Assessing Roof Condition:
An important step towards identifying the moisture source involves evaluating the state of the room’s upper surface – the roof. Upon observation, the roof appears to be in good condition, with no notable cracks or openings present. Cracks or openings might have suggested rainwater or snow melt leakage.
• Evaluating the Need for Internal Wall Investigation:
Given the abstruse nature of moisture sources, I am contemplating the removal of some of the room’s drywall.
The elimination of a section of drywall, as well as the baseboard, could aid in a more thorough investigation. This effort may also be necessary to conduct any subsequent repairs to eradicate the dampness.
• Enlisting Professional Assistance:
The complexity of this issue prompts me to consider seeking professional assistance. But then a crucial question arises: what type of professional is best equipped to address this predicament? I recommend research and consultation with experts experienced in building inspections or structural waterproofing.
• Examining the Installation of Windows:
A commenter with knowledge in this field suggested that the room’s moisture issue could stem from the windows. Poorly installed windows or faulty sealing can easily become a conduit for water leakage.
For more information, refer to the California Department of Consumer Affairs guide on window installation best practices.
• The Impact of Improper House Wrap:
House wrap is designed to protect the building from rain and other forms of moisture. However, if not installed correctly, it could contribute to interior dampness. An investigation into the house wrap’s condition and correct installment could help in zeroing in on the issue.
• Inspecting the Sill Plate:
Finally, another commenter suggests inspecting the sill plate. The sill plate, situated on top of the foundation wall, may lack a proper gasket or adequate caulking. In such cases, it is often the unsuspected culprit behind indoor dampness.
A more comprehensive study about sill plates and their impact on home structures can be found on The National Institute of Building Sciences website. In conclusion, moisture within interior spaces is a daunting issue to combat due to its elusive origins.
However, through a systematic process of elimination, and possible professional consultation, a solution can be identified and implemented. The willingness to explore multiple avenues to identify the source of moisture is crucial.
Understanding Concrete Cracks in Home Improvement
Cracks in the concrete is an issue that many homeowners come across during home renovations. These cracks often occur due to shrinkage resulting from the loss of water. As concrete dries and hardens, it can often reduce in size and crack.
Other reasons can include unstable soil under the concrete or excessive weight applied on the concrete surface. Correcting these issues before they escalate can save homeowners valuable time and money in the future.
• Cracked Bathroom Grout Repair Techniques
Cracked grout in a bathroom is not merely an eyesore; it can also lead to much bigger problems like water damage if left unaddressed.
Immediate actions can be taken, such as using a grout saw to remove the damaged grout. Then proceed to apply a fresh layer of grout, followed by a thorough cleaning. For more detailed instructions, you may refer to this DIY guide provided by This Old House.
• Components of a Home’s Foundation
A home’s foundation plays an instrumental role in bearing the whole weight of your house and hence, it is vital to have a thorough understanding of its key components.
These are typically the footings, walls, and slab. The footings act as the base of the foundation, while the walls provide structure, and the slab forms the floor.
• Eco-Friendly Features in Home Construction
The incorporation of eco-friendly features in home construction is not only beneficial for the environment but also cost-effective in the long run. Solar panels, energy-efficient appliances, water-saving fixtures, and insulating walls and roofs are examples of such features.
Opting for an eco-friendly approach isn’t just a trend; it’s a commitment to reducing environmental impact and reaping future savings.
• Home Design Trends of 2016
Throughout the year, various trends have arisen in the home decor industry. In 2016, we witnessed the rise of metallic decor, sustainable and artisanal objects, and the incorporation of tech into the home design industry.
Other notable trends include an emphasis on softer color palettes and a combination of modern and traditional elements.
• Suspended Sculptures in Home Decor
Another interesting design trend is the use of suspended sculptures. Be it in the living room or hall, these hanging installations add an artistic touch while also making use of vertical space. These suspended pieces are not just limited to sculptures; they also include light fixtures and even hanging planters.
• Strategies for Low Water Gardens
With the ever-increasing emphasis on water conservation, it’s essential to devise strategies for establishing lush gardens without incurring high water usage.
Opt for drought-tolerant plants and efficient irrigation systems. Mulching is also recommended to retain soil moisture. For additional tips, refer to this water-wise guide provided by the Environmental Protection Agency.
• Case Study: Designer Apartment Makeover under $10,000
In one notable case study, a designer was tasked with decorating an apartment in just four days with a budget below $10,000.
This required strategic planning and the use of reusable and budget-friendly items. Regardless of the short time and budget constraints, the end result was a beautifully designed space portraying the best use of existing resources.
• Showcasing Unique Homes in Remote Locations
The world is filled with unique homes in the most unexpected of locations. From a house built into a mountainside in Greece to an underwater house in Dubai to a forest home in Japan – each of these homes personifies the uniqueness and creativity of its owners.
• Water Conservation: Not just a Suggestion, but a Necessity
Water conservation is an area that homeowners need to prioritize. This not only results in significant cost-saving but also plays a key role in environmental protection.
Implementing small changes, like fixing leaks promptly and opting for water-efficient appliances, can make a big difference over time.
• Water-Wise Tips for Homeowners
Being more water-wise at home doesn’t require drastic changes. Start by using water-efficient appliances, minimizing water usage in gardening, mending water leaks promptly, and using greywater for plants.
Additionally, one could also consider capturing and utilizing rainfall. Making these simple practices part of our daily routines is our food forward.
Recognizing and Repairing Water Damaged Baseboards
• Causes of Water Damage on Baseboards
Water damage on baseboards is a common household problem. This issue is generally a consequence of domestic flooding or a result of slow leaks from pipes situated behind the walls.
It is crucial to understand this potential source of water damage, especially in older homes or in areas prone to flooding.
• Detecting Signs of Water Damage
One of the most visible signs of water damage is peeling paint or wallpaper where the wall meets the baseboard. This is a clear indication that the drywall is wet and exposed to moisture over a period of time. It is a significant indicator of a water leakage problem that shouldn’t be ignored.
Furthermore, visible stains on white baseboards also indicate water damage. It is a sign that the baseboard has been exposed to moisture, and if left untreated, it can lead to mold growth. Mold is not only unsightly, but it can also cause health issues, particularly for individuals with respiratory problems.
Another noticeable sign of water damage is when you find a loss of contact between the baseboard and the wall. This suggests that the baseboard is either warping or swelling due to water absorption. Warping is a clear sign the baseboard material has been compromised and needs to be addressed.
• The Process of Repairing Water Damaged Baseboards
Repairing water-damaged baseboards involves several steps. First, you must identify and fix the source of the leak. This is vital to prevent further water damage. After dealing with the source of the leak, repairing the compromised drywall is the next step.
Once the drywall is repaired, the baseboards can be reattached. However, baseboards that have warped or absorbed water often need to be replaced. This is because the water causes structural damage to the baseboard material, making it ineffective.
It is essential to address the underlying leak and damaged drywall before installing new baseboards. This prevents the new baseboards from being immediately subjected to the same water damage.
Bypassing these steps and rushing to replace your baseboards can lead to repeated damage and a waste of time and resources.
• The Role of Professionals in Repairing Water Damage on Baseboards
Given the potential risk of mold growth and the necessity of effective mitigation, it is recommended to involve professionals in repairing water damage on baseboards.
These experts have the knowledge, tools, and experience to accurately diagnose the source of the leak, fix it, and repair the consequential damage to baseboards and drywall.
One such company is Revere Construction and Roofing in Atlanta; they offer specialists equipped with drying equipment that helps address water leaks and minimize further damage. Their team of professionals ensures a thorough and meticulous repair job to protect your home.
• Additional Resources
For more information on water damage and mold prevention, you can visit the Centers for Disease Control and Prevention (CDC) site. This gives detailed information on how to prevent mold growth caused by moisture, ensuring a safe and healthy environment for you and your family.
In conclusion, water damage on baseboards is a common issue that many homeowners encounter, but with proper detection and well-executed repairs, you can protect the integrity of your home.
However, due to the potential risks involved, it is always recommended to consult a professional when dealing with water damage repairs.
– Dealing with Damp Insulation
In situations of water infiltration into wall cavities, the insulation may fail to dry out independently. This necessitates the immediate removal and drying of the insulation to prevent further damage. From my experience, I recommend prompt action to mitigate secondary issues arising from moist insulation.
– The Risk of Mold Development
The peril of mold formation post-water infiltration is real and it can occur within 24 hours. Thus, it is crucial to address and rectify the water leakage issue without delay.
According to the Environmental Protection Agency EPA, it’s important to take instant action upon water intrusion to stave off mold growth.
– Identifying the Source of Water Infiltration
The source of water infiltration isn’t always obvious. Sometimes, water can seep in from the ground upwards rather than from the wall downwards. Hence, inspecting for water stains or lines appearing under your carpet or other floor coverings is highly advisable.
– Signs of Water Damage
Examine your baseboards and insulation closely. If they are damp and exhibit signs of water damage, they should be removed to deter the spread of moistness. Always be on the lookout for structural and aesthetic hints of water penetration, like warping, discoloration, or wet patches.
– Drywall and Wall Cavity Maintenance
Cutting off a portion of the drywall and opening the wall cavities assists in extracting any damp insulation dwelling within. This is an effective measure to accelerate the drying process and decrease the chances of further adverse impacts.
– Preventing Water Infiltration through Proper Building Practices
The absence of a water stop and inadequately compacted backfill next to a wall may let water infiltrate with ease. Consistent checks and improvement of such practices can notably drop your property’s vulnerability to water damage.
– Importance of Waterproofing and Installation of Sump Pump
Proper waterproofing techniques or installation of a sump and pump system might be needed to address persistent water infiltration issues. Consider consulting a professional to evaluate whether these procedures are necessary for your building’s specific needs.
– Redirecting Surface Rainwater
An effective way to prevent water infiltration through baseboards is by rerouting the flow of rainwater away from the house. This step can significantly cut down on the quantity of water reaching the base of your house and possibly seeping into your property.
– Redesigning Outdoor Features to Keep Water at Bay
Demolishing and repouring the patio with an outward pitch can be instrumental in keeping water at a distance from your house. This reshaping can aid in channelizing the water away, hence minimizing contact with your building’s walls and foundations.
– Utilizing Downspouts for Water Distribution
Extending downspouts and rerouting water away from the house is an effective measure in combating water infiltration. Ensure that your downspouts are aimed far from your house and that they are functional to divert rainwater effectively.
By following these steps, you can secure your property from the adverse effects of water infiltration. Stay vigilant, proactive, and swift in addressing these issues to enjoy a safe, dry, and cozy indoor environment.
The Consequences of Ignoring Slab Leaks
Slab leaks, an issue often thought of as minor, can ultimately evolve into a nightmare for homeowners if not addressed promptly. They can cause significant damage, resulting in costly repairs and potentially reduced property values.
Households familiar with the symptoms of slab leaks can quickly acknowledge their presence and intervene before excessive damage occurs.
• Recognizing the Indicators of a Slab Leak
Identifying signs of a slab leak can be straightforward if you know what to look for. A sudden increase in your water bills should raise a red flag; an unattended leak can lead to substantial water wastage, thus driving up costs.
The presence of damp spots in your carpet or baseboards may be indicative of a leak beneath your house’s concrete slab. Noticing these indicators early on can help minimize the damage caused by a leak.
In addition to visible damp spots, homeowners should also be aware of less obvious signs like the emergence of mold and mildew. Growth of such fungi is often a byproduct of excess moisture and can pose serious health risks, aside from damaging your property.
Lastly, encountering warm spots on your floor can be another giveaway of a slab leak. Such spots occur when hot water leaks from the pipes embedded in or beneath the concrete slab your house rests on. In this case, immediate action is recommended to prevent further damage.
• How to Find Slab Leaks Without Disrupting Your Home
Non-invasive testing options can be used to discern the presence and location of a slab leak. These techniques, such as infrared thermal imaging and ultrasonic leak detection, are both effective and efficient, causing minimal disruption to your house.
Subscribing to a trusted professional service can yield accurate and quick results, mitigating the damage done by potential slab leaks. The United States Environmental Protection Agency recommends these less intrusive methods of leak detection to homeowners.
• Repairing Slab Leaks Using Epoxy Restoration
One proactive method of addressing slab leaks is through epoxy restoration, which involves drilling small holes within the slab to reach the leak and conduct the necessary pipe repair.
This method is less invasive compared to traditional slab leak repair procedures and allows for precise treatment of the affected area. An experienced professional can carry out this procedure with minimal disruption to your home whilst effectively treating the leak.
• When It’s Time to Install New Piping
In some cases, particularly when multiple leaks are detected, a complete pipe replacement may be the most viable option. This procedure, while more extensive and costly than typical repairs, ensures a long-term solution to recurring slab leaks.
Ensuring the use of high-quality materials for new piping can significantly increase the life-span of your plumbing system, thereby reducing the likelihood of frequent leaks.
Remember, the cost of installing new pipes is usually dwarfed by the potential damage caused by persistent leaks.
• The Importance of Expertise in Addressing Slab Leaks
With the various issues that can arise from unattended slab leaks, it becomes crucial to quickly identify and rectify them. Engaging professional services with relevant expertise can prove invaluable in reducing the disruption and damage caused by slab leaks whilst also ensuring effective and durable solutions.
• Causes Of Concrete Cracking
In my experience, concrete cracking is primarily caused by shrinkage, temperature changes, and uneven settling. Each of these factors contributes differently to the issue and requires unique solutions.
• Combating Shrinkage Cracking
Shrinkage in concrete is a common cause of cracking. The best approach to combat this issue is by adjusting the mix design. One popular solution in the industry is the use of supplementary materials like fly ash.
These materials are highly effective in reducing the amount of water needed for the mixture to reach a consistent state, thereby controlling shrinkage cracking.
Fly ash has seen immense popularity due to its ability to effectively limit the occurrence of shrinkage cracks in concrete mixtures. You can learn more about the use of fly ash in this research paper.
• Utilizing Control Joints
In addition to using fly ash, control joints have also proven to be a highly effective method for controlling shrinkage in concrete. Control joints can be seen as pre-planned cracks that allow the concrete to shrink without causing random cracking.
Utilizing control joints strategically is a worthy practice that can extend the lifespan of your concrete structures by controlling shrinkage actively and proactively.
• Addressing Temperature-Related Cracking
Temperature changes can induce stresses in the material and cause thermal expansion and contraction, leading to cracking. The best way to address temperature-related cracking is by incorporating thermal expansion joints and utilizing appropriate curing techniques.
The application of a moist cloth or curing compound after the pouring process can be very beneficial in minimizing temperature-induced cracks. This process allows the concrete to gradually adjust to ambient temperatures, significantly reducing temperature-related cracking potential.
• Preventing Uneven Settling
Uneven settling is yet another prominent cause of concrete cracks. This usually happens due to improper subgrade preparation before pouring the concrete.
A well-prepared subgrade, including thorough soil compaction and the addition of a layer of gravel or crushed stone, can significantly minimize the chances of uneven settling.
Regular and meticulous subgrade preparation is an experienced professional’s recommendation for an extended lifespan of your concrete structures.
• The importance of Reinforcement
In the case of uneven settling, reinforcement elements can significantly reduce the likelihood of crack formation. For instance, applying reinforcement mechanisms such as rebar or wire mesh can effectively prevent cracking caused by uneven settling.
Reinforcement provides an extra layer of strength and resilience that helps better distribute the loads and stresses within the concrete.
Having spent years dealing with concrete structures and their maintenance, I can attest that concrete cracks are a common yet solvable issue.
By incorporating the methods mentioned above – from adjusting the concrete mix design, using control and thermal expansion joints, and proper curing techniques to meticulous subgrade preparation and reinforcements – we can build resilient concrete structures.
When these methods are combined and used effectively, they significantly minimize the likelihood and severity of concrete cracking.
Whether you are a professional or a DIY enthusiast, understanding the nature of concrete cracks and their solutions is vital to maintaining the longevity and aesthetic appeal of your concrete structures. A little attention to detail and strategic planning can go a long way in ensuring the durability of your concrete structures.
– Discovering Wet Insulation
As a homeowner, I once came across a concerning issue: wet insulation behind the baseboard. My immediate plan was to remove the baseboard and a section of the drywall. This would allow me to inspect the extent of the damage and dry out the affected area.
– Tracing the Cause of Water Leak
One potential cause of the water leakage could be improperly installed windows. Any fault with the window installation could provide an entry point for water to get into the wall. It is advisable to get your windows checked from time to time to avoid any such mishap.
This guide from the U.S. Department of Energy provides a comprehensive overview of window installation for homeowners.
– Checking the Moisture Barrier
Another important aspect to check is the house wrap. An improperly installed house wrap can let wind-driven rain penetrate the wall, potentially causing water leakage.
This wrap acts as an effective moisture barrier when installed underneath the exterior siding. Ensuring its proper installation is a preventive measure that could save a significant amount of time and money in the long run.
– Inspecting the Sill Plate
A less obvious yet relevant potential source of a leak is the sill plate- the wooden plate that sits atop the concrete foundation. It is integral to inspect this, as improper caulking or the lack of a gasket may be a source of a leak.
Any kind of water leakage at this stage could potentially damage the wall as well as the insulation in the long run.
– Hiring a Professional for Repairs
Sometimes, trying to fix things on your own might aggravate the problem rather than solving it. In such cases, it is advisable to hire a professional. When hiring, look for an all-around handyman with specific experience and knowledge related to addressing water leakage issues in walls.
Ensuring that they have proven skills and experience in your specific issue can mean the difference between a quick, one-time fix and a drawn-out and potentially costly series of repairs.
– Conclusion
Finding wet insulation behind your baseboard or wall can be a concerning sight for any homeowner. By following the steps above, however, you can make a thorough investigation into the cause and extent of the problem.
Whether it’s improperly installed windows, a poorly positioned house wrap, or a faulty sill plate, knowing where to look can make all the difference.
If, however, the problem seems too complex to handle on your own, never hesitate to bring in a professional. With their specific knowledge and expertise, they can save you from potential stress and expense.
Preventive measures like regular inspection and maintenance can go a long way in avoiding such situations.
Most importantly, remember that being a homeowner is a great responsibility, and dealing with such issues promptly ensures the longevity of your home.
From my personal experience, not taking care of these problems quickly can cause increasingly complex and costly issues down the line. The faster you act, the better it is for your home.
Water Damage on Baseboards as a Symptom of Larger Problems
In my professional experience, water damage on baseboards is often an indication of more serious underlying problems. This damage could be the result of home flooding or, perhaps more worryingly, leaking pipes concealed behind walls.
• Primary Causes of Water Damage on Baseboards
In many cases, the primary culprit behind water damage on baseboards is home flooding. Yet, do not overlook the potential risks of leaking pipes, which can equally lead to water damage.
Our homes’ plumbing systems are intricate and extensive, and any leaks, however insignificant they may seem, can gradually inflict harm on your property, often beginning with the baseboards.
• Peeling Paint or Wallpaper: A Warning Sign
The signs of water damage aren’t always obvious. In fact, sometimes they can be deceivingly subtle. For instance, peeling paint or wallpaper along the baseboards might seem like a decor problem that requires a quick DIY fix.
However, it might be showcasing an underlying water damage issue that needs attention.
• Visible Stains and Potential Mold Growth
Visible stains on or above your baseboards are another telltale sign of an ongoing leak. These stains are more than a cosmetic problem.
They’re a red flag for potential mold growth. Mold thrives in damp and humid conditions and can cause significant health issues. So, if you notice staining, it’s time to take action and dig deeper into the cause.
• Loss of Contact: An Unmistakable Sign
One clear sign of water damage or a larger issue lurks in the loss of contact between the baseboards and the walls. Water, as subtle and innocuous as it may seem, has the potential to warp and alter your baseboard’s shape, resulting in gaps between the wall and the baseboard.
• Steps to Repair Water Damaged Baseboards
Recovering from water damage on baseboards is a multi-step process. It starts with locating and repairing the source of the leak. Not tackling the root cause will just lead to recurring damage.
After addressing the leak, it’s time to deal with any damaged drywall. If water has soaked into the drywall, it’s crucial to remove and replace the affected area to prevent mold growth. Once the drywall is fixed, any undamaged baseboards can be reattached.
• When Baseboards Should Be Replaced
Unfortunately, not all baseboards can be saved after water damage. Warped or swollen baseboards generally need replacing. Salvaging these can be more troublesome than beneficial in the long run.
• Calling in The Professionals
Battling water damage on baseboards can, at times, be overwhelming. I strongly recommend seeking help from water mitigation specialists. These professionals come equipped with the tools, knowledge, and experience to efficiently and effectively address water damage.
Emergency Services | Florida Disaster is a reliable .org site loaded with resources and contacts. It’s perfect for finding professional help in dealing with water damage and other emergency situations.
Remember, prompt and accurate action is vital when it comes to water damage. Identifying symptoms, finding the cause, and implementing solutions can save you from extensive damage, loss, and potential health risks. So, stay vigilant and proactive in maintaining your property.
• Rainwater and the Rec Room Issue
Imagine a simple situation: It’s been raining, and there’s water leaking into the basement rec room. It’s a nightmare for anybody, especially for our original poster (OP). There seems to be a recurring problem related to a backyard patio slab suspiciously sloped toward the home.
• Suspected Source of the Leak and Its Problematic Effects
What’s interesting to note is that after each rain shower, the carpet in this area only gets wet in the same spot as the patio step. However, it’s quite commendable that it dries quickly after the rain stops. It does pose a severe question, though – the possibility of water seeping into the room from the bottom.
At first glance, one would jump to conclude that there could be a problem with the drain tile. Another concern building up in the OP’s mind is the dread of a potential mold infestation owing to the repetitive damp conditions.
• Mold: The Invisible Threat
An extended period of dampness, as short as 24 hours even, can pose a significant risk for mold to develop.
Therefore, as prevention, one suggestion is to remove the baseboards and cut off two feet of drywall from the floor up. This action would allow for the wall cavities to release any damp/wet insulation within them.
• Detecting the Intrusion Source
On the flip side, it is also equally important to determine if the water is originating from the ground up rather than trickling down the wall. You could do this by pulling up the carpet and examining for any water stains or wet tack strips.
• Unseen Intruders: The Cove and Soft Soil
“Cove” is where the floor meets the wall, and in most homes, the basement wall is established directly onto the foundation without a water stop. Mostly, residential builders do not include the addition of waterproofing material in such areas, a practice fundamentally flawed.
Thus, the soft soil adjacent to the wall becomes an easy vehicle for water to penetrate and run downhill into the basement. You can learn more about this on the Environmental Protection Agency’s website.
• Building Code Prescriptions and Their Inadequacy
Perhaps the builders might argue that they are abiding by the building code norms, which, unfortunately, call for a dampproofing coating instead of something more assertive like waterproofing. But let’s also accept the fact that this short-sighted provision often contributes to water intrusion problems.
• Approaching a Final Solution: Waterproofing and Drainage
Here are two decisive recommendations to address this issue.
Firstly, it would be highly beneficial to dig next to the basement wall to carry out proper waterproofing. However, do it professionally and do it well.
Secondly, a timely intervention would be to ensure the top-grain flow of rainwater is always away from the house. Taking necessary precautions to prevent water from flowing toward the basement is a fundamental requirement of efficient home design.
A note to remember – in any water-related problem, the sooner the detection and reaction, the smaller the damage. Water can be a persistent foe but remember; you can always cap your leaks with some waterproofing wisdom.
Identifying Water Damage on Baseboards
Water damage on baseboards is more than an eyesore. It’s often a silent alarm of a significant problem behind the wall. Ignoring it can lead to catastrophic damage to your property. Therefore, identifying and addressing it at the earliest is crucial.
• Dampness Causes of Water Damage on Baseboards
Home flooding and leaking pipes are among the most common causes of water damage on baseboards. Slow leaks can evade your attention, giving mold ample time to grow and potentially cause health risks.
According to the Centers for Disease Control and Prevention, exposure to damp and moldy environments may lead to respiratory issues like asthma or coughing and wheezing in otherwise healthy individuals.
• Potential Signs of Past Flooding
If you stumble upon water damage in a new home or after a long vacation, chances are it was a result of past flooding events. Such cases call for a meticulous inspection coupled with an expert eye to check for hidden mold growth.
• Tell-Tale Signs of Water Damage
Visual cues often betray the presence of water damage in baseboards. These include:
- Peeling paint or wallpaper
- Visible stains
- The baseboard’s detachment from the wall
- A persistent musty odor
These conditions signal the need for professional intervention.
• Alarm Bells: Detached Baseboards
An alarming sign of water damage is when baseboards lose contact with the wall. This detachment, often due to a wall leak, should prompt you to contact a water damage or mold expert immediately.
• Repairing Water Damage on Baseboards: To Repair or To Replace?
The degree of water damage determines the best course of action. If the water hasn’t distorted the baseboards and they still lay flat, often, a repair job is sufficient. This would involve stopping the leak, repairing the underlying drywall, and reattaching the baseboards.
In contrast, swollen or warped baseboards are beyond repair. They require replacement following the leak rectification and drywall repair process.
• The Importance of Hiring a Water Mitigation Expert
Correcting baseboard water damage may seem straightforward, but it’s not for the uninitiated. The real challenge lies in uncovering and fixing the root cause of the leak and checking and resolving potential mold growth.
In my experience, hiring professionals who specialize in water mitigation like the team at Revere Construction and Roofing can be a wise decision. These experts are equipped with state-of-the-art drying equipment to promptly address water leaks, minimizing further damage to the property.
• Conclusion
Ignoring water damage on your baseboards is not an option. It’s like ignoring termites chewing away at the structure of your home. The result could be devastating.
The key to tackling water leakage is timely discovery and intervention. Be alert to signs of water damage, and don’t hesitate to call professionals when you see them.
Always remember, patching the symptom does not cure the ailment. So, resolve to reach the severity of the issue before deciding between repairing and replacing damaged baseboards. Your home will thank you for it.
Identifying the Source of Water Damage
One of the first steps in tackling water damage is identifying its source. A variety of factors could be contributors, such as leaks in windows, appliances, pipes, and fixtures.
Windows, for instance, may have insufficient seals allowing water to seep in. Appliances like washing machines or dishwashers may malfunction, leading to leaks. Check for any signs of leaking or pooling water around these.
Similarly, examine your piping system. Corroded, broken, or frozen pipes are typical culprits of water damage. Lastly, scrutinize your fixtures.
Sink, bathtub, and shower faucets, if not properly sealed, can allow water to leak into walls or floors. Educate yourself further on these sources via resources such as The EPA’s Guide on Indoor Air and Moisture.
• Importance of Drying Flooded Areas
Post any water incident; your highest priority should be swiftly drying up flooded areas. Lingering moisture will not only dubiously highlight your baseboard’s swelling but also create an ideal environment for hazardous substances such as mold and mildew.
A simple yet effective measure entails ventilating the room adequately. Open windows, use fans or dehumidifiers to expedite the drying process. Simultaneously, remember to mop or blot the area gently to absorb any standing water.
• Health Risks Associated with Water Damage
Water damage behind walls often triples the risk of in-house mold and mildew growth. Mold, a type of fungus, thrives in damp environments, causing ugly stains and unpleasant odors.
More importantly, it poses several health risks, such as allergy symptoms, respiratory problems, and in the worst scenarios, neurological damage or even death.
Eliminating water sources and keeping humidity levels under control is recommended as a preventive measure. Also, the use of mold-resistant building materials for your walls can prove beneficial. CDC’s Guidelines offer deeper insight into preventing mold growth.
• Refinishing a Baseboard
Baseboards suffering from mere discoloration or peeling paint can often be restored with a few simple steps. First, sand the surface to remove the old coat of paint. Make sure to wear a safety mask during this, as inhaling paint particles can be harmful.
Next, clean the sanded surface using a damp cloth to remove any residual dust. Once it dries, apply a primer. Two layers of an oil-based primer should prove sufficient. Finally, paint the baseboard in your desired color. Remember to let each coat dry before applying the next one.
• Measuring and Cutting New Baseboards
In severe water damage cases, the baseboard may require replacement. To do this, accurate measuring and cutting are imperative. Typically, a tape measure is used to calculate the length of the wall where the new baseboard will fit.
When cutting, make sure to mark your cutting line accurately, as any errors could result in a misfit. Don’t forget to factor in any corner cuts in your measurements. Finally, use a miter saw for precise cuts along the marked lines.
• Attaching New Baseboards to Walls
Once cut, the next step is attaching the new baseboards to the wall. For this, you will need a combination of finished nails and glue.
Apply a thin layer of adhesive on the back of the baseboard and press it to the wall. Then, using a nail gun or hammer, add finish nails at an angle through the baseboard into the wall every 12 inches or so. Ensure, though, that nails aren’t too close to the edges to prevent splitting the board.
• When to Seek Professional Assistance
Tricky as it may be, water damage doesn’t always fall within the realm of DIY repairs. Certain situations call for professional assistance. For one, if the water source isn’t readily identifiable or hard to access, a plumber with experience in water damage repairs might be necessary.
Similarly, a water damage restoration specialist can be indispensable when you’re dealing with extensive damage or full baseboard replacements. They are often better equipped and accustomed to handling such situations.
The Institute of Inspection Cleaning and Restoration Certification (IICRC) offers valuable advice on when to bring in professionals.
Remember, acting promptly is just as essential as acting correctly when facing water damage. Your health and the longevity of your home are always worth it.
Managing Water Damage on Baseboards
Water leaks, flooding, and high humidity can significantly affect the integrity of your baseboards. If left unaddressed, water damage can escalate, leading to mold growth, which can pose a serious health risk in your household.
• Identifying and Addressing Mold Growth
Upon noticing water damage on your baseboards, it is crucial to carry out a mold inspection during the repair process. Unfortunately, mold contamination can occur rapidly, stretching from a few hours to a couple of days.
CDC reveals that exposure to moldy environments can cause health effects ranging from minor irritations to severe allergic reactions. Therefore, do not underestimate the urgency of mold detection and remediation.
In case of any mold detection, I strongly recommend consulting with a certified mold remediation expert. This specialist has the right knowledge and tools to eliminate existing mold professionally and prevent potential growth.
• Addressing MDF Baseboards
For homeowners with MDF baseboards, it’s important to know that this material is particularly susceptible to water damage. Unlike solid wood, MDF baseboards absorb water and swell, leading to significant degradation of their structural integrity.
In cases where the water damage is severe, repairing the MDF baseboards might not be the most viable option. Instead, it is recommended to replace the damaged sections completely.
This will help preserve the overall aesthetic appeal of your home while ensuring the new baseboard sections are structurally sound.
• Tracing the Source of Excess Moisture
Baseboards pulling away from the wall is a classic sign of water damage. When this happens, it’s important to address the underlying problem. This could be a hidden leak or an unusually high level of humidity within the house.
Prevention is key with water damage. Always be on the lookout for signs of a leak, such as mold growth, damp spots, discoloration, or a musty smell. Repairing such leaks immediately not only prevents further baseboard damage but also averts potentially costly structural repairs in the future.
• Fixing Leaks During Rain
If you notice water coming from your baseboards when it rains, this is a red flag that needs immediate investigation and repair. The source of the leak could be from your windows or roof. Ignoring such a problem could lead to extensive water damage affecting more than just your baseboards.
• Preventing Future Baseboard Swelling
Investing in preventive measures is always a worthy cause when it comes to maintaining your home. Here are some practical steps to prevent future baseboard swelling:
- Sealing Windows: Make sure all windows are secure and sealed. Any openings can let in moisture, leading to dampness and subsequent baseboard damage.
- Checking Appliances and Pipes for Leaks: Early leak detection in your appliances and pipes can prevent water from reaching your baseboards.
- Prompt Cleanup of Water in the Bathroom: Bathrooms are often moisture-rich environments. Promptly cleaning up water after use reduces the likelihood of water damage to the baseboards.
- Drying of Flooded Areas: After a flood event, swift action should be taken to dry out soaked areas. Use towels, mops, or a wet/dry vacuum to soak up the water, followed by fans or dehumidifiers to dry out the space.
- Reducing Moisture in the Home: A humid environment fuels baseboard swelling. You can control your home’s humidity by improving ventilation or using air conditioning systems and dehumidifiers.
Implementing these measures can significantly lessen the recurrence of water damage on your baseboards, saving you from expensive repairs and replacement costs.
• Recognizing and Addressing Water Damage on Baseboards
Exposure to water can significantly affect baseboards. This is because baseboards are often made of materials such as wood or MDF, which are susceptible to water damage.
One of the foremost signs of water damage on baseboards is their swelling. Water causes the baseboards to expand, causing them to appear swollen or bloated.
In addition to the swelling, another common sign includes peeling paint or wallpaper near the affected area.
When the baseboards soak up water, they can seep into the walls, damaging wall coverings such as paint or wallpaper. Even if the baseboards are immediately dried out, this damage can be long-lasting and require repair.
Stains and discoloration may also appear above the baseboards as a result of water leakage. These stains are typically an indication of ongoing leaks rather than occasional spills or accidents. If you spot any such discolored marks, make sure to inspect them promptly.
Without immediate attention, water damage can lead to warping of walls. The water-soaked baseboards can cause the walls to curve or bend out of shape, a structural issue that can be quite challenging to resolve.
• Identifying and Rectifying the Source of Water Leakage
Before you begin repairing or replacing baseboards, it’s crucial to identify and address the source of the water leak. Only when the source has been identified can you effectively prevent further damage from occurring?
In my personal experience, leaks can typically be traced back to one of these common sources – plumbing leaks, roof leaks, or leaks in the building’s exterior walls. Therefore, start by checking these areas when trying to locate the origin of the leak.
Once you have addressed the leak, you can focus on repairing the damaged baseboards. This process involves thoroughly drying the baseboard and fixing any warped walls or damaged exterior coverings.
• Repair or Replace? A Useful Guide
While some water-damaged baseboards can be repaired, others might need complete replacement. Particularly in cases where the intense water damage has led to rotting, warping, or mould growth on the baseboards, replacement may be necessary.
As a general rule, if more than half of the baseboard length is damaged, consider replacement rather than repair. On the other hand, if the damage is relatively localized, a repair project is entirely possible and cost-effective.
In both scenarios, it’s important to act quickly to reduce the risk of issues like mould growth, which can pose potential health hazards.
In such situations, I recommend contacting a water damage restoration expert as soon as possible. Experts can thoroughly assess the situation and guide you on the best course of action.
– Preventive Measures: Ongoing Leak Detection
Note that water damage on baseboards can often be a sign of more significant problems, such as hidden leaks in the walls or potential mould. Thus, it’s always a good idea to continuously monitor for signs of water damage like stains, peeling paint, and warping baseboards.
Timely detection and control of water damage can save exponential costs and health risks in the long run. For further information on mould and how it can affect your health, visit the United States Environmental Protection Agency website at www.epa.gov/mold.
To sum up, water damage on baseboards can lead to major structural and health issues if ignored. Thus, always be proactive in identifying and addressing water damage at the earliest.
Do so by keeping an eye on common signs of baseboard damage and immediately contacting a restoration expert when necessary.
The Impact of Water Damage on Residential Properties
Water damage poses various threats to residential properties. Its impact ranges from minor cosmetic issues to severe structural problems, leading to further complications if left unaddressed. Damages typically manifest in many forms, such as mold, cracks, or stains found in varying areas of the property.
Mold blooms can rapidly invade damp areas, not only reducing aesthetic appeal but also potentially posing health risks. Cracks often imply internal structural damage, possibly weakening the foundation of the unit. On the other hand, stains are usually tell-tale signs of water leakage and seepage.
• Recognizing Signs of Water Damage
Prevention remains the best approach to mitigate water damage, so understanding its early signs and symptoms is crucial. Common signs of water damage can be seen as discoloration, peeling, or stains on baseboards, ceilings, walls, and floors.
Discoloration often exhibits with dark or yellowish patches on ceilings and walls. Peeling paint or wallpaper can denote prolonged moisture exposure. Lastly, stains on baseboards or floors suggest water leakage from nearby pipes or appliances.
• DIY Fix for Water-Damaged Baseboards
In situations where the damage is contained on the baseboards, homeowners can undertake do-it-yourself (DIY) repairs to save on costs.
Fixing water-damaged baseboards can be a DIY project if you possess carpentry skills and the necessary tools. However, ensure properly assess the environmental conditions before proceeding.
• Preparing for Baseboard Replacement
Before replacing baseboards, it’s essential to ensure that the wall behind them is completely dry. If the wall remains wet or damp, it may compromise the repair work and potentially encourage mold growth. You can use a moisture meter available from major home improvement stores to check for residual moisture.
• Addressing Severe Water Damage
For severe cases of water damage, it’s advisable to involve a restoration specialist. They possess the technical expertise and heavy-duty equipment and know the safety protocols to manage extensive water damage.
If you suspect that the damage goes far beyond the baseboards or involves the internal structure of your home, don’t hesitate to contact a restoration specialist.
• Salvaging Existing Base Shoe
Homeowners can choose to save the existing base shoe by diligently driving a finish nail through it with a nail set. This process requires precision but can save costs if the base shoe remains undamaged.
• Measuring and Cutting New Baseboards
Following the removal of damaged baseboards, it’s time to measure and cut new ones. Precision is key during this stage to ensure a seamless fit. Carefully measure and cut new baseboards to the appropriate length, taking into account the overall wall length and the corners where walls intersect.
• Installing the Replacement Baseboards
To install the new baseboards, start by drilling pilot holes and driving finish nails into the sole plate. For additional stability, try applying glue to the outside corners. Use durable and waterproof adhesive to prevent future water-related issues.
• Attachment of Base Shoe Molding
Finish the baseboard project by installing the base shoe molding at the foot of the baseboard. Securely attach the molding to the baseboard or floor using pilot holes, but make sure not to drill into both.
Remember that the base shoe should move a little to adjust to the floor’s unevenness, ensuring a level appearance.
• Seeking Professional Help
Professional water damage restoration services offer comprehensive solutions for water stains on baseboards and other issues related to water leaks or flooding.
Their team of trained professionals can provide prompt and efficient remedies. They conduct a thorough inspection, cleanup, drying, and restoration, offering invaluable peace of mind.
• Emergency Services for Water Damage
Moreover, service providers also offer 24/7 water mitigation services, suitable for emergency situations.
They are equipped to effectively clean, dry, and restore properties affected by water damage around the clock. Additionally, most companies also provide assistance with insurance claims, streamlining a commonly complex process.
For more detailed information about dealing with property damage and recommended restoration procedures, consult resources provided by Federal Emergency Management Agency.