Hard Wood Floor Water Damage and Repair. What Pros Say
Hardwood floor damage is a very common issue in a home or business. The typical cause for the damage is water. The amount of water does not matter. It could be a minimal amount from a cup that drops, a slow leak through a crack, to a large leak caused by a burst pipe.
Hard Wood Floor Water Damage and Repair:
The first step you should always start with is removing the water as soon as possible. When the water is gone, dry the hardwood floor. Assess the damage, and make repairs if needed. Resurface the entire floor, so it looks cohesive and has the same color and texture.
As a professional, I understand that dealing with water damage can be intimidating. If you have hardwood floors that are water damaged, it advises you to act as soon as possible. The faster you remove the water and dry the floors, the sooner you can make your repairs. Water damage is more common than most people realize, and with the right knowledge and tools, you can repair the damage and make your floors look great.
Contents
- 1 Signs of Water Damage On Hardwood Floors
- 2 How Do I Know If My Hardwood Floor Is Water Damaged?
- 3 Can Water Damaged Hardwood Floors Be Sanded?
- 4 How Do You Fix Water-Damaged Hardwood Floors?
- 5 Identification of Water-Damaged Wood Floors
- 5.1 • Signs of Water Damage
- 5.2 • Water Removal
- 5.3 • Cleaning the Water-Damaged Floor
- 5.4 • Drying the Floor
- 5.5 • Sanding the Damaged Wooden Floor
- 5.6 • Resetting the Floors
- 5.7 • Replacing Wood Floors
- 5.8 • Preventing Further Damage
- 5.9 • When To Seek Professional Help
- 5.10 • Your Wood Floors Are Worth It
- 5.11 • Evaluating the Severity of Water Damage
- 5.12 • Decision: Repair or Replace?
- 5.13 • Identification of Damage Source
- 5.14 • Prompt Removal of Surface Water
- 5.15 • Cleaning the Affected Area
- 5.16 • Treating Mold
- 5.17 • Drying the Floor
- 5.18 • Reducing Cupping
- 5.19 • Paint Removal
- 5.20 • More Cleaning and Drying
- 5.21 • Staining and Refinishing
- 5.22 • Sealing your Hardwood Floor
- 5.23 • Fixing Water Leakage
- 5.24 • Consider Professional Help
- 6 Understanding Wood Floor Infiltration Points
- 6.1 • The Necessity of Dirt and Water Elimination
- 6.2 • Swift Surface Water Removal Process
- 6.3 • How to Conduct Effective Floor Scrubbing
- 6.4 • Spotting and Treating Mold Prone Areas
- 6.5 • Tips for Effective Floor Drying
- 6.6 • Rectifying a Concave or Convex Wood Floor
- 6.7 • Mold Under Painted Floors
- 6.8 • The Case of Laminate Flooring
- 6.9 • Recognizing Water Damage in Hardwood Floors
- 6.10 • Odors as Indicators of Water Damage
- 6.11 • Cupping and Buckling: Signs of Water Damage
- 6.12 • Check for Mold, Wet Spots, and Weak Spots
- 6.13 • Standing Water and Leak Checks
- 6.14 • Discoloration and Stains: Unseen Signs
- 6.15 • Sanding and Repairs
- 6.16 • Addressing the Damage: Cleaning and Drying
- 6.17 • Assessing the Damage
- 6.18 • Resurfacing the Floor
- 6.19 • Taking Action Immediately
- 6.20 • Preventive Measures
- 6.21 • Professional Help
- 7 Understanding the Full Scope of Water Damage
- 8 Impact of Water Damage on Hardwood Floors
- 8.1 • Mechanics of Water Damage
- 8.2 • Urgent Treatment of Water-Damaged Floors
- 8.3 • Identifying Signs of Water Damage
- 8.4 • How to Fix Swollen Wood Floors
- 8.5 • Importance of Locating and Cutting off the Water Source
- 8.6 • Cleaning and Drying Floors
- 8.7 • Necessary Drying Precautions for Wood Floors
- 8.8 • Inspection and Treatment of Mold
- 8.9 • Effective Remedies for Water-logged Wood Floors
- 8.10 • Protecting Wood Floors with Mats and Rugs
- 8.11 • Regular Maintenance and Precaution Measures
- 8.12 • Addressing Water Damage under Engineered Wood Floors
- 8.13 • Professional Assistance with Wood Floor Water Damage Repair
- 8.14 • Frequently Asked Questions (FAQs)
- 8.14.1 – Address the Root Cause of Water Damage
- 8.14.2 – Necessary Tools and Materials for Repair
- 8.14.3 – First Steps in Repair
- 8.14.4 – Clean the Floor with Disinfectant
- 8.14.5 – Drying the Floor
- 8.14.6 – Dealing with Floor Cupping
- 8.14.7 – Floor Staining and Refinishing
- 8.14.8 – Maintenance and Preventive Measures
- 8.14.9 – Hiring Professionals
- 8.15 • Documenting Water Damage
- 8.16 • Signs of Water Damage
- 8.17 • The Replacement Question
- 8.18 • Drying Before Repair
- 8.19 • Cleaning
- 8.20 • Dealing with Mold
- 8.21 • Preparing for Repairs
- 8.22 • Floorboard Repair
- 8.23 • Staining and Painting
- 8.24 • Maintenance Practices
- 8.25 • Consulting a Professional
- 8.26 • Repairing Water Damage
- 9 The Impact of Water Damage on Hardwood Floors
- 10 Managing Hardwood Floor Damage in Flood-Prone Areas
- 10.1 • Immediate Aftermath: Water Removal
- 10.2 • Deep Cleaning: Detergent, Disinfectant, and Scrubbing
- 10.3 • Special Attention: Dealing with Mold
- 10.4 • Air Dry: Slow and Steady Approach
- 10.5 • Surface Finishing: Sanding and Nailing
- 10.6 • Painted Floors: Special Care Needed
- 10.7 • Laminate Flooring: A Word of Caution
- 11 Recognizing Water Damage Timelines and Consequences
- 12 Recognizing Water Damage and its Consequences
- 12.1 • Importance of Timely Intervention
- 12.2 • Engaging Professional Help
- 12.3 • Identifying Signs of Water Damage
- 12.4 • Initial Measures to Manage Damage
- 12.5 • Adhering to a Standard Drying Process
- 12.6 • Using Preventive Measures
- 12.7 • Ongoing Maintenance and Regular Inspection
- 12.8 • Repairing Engineered Wood Floors
- 12.9 • Swift Action and Professional Assistance: Keys to Damage Control
- 13 Sources of Water Damage to Floors
- 13.1 • Importance of Prompt Action
- 13.2 • Odors Indicating Water Damage
- 13.3 • Water Damage: Cupping and Buckling
- 13.4 • Mold Growth Due to Water Damage
- 13.5 • Detecting Water Damage
- 13.6 • Weak spots Indicating Water Damage
- 13.7 • The Dangers of Standing water
- 13.8 • Stains Indicating Water Damage
- 13.9 • Physical Signs of Water Damage
- 13.10 • Repair and Replacement Options
- 13.11 • Preventing Water Damage
- 13.12 • Engineered Wood Flooring: A Solution
- 13.13 • Protective Coating for Floors
- 14 Recognizing and Addressing Mold Growth on Wood Floors
- 14.1 • Understanding Mold Growth
- 14.2 • Dangers Lurking Beneath
- 14.3 • Laminate vs. Hardwood
- 14.4 • Effect of High Moisture on Wood Floors
- 14.5 • Spotting Signs of Water Damage
- 14.6 • Health Risks Posed by Mold
- 14.7 • The Risks of Leaving a Wet Wood Floor Untreated
- 14.8 • Drying Hardwood Flooring in Place
- 14.9 • Determining Whether to Dry or Replace
- 14.10 • Salvaging Hardwood Floors
- 15 The Threat of Mold Growth on Hardwood Floors
- 15.1 • Why Swift Professional Intervention is Crucial
- 15.2 • Laminate Floors: The Higher Risk
- 15.3 • Factors Affecting Hardwood Floor Salvage Potential
- 15.4 • The Value of Expertise: Certified Restoration
- 15.5 • Insurance Claims and Restoration Plan
- 15.6 • Advanced In-Place Drying Equipment
- 15.7 • Always Opt for Professional Consultation
- 16 Moisture and Hardwood Floors
- 16.1 • Health Risks of Mold
- 16.2 • Preventing and Eliminating Mold Growth
- 16.3 • Stepwise Mold Removal
- 16.4 • Mold Damage: When to Seek Professional Help
- 16.5 • Identifying Water Damage: The Warping of Floorboards
- 16.6 • The Mystery of the Changed Colors: A Signature Stamp of Water Damage
- 16.7 • Treacherous Fungi: The Growth of Mold and Mildew
- 16.8 • Engineered vs. Solid Wood: The Battle of Water Resistance
- 16.9 • From the Forest: Binding Strength with Elegance
- 16.10 • With Experience Comes Wisdom: Personal Recommendations
- 16.11 • To Summarize
- 16.12 • Importance of Prompt Action in Mitigating Water Damage to Wood Floors
- 16.13 • Enlisting Professional Help for Major Water Disasters
- 16.14 • Recognize Signs of Water Damage
- 16.15 • Dealing with Swelling and Bulging in Water-damaged Wood Floors
- 16.16 • Five-Step Drying Process for Water-damaged Hardwood Floors
- 16.17 • Utilizing Water Vacuums for Efficient Water Removal
- 16.18 • General Protection Measures against Water Damage
- 16.19 • Dealing with Water Damage on Engineered Wood Floors
- 16.20 • Professional Help for Severe Water Damage
- 17 Understanding Water Damage to Hardwood Floors
- 18 Spotting Water Damage in Wood Flooring
- 19 Quick Response to Water Damage
- 19.1 • Dry Before Assessment
- 19.2 • Resurfacing for Uniformity
- 19.3 • Identifying Water Damage
- 19.4 • Diagnosis: Finding the Source
- 19.5 • Analyzing Damage Severity and Type for Appropriate Action
- 19.6 • Navigating Insurance Coverage
- 19.7 • Recognizing the Need for Replacement
- 19.8 • Considering the Repair Timeline
- 19.9 • The Replacement Versus Repair Debate
- 19.10 • Professional Consultation
- 19.10.1 – Act Quickly – The Key to Minimizing Water Damage to Hardwood Floors
- 19.10.2 – Identifying Signs of Water Damage on Hardwood Floors
- 19.10.3 – Fixing Swollen Wood Floors
- 19.10.4 – A Five-Step Drying Process
- 19.10.5 – Protecting Against Water Damage
- 19.10.6 – Addressing Water Damage under Engineered Wood Floors
- 19.10.7 – Seek Professional Help
- 19.10.8 – Common Questions on Hardwood Floor Water Damage
Signs of Water Damage On Hardwood Floors
If you think your floor may have water damage, there are some signs to watch out for. Some of these signs are obvious, and others are hard to notice. You may see all or some of these problems if your hardwood floor is damaged by water.
● Bad Odors
Before you see the water damage on a hardwood floor, you may smell it. Although it can take some time for the damage to become apparent, you may notice a bad or musty odor in the room. This could mean that your floor is wet or has been and is now damaged. The odor often becomes stronger as the damage becomes more severe. If you do not notice anything wrong on the top of the floor, it could be damage to the bottom and subfloor.
● Cupping
Cupping occurs when the edges of the floor become higher than the center. The water in the room or the extra moisture makes the wooden boards swell and pushes them together. They are pressed against the wall as they swell and have no place to go but up. Cupping can occur with other signs of water damage as well.
● Buckling
Buckling happens when the floor planks spread apart or become higher in the center and lower around the edges. This is common if water has pooled in the center of the floor or if it has reached the subfloor and caused it to become weak or broken.
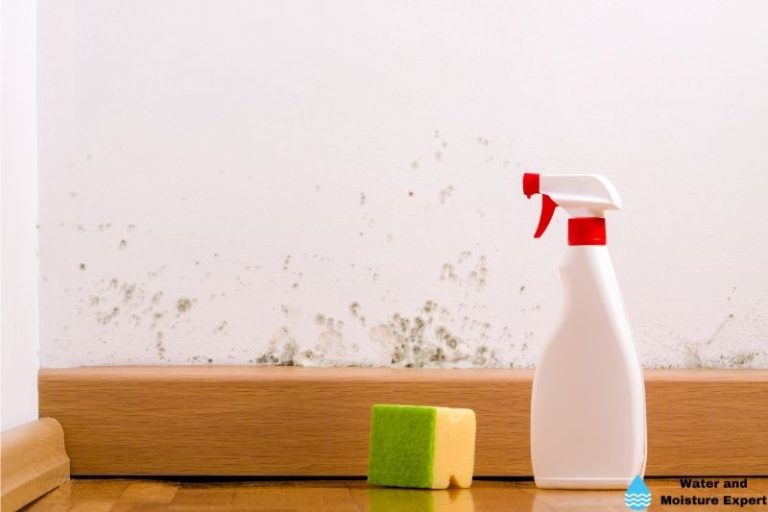
● Mold Growth
If you notice mold growing on your floors or in a room in your home, it could mean that there has been a water leak. This also means there’s a possibility your floors may be damaged as well. If you do see signs of mold growth, you should not try to repair the floor. Instead, you should call a qualified mold remediation team to remove it safely.
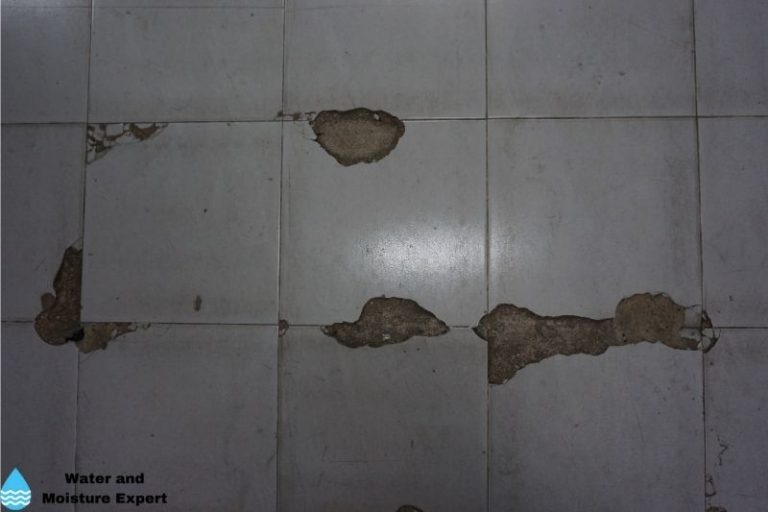
● Wet Spots
You may be walking through a room and stepping on a spot on the floor that feels soft and wet. It could gush water or even have a puddle near it. Some leaks occur under the floor and aren’t noticed until the water makes its way to the surface. When you press the flooring down, it makes it easier for the water to get through.
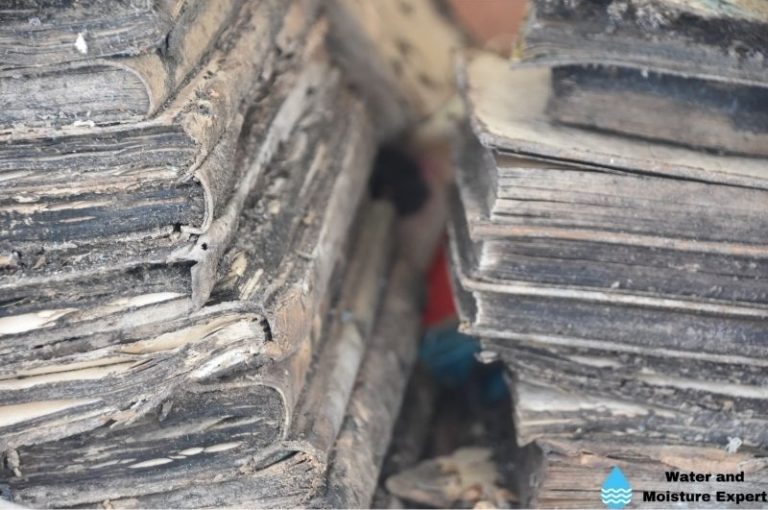
● Weak Spots
Weak spots can occur if water has leaked on your flooring or pooled in certain areas. You may have one large area where you feel the floor is weak, or you may feel several small weak spots. If your floor is weak, you will feel it give out as you try to walk on it. Even if the wood flooring feels hard, your subfloor could feel soft.
How Do I Know If My Hardwood Floor Is Water Damaged?
Sometimes it is easy to look at a hardwood floor and tell if it has water damage. Other times, the water dries up before you realize there has been a flood or leak. You might not even think to check it out. Here are some ways to know if your hardwood floor is water damaged.
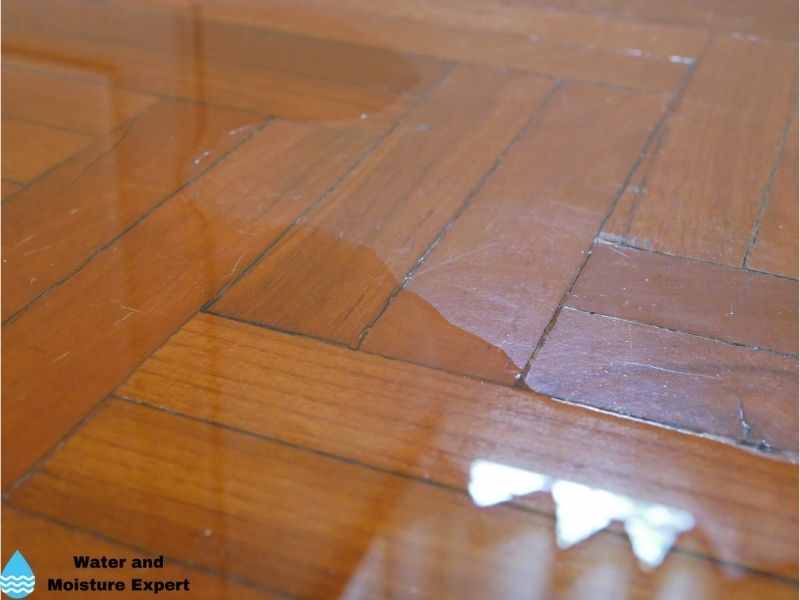
● Look For Standing Water
If you find standing water in your home, there is always a chance the floor could be damaged. The sooner you remove the water, the less severe the damage will be. If you are trying to determine if your floors are damaged, you will want to clean up the water, dry the floor, and assess the areas for damage.
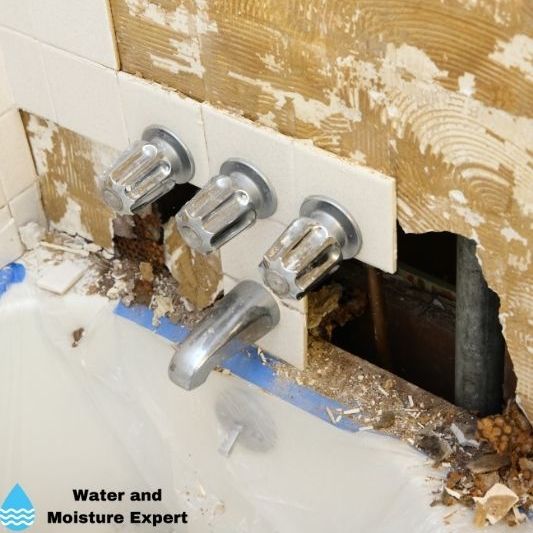
● Check For Leaks
If you suspect a leak in your home, you should check the pipes and appliances. If you find a leak, you will want to inspect the floor nearby. If the water has been leaking for a while, the wood flooring is probably damaged around it.
● Look For Staining
You may notice that your floor changes colors after a spill or flood. This standing could be a sign of water damage. If the staining is a light color, it may not be severe. If you notice dark or black stains on your wood floors, it could mean the water damage has become worse.
● Look For Physical Signs
If you are worried that your wood floor could have water damage, look for any physical signs. Check to see if your floor has soft spots or mold present. Look around for signs of cupping or buckling. If you see anything wrong with your floor, then it is likely water damaged.
Can Water Damaged Hardwood Floors Be Sanded?
In general, water-damaged hardwood floors can be sanded. But sanding isn’t always the best option. Before you opt to sand the hardwood floor, it’s a good idea to inspect them to determine the severity of the damage. If your floor is simply stained and needs to be sanded before it can be refinished, then sanding can be an excellent solution. If you notice some cupping, but it isn’t too severe, you may be able to sand down the edges to make the floor even.
Never attempt to sand the floor if it feels weak or soft to touch. This is a sign that the floor’s structure is damaged and will need to be replaced. Sanding is only an option for surface damage.
How Do You Fix Water-Damaged Hardwood Floors?
Finding out your wood floor has been damaged by water can be stressful. You may not know where to turn or what to do. I usually advise homeowners to stay calm and use the following steps to deal with the problem:
● Step 1: Find The Leak
The most important thing to do is find the cause of the flooding or leak and take care of it. As long as the water continues to leak onto the floor, you won’t be able to assess the damage or make repairs.
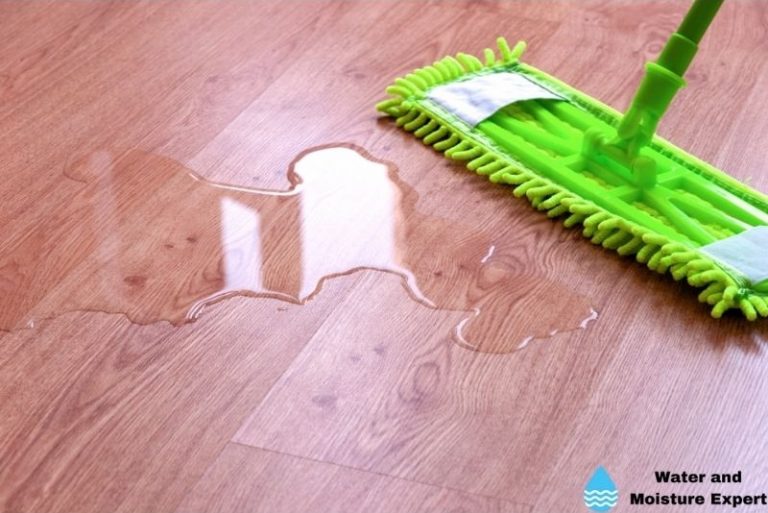
● Step 2: Clean Up The Water
You will need to remove the water completely. You can do this with towels or a mop. If the floor is completely flooded, you may need to use a sump pump to remove large amounts of water quickly. Cleaning up the water also means cleaning the floor. Even if the leaking or flooded water doesn’t appear to be dirty, it could contain microbes and germs that could lead to mold or fungi growth and be a hazard to the health of your family.
● Step 3 Dry The Floor Thoroughly
Once the water has been removed, allow the floors to dry completely. You want to ventilate the room as much as possible to remove the moisture and reduce mold growth. Open the windows if possible and use a fan to keep the air circulating. If the floors are very wet, you might need to buy or rent commercial fans and drying equipment to help remove the moisture faster and prevent more damage.
● Step 4: Assess The Damage
Once the floors are clean and dry, take some time to check out the area and the flooring. Look for signs of damage and weak spots. You may find that only a small section of the floor has water damage. I always recommend checking for mold damage during this step too. You also have the option of having a professional handle this part as well. Mold can be dangerous, and if you aren’t sure how to remove it safely, you are better off leaving it to the professionals.
● Step 5: Make The Necessary Repairs
When you know what parts of your floor are damaged and how severe the damage is, you can start to make the repairs. You will want to cut out and remove the damaged wood floor panels and any damaged subfloor. It may be easier to replace large subfloor sections rather than cutting out small sections. The wood flooring should be easy to replace in panels or strips.
● Step 6: Resurface The Entire Floor
Whether you need to replace the entire floor or a small section, you will still want to resurface it all. This will ensure that the entire floor looks cohesive and is the same color and texture. It will prevent uneven spots, discoloration, and streaking and allow the new parts of the floor to blend with the old parts.
Finding your floor flooded or seeing signs of wood floor damage can be scary. Wood flooring is expensive, and if you have it in your home, you expect it to last a long time. The good news is, if you do find water damage, there is a good chance you will be able to repair it and have it look good as new in no time. If you suspect your floors may be water damaged, be sure to keep the above points in mind.
Identification of Water-Damaged Wood Floors
Determining the type of water damage present on your wood floors is a critical step. Typically, water damage can be categorized into clean water damage, gray water damage, and black water damage. Clean water damage tends to occur from the direct intrusion of water, such as from rain or leaks.
Gray water damage pertains to water that contains microorganisms and nutrients of microorganisms, like water from a dishwasher.
Lastly, black water damage is often the most severe, arising from sources such as sewage or any water that contains fecal matter. The type of water damage partly determines the treatment of your floors.
• Signs of Water Damage
Key indicators of water damage on your wood floors can range from physical alterations to changes in odor. Culprits are cupping, crowning, and buckling, which are deformations of the timber. Cracking and warping are also severe, indicating stress on the wood.
A standout sign of water damage is discoloration, pointing to potential mold growth. Often, this is accompanied by a musty smell. Early detection of these signs can hasten the repair and mitigation of damage.
• Water Removal
In repairing water damage, the first step is crucial – the removal of water. This can be achieved either by traditional mopping up or employing more modern techniques using water vacuums. Early removal of water can significantly reduce the extent of water damage.
• Cleaning the Water-Damaged Floor
Once the water is removed, cleaning the floor using a wood-safe disinfectant is next. This step helps halt mold growth which could lead to more severe damage. The disinfecting process requires meticulousness, ensuring no spot is left untouched.
• Drying the Floor
Post-disinfection, the floor should be thoroughly dried. Pat-drying can achieve this, but sometimes environmental control methods like opening windows or employing a dehumidifier are needed for effective drying. Remember, high humidity levels can cause additional damage.
• Sanding the Damaged Wooden Floor
Sanding becomes necessary when wood floors are subjected to cupping or crowning. This process allows for the smoothening of the surface and makes them flush with the other boards. After sanding, re-varnishing, and staining follow to match the original color of the floor.
• Resetting the Floors
For boards that have popped out of the subfloor, their reestablishment is done by either nailing or screwing them back in place. Accurate alignment is essential here to maintain the floor’s aesthetic.
• Replacing Wood Floors
Sometimes, damage to the wood floors requires entire replacement, especially if there is mold growth or persistent buckling, which can compromise the structural integrity of the floor.
• Preventing Further Damage
To stave off future damage, consider installing a dehumidifier in rooms prone to excessive moisture. Using rugs can also protect your wood floors from potential spills or water exposures.
• When To Seek Professional Help
There are scenarios where DIY is insufficient and professional help becomes necessary. This is often the case in black water flooding due to the serious health risks it poses. Handle with caution.
Before embarking on any repairs, homeowners should weigh safety implications and evaluate the level of expertise required. The EPA’s guidance on mold cleanup in homes ascertains it, advocating that larger molds are better left to professionals.
• Your Wood Floors Are Worth It
Periodic checking of wood floors for any signs of water damage can translate to longevity and maintaining aesthetics. Handling your floor with love and care and knowing when to seek help protects your wood from sustaining unabated damage.
• Evaluating the Severity of Water Damage
Before starting, it’s crucial to evaluate the severity of water damage. You can do this by looking for signs like cupping and crowning. Cupping occurs when the edges of a floorboard are higher than the center, creating a concave shape.
On the other hand, crowning is a convex distortion where the center is higher than the sides. These deformations indicate serious water damage.
• Decision: Repair or Replace?
The tough decision of whether to repair or replace your wood floor depends on several factors. These include the duration of water exposure, type of wood flooring, severity of damage, and flooring finish.
For instance, solid wood and engineered wood react differently to water damage, and their recovery also varies.
• Identification of Damage Source
One key step before repair work begins is identifying the source of the water damage. It could be a leaky pipe, roof leakage, or high humidity in the room. Identifying and addressing the source is crucial to prevent further damage.
• Prompt Removal of Surface Water
Remember, time is of the essence in water damage repair. Immediately remove surface water using a shop vacuum or squeegee. This can prevent further absorption and minimize damage.
• Cleaning the Affected Area
Next, clean the floor using a mild detergent and a disinfectant compatible with your floor type. Be sure to scrub any affected woodwork to remove all traces of water and dampness.
• Treating Mold
If you spot moldy areas, treat them with trisodium phosphate (TSP). This chemical compound is well-known for its effectiveness in eradicating mold growth.
• Drying the Floor
After cleaning, allow the floor to dry naturally. Avoid using direct heat as it can weaken and crack the wood. Speed up the drying process using dehumidifiers and fans.
• Reducing Cupping
If you notice cupping, reduce it by heavy sanding with a drum sander or orbital sander. If necessary, face nail any cupped floorboards to flatten them.
• Paint Removal
Do remember to remove paint from the floorboards. This step is important as retained paint can trap water between the wood and the paint, exacerbating the damage.
• More Cleaning and Drying
After paint removal, apply an abrasive cleaner to scrub the wood before drying it again. This adds another layer of cleaning, ensuring all trapped moisture is dealt with.
• Staining and Refinishing
Once the floor is completely dry, stain and refinish it to restore its original beauty. This will breathe new life into your wood floor, making it almost as good as new.
• Sealing your Hardwood Floor
For hardwood floors, don’t forget to apply an appropriate sealant and regularly reapply it to keep moisture at bay.
• Fixing Water Leakage
Always fix any areas with water leakage as soon as possible to prevent further water damage. Preventive maintenance is key to saving expensive repair costs.
• Consider Professional Help
In cases of severe water damage, consider hiring a professional water damage restoration or flood cleanup company. These companies are equipped with specialized equipment and have the expert knowledge to deal with such cases.
This article was inspired by tips provided by the National Wood Flooring Association, an .org website which you can visit here for more information on dealing with water-damaged wood floors.
Understanding Wood Floor Infiltration Points
Wood floors are a sophisticated addition to any home, enhancing the aesthetic allure and value. Unfortunately, they also come with their unique set of vulnerabilities – the highest being infiltration points. These issues are not confined to the top layer of the floor.
Water and dirt can seep in through seams, breaks in the coating, underneath baseboards, and even through heating registers.
Knowledge of these infiltration points equips homeowners to safeguard their wood floors against potential damage, increasing their lifespan. Visit National Wood Flooring Association for more tips.
• The Necessity of Dirt and Water Elimination
It’s not enough to only combat water penetration. Dirt must be eliminated as well. The rationale behind this is simple – damp and dirty environments promote the growth of mold and mildew. These organisms can damage the structural soundness of your floor and, perhaps even worse, your health.
• Swift Surface Water Removal Process
Quick action is crucial when dealing with water on your wood floor. My first recommendation is always immediate surface water removal.
You can effectively do this by employing a shop vacuum in wet mode, sans a bag. This immediate action minimizes water exposure time, reducing the floor’s risk of water damage.
• How to Conduct Effective Floor Scrubbing
After removing surface water, it’s time to carry out an extensive floor scrubbing operation. For this task, you will need a mild detergent and a disinfectant that is compatible with wood.
Using a stiff brush, begin scrubbing the floor and woodwork thoroughly with a solution of detergent, disinfectant, and clean water. This will eliminate any residual dirt, keeping mold and mildew at bay.
• Spotting and Treating Mold Prone Areas
It is beneficial to have a sharp eye for areas that exhibit signs of mold. Such locations require extra attention and a more potent solution for effective treatment.
My advice is to use a mixture of trisodium phosphate (TSP) or a reliable TSP substitute with water. This should effectively handle any potentially problematic mold presence.
• Tips for Effective Floor Drying
Once your floor is clean, it’s time to dry it. It’s crucial to allow your wood floor to dry naturally and slowly. This can be achieved by utilizing fans and ensuring there’s adequate airflow in the room.
Fast drying can spell disaster for your floor, potentially causing it to warp, crack, or split. Therefore, patience and prudence are valuable during this phase.
• Rectifying a Concave or Convex Wood Floor
Unfortunately, the drying process doesn’t always go as planned. If your wood floor becomes concave or convex after drying, minor high areas can be flattened with intense sanding.
Resorting to a drum or orbital sander is an effective recourse. Heavy sanding can help to restore uniformity to the surface of your floor.
• Mold Under Painted Floors
A painted floor may conceal mold growth under its surface. This is because paint creates a seal over the wood, trapping water and serving as a breeding ground for mold.
In such cases, the only viable solution is to remove the finish entirely. This will expose the trapped water and allow for appropriate mold treatment.
• The Case of Laminate Flooring
Laminate flooring, despite posing as a cost-effective alternative to solid wood floors, comes with its drawbacks. Made from wood pulp, laminate floors are highly susceptible to water damage.
In most cases of water damage, the laminate flooring will need a complete replacement. Unlike solid wood, laminate cannot be effectively repaired or restored.
Throughout the journey of maintaining your wood floors, keep practicing patience, vigilance, and informed action to ensure their longevity. Rest assured that your efforts will keep your floor in the best shape possible, prolonging its life and enhancing the beauty of your home space.
• Recognizing Water Damage in Hardwood Floors
Water leaks can be incredibly destructive, particularly when they involve hardwood floors. A burst pipe, for example, can cause extensive damage. Large leaks have the potential to wreak havoc on your precious hardwood flooring, leading to substantial repairs or replacements.
• Odors as Indicators of Water Damage
It’s worth noting that bad odors can often indicate water damage. If a room suddenly develops a peculiar smell, this could be a sign that your hardwood floors have been exposed to water damage.
• Cupping and Buckling: Signs of Water Damage
Perhaps among the most visible signs of water damage on hardwood floors are cupping and buckling. Cupping refers to when the edges of the floor rise higher than the center due to water exposure.
Buckling can be seen when the water has pooled in the center of the floor or if it has penetrated the subfloor, causing it to warp upwards.
• Check for Mold, Wet Spots, and Weak Spots
Excess moisture can also lead to mold growth, another primary indicator of water damage. Wet spots on the floor or in the room can also signify water exposure, especially if they feel soft to the touch.
Even seemingly solid parts can hide damage, as weak spots on the floor may still be a sign of water damage, regardless if the flooring feels hard.
• Standing Water and Leak Checks
Finding standing water in your home is a surefire sign of potential hardwood floor damage. Similarly, leaks from pipes or appliances can also mean your hardwood floor could have been impacted. To determine this, conduct thorough checks for leaks throughout your home.
• Discoloration and Stains: Unseen Signs
Discoloration or staining, while not as visible, can also be early indicators of water damage, particularly after a spill or flood. Do not ignore physical signs such as soft spots or visible mold on the floor.
• Sanding and Repairs
In cases of surface water damage, sanding might be your best bet. However, this is only recommended if the structure of the floor is not compromised or softened due to water exposure.
• Addressing the Damage: Cleaning and Drying
The first step in tackling water-damaged hardwood floors is locating and dealing with the leak’s origin. Cleaning up the water promptly is crucial to prevent extensive damage and potential mold growth. Once done, ensure you thoroughly dry the floor to remove lingering moisture.
• Assessing the Damage
Having a thorough check for damage and potential mold is a crucial step in the repair process. Based on your assessment, you may need to remove damaged wood floor panels and the subfloor and carry out necessary repairs.
• Resurfacing the Floor
Resurfacing the entire floor is a worthwhile consideration for ensuring a uniform look and avoiding uneven spots or discoloration.
• Taking Action Immediately
Acting swiftly can help minimize water damage on your hardwood floors.
• Preventive Measures
Consider placing rugs and mats and regularly inspect your home for leaks. These preventive measures can significantly reduce water damage risks.
• Professional Help
In severe cases, don’t hesitate to seek professional help. Water damage can be devastating, sometimes impossible to handle without expert assistance. The National Wood Flooring Association offers a plethora of resources on dealing with water-damaged hardwood floors, providing invaluable advice.
In conclusion, water damage to hardwood floors can be costly and cause significant inconvenience. Recognizing the early signs, acting quickly, and taking preventive measures can help mitigate damage and avoid hefty repair costs.
However, never be hesitant to seek professional help if the situation seems beyond your control.
Understanding the Full Scope of Water Damage
When addressing wood floor damage caused by water, it’s not enough to concentrate only on the surface. Areas out of immediate sight also count, including those between seams, under baseboards, and through heating registers.
• Importance of Thorough Cleaning
Once surface water is removed, the next step is to clean the entire floor and associated woodwork. A comprehensive cleaning serves several purposes. Firstly, it removes accumulated dirt, mud, and silt.
Secondly, but just as importantly, it eliminates organic material that constitutes fertile ground for mold growth.
A recommended cleaning solution includes a mixture of mild detergent and disinfectant.
– Addressing Mold Growth
An early indication of mold growth is the presence of mold in visible areas. If mold is detected, it should be promptly treated with Trisodium Phosphate (TSP) or a suitable substitute mixed with water.
Following the use of the TSP solution, it’s necessary to rinse the area with clear water and dry it using a fabric that absorbs water effectively.
You may refer to the United States Environmental Protection Agency’s guidelines on handling mold for a more detailed approach.
– Drying Water-Damaged Floors
Drying the water-damaged wood floor is an essential part of the restoration process. However, it’s crucial to do it slowly, naturally, and with plenty of airflow in the space.
Careful use of fans can enhance this, while simultaneously opening windows and doors can lend a hand unless outside air brings in more humidity.
– Avoiding Heat Damage
It’s not uncommon for well-meaning efforts to cause further damage. One such scenario is the urge to apply heat to hasten the drying of the water-damaged hardwood floor. This should be avoided, as the heat can warp and distort the wood, leading to costly repairs or replacements.
– Sanding for Uniformity
The impact of water damage on wood floors can lead to cupping, causing floorboards to become concave or convex. In such cases, sanding becomes necessary to restore the smooth level of the floor.
– Handling Heavily Cupped Wood
However, there are instances when the water damage is severe, and the resulting cupping cannot be rectified through sanding alone. At this point, it becomes incumbent to face-nail the floorboards back down to provide more stability.
– Dealing with Painted Floor
If a painted wooden floor shows signs of mold, it’s important to undertake a more extensive cleaning regime. This requires the removal of the finish to ensure the wood beneath is cleaned properly rendering it free of mold again.
– Vulnerability of Laminate Flooring
Laminate flooring, though a popular choice due to its aesthetic appeal and durability, is highly susceptible to water damage. Often, once laminate flooring becomes water-damaged, the structure is compromised to a level where replacement is the only viable choice.
By understanding these critical points and following the recommended steps, the restoration of a water-damaged wooden floor becomes a manageable task.
Despite the challenge, treating the problem at its root ensures that the refurbished floor regains its original charm and continues to add value to the home.
• Classification of Water Damage
When dealing with water damage on wood floors, understanding the type of water involved is crucial. Water damage is primarily categorized into three types: clean water, gray water, and black water.
– Clean Water Damage
This is the easiest type of water damage to handle. It arises from rainwater or tanks and doesn’t contain contaminants, making it relatively safe to clean yourself. After removing the water with a mop or vacuum, it’s necessary to dry the area thoroughly to prevent the wood from absorbing more water and warping.
– Gray Water Damage
Gray water damage originates from appliances like dishwashers, washing machines, and sinks. It contains minor impurities and therefore, it’s vital to use wood-safe cleaning products when handling it. You might need to disinfect the affected area after cleaning to get rid of any bacteria present.
– Black Water Damage
This type of water damage poses a significant health risk as it originates from sewage spills, toilet overflows with feces, and flooded rivers, among other contaminated water sources. I highly recommend seeking professional help in such cases.
Black water is hazardous and polluted and requires professional-grade cleaning and sanitization to eliminate any risks. More info can be found in EPA water damage guidelines.
• Identifying Water Damage to Wood Floors
To effectively address water damage, it’s essential to recognize the signs. For wood floors, common signs include cupping, crowning, buckling, cracking, warping, and discoloration.
– Warping Indicators
Discoloration and warping are among the first visible signs. In the presence of water, wood floors may buckle and form high spots or cups, creating concave depressions.
– Mold Indicators
Other telltale signs include a musty smell and the appearance of dark patches, which may suggest mold growth.
• Guidelines for Repairing Water Damaged Wood Floors
– Remove and Dry
The first step to repairing water-damaged wood floors is to remove any standing water. Use towels, mops, or a wet/dry vacuum to sop up as much water as you can. Move wet rugs and mats to a dry area, and use fans or dehumidifiers to dry the place thoroughly.
– Cleaning and Disinfection
Clean the floor using a wood-safe disinfectant to kill any bacteria and prevent mold growth.
– Ensure Complete Drying
To ensure faster drying, open windows to allow air circulation or use a dehumidifier, particularly in moisture-prone rooms.
– Sanding and Varnishing
Gently sand down raised edges if there is cupping or crowning. This process helps to even out the surface, after which you can re-varnish and stain the floors.
– Board Replacement and Nailing
In some instances, the boards may pop out or warp so much that they have to be removed. Should this be the case, nail or screw back the boards carefully? However, for severe damage, I’d advise the replacement of the entire flooring.
• Preventing Future Water Damage
With some careful planning, it’s possible to prevent future water damage. You can minimize water contact on wooden floors by placing rugs in high-moisture areas. Installing a dehumidifier in moisture-prone rooms can also regulate humidity levels and reduce the chances of water damage.
• Seeking Professional Help
Sometimes, the extent of the damage may necessitate an expert’s intervention, especially when dealing with blackwater flooding or extensive damage. Always reach out to professionals in such cases to ensure your safety and the structural integrity of your wood floors.
Remember, your health and safety always come first. Dealing with water damage can be complex, but with the right approach, you can restore your floors to their former glory or even better.
Impact of Water Damage on Hardwood Floors
It is noteworthy that water damage can adversely affect hardwood floors, leading to unsightly warping and decreased property value. Even worse, mold can start to grow, posing health hazards to residents. The negative impact of water damage on your hardwood floors can’t be stressed enough.
• Mechanics of Water Damage
Typically, the top layer of hardwood boards is treated to prevent damage from small liquid spills. However, an uncontrolled amount of water can leak between the boards.
Once there, it’s absorbed, causing the wood to expand in an uncontrollable manner. The aftermath is often eye-catching, and not in a good way.
• Urgent Treatment of Water-Damaged Floors
Prompt action is crucial in the event of water damage on your hardwood floors. The quicker you eliminate the water damage from your floors, the higher the chances of preserving them. They’re a worthy investment and should be treated as such.
• Identifying Signs of Water Damage
Hardwood flooring affected by water damage may exhibit several tell-tale signs. These include adverse odors emerging from below the floors, visible discolorations, and staining.
Also, the wood may start buckling, nails lifting, and the growth of mold can be observed. To protect the floor, take immediate action whenever these signs become apparent.
• How to Fix Swollen Wood Floors
Addressing water-damaged swollen floors effectively requires laying thick towels over the swollen areas. This, combined with the use of a dehumidifier, can significantly help in eliminating excess moisture, thereby reducing further swelling.
• Importance of Locating and Cutting off the Water Source
Before you can start the drying process, identify and cut off the water source. It’s a practical essential that will pave the way for successful hardwood floor repair by minimizing further water damage.
• Cleaning and Drying Floors
Removal of wet objects around the affected area is necessary, followed by thorough cleaning and drying of the floors. Intense scrubbing helps remove impurities, mitigating permanent damage potential.
• Necessary Drying Precautions for Wood Floors
To prevent severe damage to wood floors due to water exposure, thorough drying is of utmost importance. The use of fans, dehumidifiers, and ventilation profoundly aid this drying process.
• Inspection and Treatment of Mold
Inspect for mold growth, and proceed with prompt treatment to halt its spread across the floor. Mold poses significant health risks and should be eliminated post-haste.
• Effective Remedies for Water-logged Wood Floors
Employing a water vacuum, dehumidifiers, and ventilation fans helps remove water and dry out the flooring. This practice ensures the longevity of your hardwood floors, despite water damage.
• Protecting Wood Floors with Mats and Rugs
Use mats and rugs strategically across your living areas. They serve as a protective barrier, reducing the risk of direct water exposure to your hardwood floors.
• Regular Maintenance and Precaution Measures
Incorporate regular checks for leaks in your maintenance schedule. Sealing your hardwood floors every few years minimizes potential water damage, preserving the luster of your floors.
• Addressing Water Damage under Engineered Wood Floors
In unfortunate cases where water damage occurs under engineered wood floors, the entire floor may need refinishing. Moreover, the affected boards may need replacement, an exercise that may require expert guidance.
• Professional Assistance with Wood Floor Water Damage Repair
Engage professionals like Jenkins Restorations, whose services focus on wood floor water damage repair. They bring in their expertise and knowledge, ensuring the successful restoration of your floors.
• Frequently Asked Questions (FAQs)
Refer to FAQs for insights on treating water-damaged wood floors, early signs of water damage on hardwood floors, and the consequences of water seeping under hardwood floors.
Reliable sources for such information can be educational websites like woodfloordoctor.com. Moreover, learn what happens when wet subfloors need replacing.
In conclusion, safeguarding hardwood floors from water damage and knowing how to act when such misfortune arises pays off in the long run. It’s about securing your investment, making your living spaces safe, and maintaining the aesthetic value of your home.
– Address the Root Cause of Water Damage
Determining and addressing the root cause of water damage is pivotal. Leaks from doors or windows or internal sources like dripping radiators or faulty household appliances can severely damage your hardwood floors.
Based on my experience, persistent dampness is not only unsightly but it can significantly affect the structure and integrity of your house. Thus, identifying and rectifying these possible sources of water infiltration should be your premier concern.
– Necessary Tools and Materials for Repair
For an efficient and comprehensive repair of your water-damaged floor, you’ll require specific tools and materials. These include a shop vacuum, bucket, stiff brush, squeegee, rubber gloves, fans or dehumidifiers, and disinfectant.
Having these at your disposal should make the process smoother and more effective. You can purchase these tools from your local home improvement store if you don’t already own them.
– First Steps in Repair
Once your materials are ready, the first step in repair would be to remove the surface water. Using a shop vacuum or a squeegee, remove as much standing water as possible. It’s essential to ensure that the area is free of water to prevent further damage and mold growth.
– Clean the Floor with Disinfectant
After emptying the water, it’s time to clean your floor. Utilize a mild detergent and disinfectant to treat moldy areas. Scrub the entire hardwood surface thoroughly, rinsing it often with clean water.
When dealing with moldy areas, a solution of trisodium phosphate (TSP) can do wonder. Its powerful formula can effectively clean damaged areas and hinder future mold growth. More information on mold removal can be found here.
– Drying the Floor
The next stage in this process involves drying the floor. Use drying equipment such as dehumidifiers and fans to dry the wood slowly and naturally. Keep in mind direct heat application should be avoided as it can cause your wooden floor to warp or crack due to the rapid water loss.
– Dealing with Floor Cupping
In case of cupping or bowing of your wooden flooring – a common effect of water damage, sanding may be required. By gently sanding the floor, you can reduce the unevenness caused by water exposure.
– Floor Staining and Refinishing
After ensuring the floor is completely dry, it’s time to move on to the final step – resurfacing the floor. Stain and refinish the floor to restore its original appearance. This would bring back the glamour and elegance of your hardwood floor.
– Maintenance and Preventive Measures
Routine maintenance and immediate action upon noticing signs of water damage can effectively preserve the charm of your hardwood floors. Regular cleaning, timely repair of leaks, and prompt attention to water pools can help avoid serious damage.
– Hiring Professionals
In severe cases of water damage, it might be beneficial to hire a professional water damage restoration or flood cleanup company. Through their expertise and specialized equipment, these professionals will ensure your problem is extensively addressed.
The Institute of Inspection Cleaning and Restoration Certification (IICRC) can help you find certified professionals within your locality.
• Documenting Water Damage
It’s integral to document the level of water damage on your wood floors. Experience shows taking photos and making notes always aid the insurance claim process. Remember, details count, so leave no corner unnoticed.
• Signs of Water Damage
Watch out for indicative signs such as cupping and crowning. These deformities essentially reveal the extent of water damage. Both signs are easy to spot – they cause the floorboards to bend to form a concave or convex figure respectively.
• The Replacement Question
If the damage is significant, be prepared for a full floor replacement. However, judging when to opt for replacement requires substantial scrutiny. It’s always a good idea to call in professionals before settling for this solution.
• Drying Before Repair
Thorough drying is necessary before you start on any repairs. A sopping floor can cause more damage if repair work is initiated without due drying. Use a high-quality dehumidifier or industrial fans to expedite this process.
• Cleaning
Objectively, using a mild detergent and disinfectant mixture to clean the floor helps control mold growth. It is recommended to use a brush to clean the grooves thoroughly. It’s crucial to remove any dirt and grime left, which can often serve as a catalyst for mold proliferation.
• Dealing with Mold
When mold is present, clean it with a mold growth prevention cleaner. After application, rinse and dry the floor thoroughly. The Environmental Protection Agency (EPA) provides guidelines for mold cleaning, eradication, and prevention.
• Preparing for Repairs
To prepare for repairs, sand the floor. However, be careful not to engage in excessive sanding – it can create more issues than it resolves. Optimize your sanding process with a balance between surface scrubbing and maintaining the wood’s integrity.
• Floorboard Repair
When cupping is significant, nailing down or replacing floorboards could be the solution. Of course, this process requires care and precision to ensure the new boards align perfectly with the existing floor.
• Staining and Painting
Consider staining or painting the floor if necessary. Yet, be mindful that painted floors have a greater chance of encouraging mold growth. So, it’s important to weigh the pros and cons before going this route.
• Maintenance Practices
Regular and proper cleaning prevents water damage on wood floors. Adopt a consistent cleaning schedule, and remember, prevention is always better than cure.
• Consulting a Professional
When in doubt about drying or needing assistance, consult a professional. Professionals leverage extensive experience and use best industry practices to manage these situations effectively.
• Repairing Water Damage
Following these steps will help restore your wood floors to their original charm. Your floor needs to lose its natural beauty due to water damage. All issues can be resolved, so stay positive and commit to the recovery process.
Remember, wooden floors are not just infrastructure – they are works of art that add personality to your home. Carrying out these steps with due diligence will reinstate that natural charm that you first fell in love with on your wooden floors.
The Impact of Water Damage on Hardwood Floors
Water damage to hardwood floors manifests itself in various forms. A common indication is cupping, a phenomenon where the edges of wood planks become higher than the center, creating a concave shape.
This happens as the wood absorbs excess moisture and expands, leaving little room for the planks to spread out, thus causing them to push up on the sides.
• Importance of Moisture Testing Before Repair
Before taking any corrective measures, it’s essential to conduct a moisture test on the water-damaged wood floors.
This test is paramount to ensure the moisture content stabilizes and is consistent throughout the room. Stabilized moisture levels help avoid uneven shrinking or expansion of wood during the drying process.
• Dangers of Sanding Before Full Drying
Sanding is usually a crucial part in the wood floor repair and refinishing process. However, initiating sanding on floors that have not fully dried can lead to more harm than good.
When this happens, another kind of wood malformation, called crowning, can occur. In this case, the wood surface swells and becomes raised, resulting in a convex shape.
• When Replacement Becomes Necessary
There are severe cases where water damage on hardwood floors requires drastic measures – replacement.
This is necessary in situations where the floorboards peak up about 4-5 inches off the floor. These extreme circumstances render simple repair attempts futile as they wouldn’t effectively get rid of the problem.
• Determining the Severity of Damage
When water damage on hardwood floors is detected, it’s important not just to dive into repairs but to assess the severity of the damage. If damage is minimal, the floors may simply require refinishing.
Yet, if the damage extends to certain boards, they might need to be replaced before the refinishing process commences.
• Preventative Measures Against Water Damage
Preventing water damage in the first place is your best course of action. Regular checks on the plumbing and fixtures are vital.
More so, having any appliances professionally installed goes a long way in preventing leakage that could damage your hardwood floors. You can gain more insights on preventive maintenance from the National Wood Flooring Association’s guide.
• Monitoring When Away from Home
Another useful measure to take into account is to arrange for a neighbor or friend to check on your house, especially if you’re away for an extended period.
They can identify any potential issues and consequently turn off the water main to prevent further damage. Proactive monitoring can help to prevent the escalation of minor water leaks to major water damage.
Water damage on hardwood floors can be distressing. Yet, with a swift and appropriate response, it can be effectively managed.
Whether the solution lies in standard repairs, refinishing, or outright replacement, what’s important is understanding the nature and extent of the damage to make an informed decision.
That, and implementing preventative measures, could save you considerable time, effort, and cost associated with hardwood floor water damage.
Managing Hardwood Floor Damage in Flood-Prone Areas
As a professional contractor experienced in dealing with diverse scenarios, one critical aspect I cannot stress enough is how hardwood floors suffer potential damage in areas prone to hurricanes and flooding.
The threat of standing water can cause notable harm to such flooring, so knowing how to deal with it is valuable knowledge.
• Immediate Aftermath: Water Removal
The first line of defense after a flood is to remove any surface water on the flooring. For this purpose, I highly recommend using a shop vacuum in wet mode. It efficiently and effectively eliminates any standing water that might cause further harm to your hardwood floors.
• Deep Cleaning: Detergent, Disinfectant, and Scrubbing
To secure the floor’s longevity and ensure there are no hidden threats, carry out a thorough scrub of the entire floor and related woodwork. For this step, mix a mild detergent and a compatible disinfectant with clean water in a bucket.
Do not forget to also scrub areas such as baseboards, stairs, and any woodwork connected to the floor. This kind of deep cleaning is essential for eliminating contaminants that could affect the wood’s durability.
• Special Attention: Dealing with Mold
If you notice signs of mold in certain areas, it is necessary to take additional steps. Using trisodium phosphate (TSP) or a TSP substitute mixed with water should eradicate it efficiently.
Mold can severely affect the integrity of your hardwood flooring, so make an effort to treat it immediately to avoid further damage. You can learn more about dealing with mold by visiting EPA’s guide on Mold Remediation in Schools and Commercial Buildings.
• Air Dry: Slow and Steady Approach
Once the cleaning is complete, drying the floor is your next step. Here, it’s advisable to follow a slow and nature-assisted approach. Provide ample air circulation by turning on fans and, if possible, open windows and doors. This helps the floor to dry naturally and evenly, preventing wood distortion.
• Surface Finishing: Sanding and Nailing
After completing the drying process, you may notice high areas on the floor. These can be managed by sanding them down with a drum or orbital sander.
Heavily cupped wood can pose a challenge, though, and may not be sanded down flat. In such cases, face-nail the cupped wood floorboards back down for a flat and uniform flooring appearance.
• Painted Floors: Special Care Needed
If you have painted hardwood floors, you need to pay special attention when there’s mold growth under the paint. The safest approach is to remove the finish and scrape off the paint altogether.
Then the wood should be scrubbed with an abrasive cleaner or a TSP-water solution, preferably containing added laundry bleach.
• Laminate Flooring: A Word of Caution
If your choice of flooring is laminate, it’s important to note that it’s highly vulnerable to water damage. In fact, it’s quite likely that you will need to replace it entirely if it gets soaked. Choose your flooring wisely, considering the location and climate of your home.
Dealing with hardwood floor damage caused by standing water can be a daunting task, but with careful intervention, proper tools, and patience, you can restore the beauty and durability of your floors.
Following the above steps will ensure the longevity of your hardwood flooring, even in flood-prone areas.
Recognizing Water Damage Timelines and Consequences
Floating floors and materials have long been at odds. Among the gravest of these oppositions is water damage, capable of altering the landscape of your beautiful flooring. The journey begins with recognizing what you are up against.
– Recognizing Signs of Delayed Water Damage
Recognizing the aftermath of prolonged water damage plays a crucial role in the decision to refurbish.
The signs paving the way can range from discoloration and staining to more visible phantoms such as buckling of boards and popping out nails. Among the dramatic ones, the development of exuberant mold colonies is also a leading indicator.
– Understanding Different Types of Water Damage
The route to efficient water damage control is understanding the four major culprits: Clean water, Greywater, Blackwater, and Saltwater. Each of them interacts differently with your floors, making resilience a relative concept.
Clean Water Damage
In the case of clean water unleashed from sources such as sinks or faucets, the repair chances are highest. Since it’s free from impurities, the damage is less severe, allowing for damage control and the possibility of restoring the affected floor.
Greywater Damage
Treading towards harsher aspects, we encounter greywater. Its source can be your everyday appliances like washers or dishwashers. Given its nature, greywater significantly lowers the chances of successful floor restoration.
Blackwater Damage
Next up in this hellbent sequence is blackwater originating from sewage systems or toilets. The contamination, thus, poses not only a restoration challenge but also a severe health risk. This level of damage typically calls for a complete floor replacement.
Saltwater Damage
At the end of the spectrum, we have saltwater, which is technically synonymous with destruction. Its interaction with your floor can lead to acute finish damage, often requiring re-staining or complete replacement.
• Response to Visible Floor Damage
Understanding the visible damage can significantly sway your decision of repair or reinstallation. Commonly observed impairments include crowning, buckling, staining, and cupping, all having varying repair requirements.
– Crowning and Buckling
Both buckling and crowning are instances of profound damage, calling for a complete replacement.
– Staining
On the other hand, staining is a lighter effect that can be remedied with apt repairs and refinishing.
– Cupping
Cupping, however, can cause long-term issues and ultimately might necessitate new flooring.
– Repair vs Replacement Timeline
The timeline of repair can also sway the decision of refurbishing or replacement. Situations involving children, pets, or the desire for faster rehabilitation might push toward professional replacement, particularly in high-traffic areas.
• Weighing in on Repair Expenses
Repairing water-damaged floors can prove a significant investment in terms of both time and money. However, some homeowners see this as an opportunity to upgrade to more robust flooring, guarding against future accidents. The cost comparison should promptly be considered here.
While the cost of repairing can be as substantial as $1000, the estimate for a new installation can usually start as low as $2400.
• Taking the Expert Consultation Route
It’s always wise to seek expert consultation before deciding whether to repair or replace your floor. A professional will weigh the pros and cons and guide you toward the ideal solution, accounting for all factors. I recommend reaching out to an expert soon to review your specific situation.
You might find resources provided by reputable .org or .edu platforms helpful in informing yourself beforehand. The National Wood Flooring Association always has a wealth of reliable information to offer.
In conclusion, approaching water damage can be intricate but navigable with the correct knowledge. Being cognizant of the signs, types of water damage, visible effects, and supporting factors can give you a head start in the game.
The insight presented above is gathered from firsthand experience and extensive knowledge in the field. It’s a guiding light to empower every homeowner to make an informed decision about their floorings future.
Recognizing Water Damage and its Consequences
Identifying water damage in its initial stages is critical to preserve the longevity of your wooden floors and maintain the value of your property.
Water damage to wooden floors can not only cause warping but also promote unwanted mold growth. The resultant mold can prove hazardous to health while reducing property value significantly.
• Importance of Timely Intervention
Addressing water damage urgently increases the chances of saving your wooden floor. This swift action serves to control the situation before it escalates into a more severe issue. It’s essential to react as soon as you identify water damage, even if it seems minor at first glance.
• Engaging Professional Help
In instances of major water disasters, such as a major leak or a flood, you are advised to get in touch with a professional water damage mitigation team within 24 hours.
These trained professionals are equipped with specialized equipment and knowledge to handle such situations more effectively and decrease further damage.
• Identifying Signs of Water Damage
Water damage can manifest itself in several ways. Telltale signs include distinct odors, crowning or discoloration of the wood, staining, buckling, or lifting of nails and floorboards. Another concerning sign is the presence of mold, which requires immediate attention.
• Initial Measures to Manage Damage
Initially, you can attend to swollen areas by laying thick towels to absorb the excess moisture. Moreover, deploying a dehumidifier can go a long way in reducing swelling by removing moisture from the air. Remember, the faster you minimize the residual water, the better the chance of mitigating damage.
• Adhering to a Standard Drying Process
A defined five-step drying process can be very useful in managing water damage to hardwood floors. Remember, the core idea is to remove water and dry the place as effectively as possible. It can be effectively done with a water vacuum, ventilation fans, and dehumidifiers.
• Using Preventive Measures
Tools like mats and rugs are easy and practical preventive measures to stop water from spreading on your wood floors. Choosing a water-absorbing rug goes a long way in quickly addressing spills and preventing water seepage.
• Ongoing Maintenance and Regular Inspection
Regular inspection of your home for possible leaks and ensuring timely sealing of hardwood floors every few years prove beneficial in preventing water damage. It is a small investment of time that can save you substantial repair costs in the future.
• Repairing Engineered Wood Floors
In the case of water damage to engineered wood floors, more substantial repair work might be necessary. This process usually involves replacing the affected boards and refinishing the entire floor to maintain a consistent look.
• Swift Action and Professional Assistance: Keys to Damage Control
Time is your best ally when it comes to dealing with water damage. Acting promptly and bringing in professionals when necessary can effectively salvage your precious wood floors and minimize damage.
For more detailed guidelines on mitigating water damage, check this comprehensive material from the IBHS (Institute for Business & Home Safety).
It’s available at https://www.disastersafety.org/wp-content/uploads/wood-flooring-wtrdam2_IBHS.pdf, a .org site with a wealth of related information on water damage and preventive measures.
Sources of Water Damage to Floors
Water damage to floors is caused by a myriad of sources. This could be a small spill or a large leak and even disastrous burst pipes. Each of these incidents can result in significant water damage that adversely affects the integrity and appearance of your floors.
• Importance of Prompt Action
Prompt action is critical when it comes to water damage. If water isn’t promptly removed and the floors dried, more severe damage may ensue. Thus, it’s best to act quickly on noticing spills or leaks and immediately start drying out the floors.
• Odors Indicating Water Damage
Water damage isn’t always visible immediately. It often manifests as a musty odor which could indicate wet or damaged flooring. This smell is a danger sign and usually signals the need for prompt attention and possible remediation efforts.
• Water Damage: Cupping and Buckling
Manifestations of water damage to floors include cupping and buckling. In these instances, the edges of the floorboards may swell to be higher or lower than the center. This results in an uneven surface which may necessitate complete replacement if not addressed in good time.
• Mold Growth Due to Water Damage
Mold growth on floors is a serious health concern, often being a sign of underlying water damage. If you notice mold, it is recommended to engage professional assistance to adequately deal with this potentially harmful substance.
• Detecting Water Damage
Even without visible signs, sustained dampness can still pose a threat to your floors. Wet spots underneath carpets or rugs could indicate water damage, necessitating deeper inspection to ascertain its extent and devise an appropriate remedy.
• Weak spots Indicating Water Damage
Weak spots on your floor may be a sign of water damage. A thorough assessment of such areas will reveal whether any repairs are needed or if more extensive remedy options are required.
• The Dangers of Standing water
Standing water, especially indoors, can pose a threat to your floors. It increases the potential for damage and may necessitate immediate cleanup and remediation measures.
• Stains Indicating Water Damage
Floor staining may also point to water damage. Dark or black stains are particularly worrisome, in some cases indicating severe damage that might require more complex remediation efforts.
• Physical Signs of Water Damage
Physical signs of water damage include soft spots or mold growth. These signs commonly suggest water damage, especially on hardwood floors.
• Repair and Replacement Options
Sanding could be an option to remedy minor surface water damage. However, if the floor feels weak or soft, it might require replacement.
Multiple repair steps may be necessary, including finding and fixing the source of the water, removing the water, drying the floor, assessing the damage, and resurfacing the entire floor.
• Preventing Water Damage
Prevention is better than cure when it comes to water damage. As hardwood floors can be expensive to replace, it is important to take steps to prevent such damage.
• Engineered Wood Flooring: A Solution
Engineered wood flooring, with its increased water resistance, can be a solution when dealing with potential water damage. However, these types of floors can still be susceptible to damage over time.
• Protective Coating for Floors
The protective coating can be applied on engineered wood floors, adding durability and enhancing water resistance. This can help significantly in preventing water damage.
In conclusion, quick action, constant vigilance, and a preventative approach are key to keeping your wooden floors looking their best. More detailed information on water damage and floor protection can be found on the National Wood Flooring Association’s website, a non-commercial and reputable source.
Recognizing and Addressing Mold Growth on Wood Floors
• Understanding Mold Growth
Mold can start growing within only 24 to 48 hours on household materials. It particularly targets organic material with a moisture level of 16% or more. This presents an especially significant risk in homes with high humidity or environments prone to flooding or water leaks.
• Dangers Lurking Beneath
The environment beneath a water-logged wood floor often provides the perfect breeding ground for mold. This combination of moisture, temperature, and dust layers can invite a host of other problems, too, including structural damage to the home.
• Laminate vs. Hardwood
Contrary to common perception, laminate floors aren’t as resilient as real wood or hardwood floors when faced with moisture or flooding issues. Their relatively low tolerance for moisture often means they need to be comprehensively replaced after a flood.
• Effect of High Moisture on Wood Floors
Wood floors typically have a moisture content ranging between 6% and 12%. However, when faced with a flood, the moisture content can soar to a concerning 40%. This can cause nails to lift, glue to release, and tongue and groove floors to buckle or cup.
• Spotting Signs of Water Damage
Cupping, popping, or cracking in your floors could be an indication of water damage to the subfloor. In such a scenario, replacement of the entire subfloor may become necessary to avoid further damage.
• Health Risks Posed by Mold
It’s important to remember that even dormant mold spores can pose significant health risks. These dried spores contain the same allergens and toxins as actively growing mold, potentially triggering allergies or causing respiratory issues.
• The Risks of Leaving a Wet Wood Floor Untreated
Leaving a wet wood floor unattended can be detrimental. Existing mold spores in the environment simply need access to a moisture source to grow and proliferate, turning your home into a veritable mold haven.
• Drying Hardwood Flooring in Place
Fortunately, addressing a soaked wood floor isn’t always a matter of complete replacement. It is, in fact, possible to dry hardwood flooring in place within the first 24 hours using specialized drying equipment. Given ideal conditions, the drying process takes up to seven days.
• Determining Whether to Dry or Replace
The decision to dry or replace the floor necessitates a thorough inspection of the extent of water damage. Discussion with your homeowner’s insurance company can also aid in making the decision more informed and cost-effective.
• Salvaging Hardwood Floors
Many homeowners have effectively salvaged their hardwood floors using advanced drying equipment and professional expertise.
While such an effort can help save on replacement costs, it’s essential to ensure that the measure completely eradicates the risk of mold growth for maintaining a healthy household environment [^1^].
The Threat of Mold Growth on Hardwood Floors
It’s a common misconception that hardwood floors are completely impervious to water damage and mold growth. But that’s not entirely true.
Left unchecked, a high level of moisture can lead to the swift growth of mold on hardwood surfaces. It usually begins in about 48-72 hours if moisture levels are exceptionally high. This level of springboard speed doesn’t leave much room for error or delay.
• Why Swift Professional Intervention is Crucial
Upon discovery, it is advisable to prompt professional attention. Why so? The earlier you can get professional help, the more significant the chances of averting further harm. Mold is insidious; it moves rapidly, damaging anything it infests–including your hardwood floors. This makes time a critical factor in the effort to salvage the floors from large-scale destruction.
• Laminate Floors: The Higher Risk
Fastidious attention is needed, particularly if your floors are laminated. Laminate floors, contrary to common beliefs, tend to be more vulnerable to water damage.
This makes them a high-risk category where water-related damage is concerned. A laminate floor subjected to water damage can reach a point where it is beyond salvage — with little to no scope for repair.
• Factors Affecting Hardwood Floor Salvage Potential
Several factors determine the potential to salvage hardwood floors after water damage or mold infestation. Two of these critical factors are the type of wood used and the amount of moisture in the floors.
Different kinds of wood have varying degrees of resistance to moisture and mold. Therefore, understanding this can help in assessing the salvage potential of the floor in question.
• The Value of Expertise: Certified Restoration
In the face of such complex scenarios, the experience and expertise of a professional can be indispensable.
Certified Restoration, for instance, is a company that has been at the forefront of water damage and mold restoration for over two decades. They’ve been steadfast in providing homeowners the assistance they need during such stressful times.
• Insurance Claims and Restoration Plan
Insurance claims can be a daunting process for many homeowners. However, with a company like Certified Restoration on your side, this process becomes much simpler and more manageable.
As part of their services, they provide thorough assistance with insurance claims. But that’s not all; they also help determine the most suitable course of action for drying or replacing the hardwood floors.
• Advanced In-Place Drying Equipment
Certified Restoration has made significant advancements in drying technologies thanks to its in-place drying equipment. With this, they’ve been able to save hundreds of floors across San Diego County, proving the efficacy of their approach.
Advanced in-place drying not only removes moisture from floors faster but also preserves the integrity of the wood during the process.
• Always Opt for Professional Consultation
When you notice signs of water damage or mold growth on your hardwood floors, don’t hesitate or attempt to manage it by yourself, it is strongly advised to contact professionals at once.
Companies like Certified Restoration are equipped with a team of experts who can help you navigate through this ordeal. They can properly assess the situation and provide the best possible solution.
You could also learn more about mold prevention from trusted resources like the Environmental Protection Agency (.gov) website.
Be it hardwood, laminate, or any other form of flooring, the threat of water damage and mold can have serious consequences. Remember, time is of the essence and immediate intervention is crucial.
When faced with such scenarios, consider reaching out to experts who possess the necessary tools, techniques, and expertise to restore the flooring to its former glory.
Moisture and Hardwood Floors
The harmful impacts of moisture on hardwood floors are often overlooked. Moisture seeping into the cracks of these floors creates an environment conducive to the growth of mold. Mold predominantly forms wherever there’s moisture and organic material, such as food.
• Health Risks of Mold
The presence of mold under hardwood floors isn’t just an aesthetic issue. It poses serious health consequences for occupants.
Exposure to mold can cause a variety of health problems, including allergies, asthma attacks, and other respiratory conditions. Visit the Center for Disease Control and Prevention for a more detailed discussion on the potential health effects of mold exposure.
• Preventing and Eliminating Mold Growth
Much can be done to prevent mold growth in hardwood floors. Enhancing ventilation and reducing moisture are crucial factors to consider.
A well-ventilated space reduces the likelihood of mold growth. This can be achieved by simple practices like opening windows, allowing fresh air to circulate and dry out the space, consequently preventing moisture buildup.
In locations with humid conditions, just circulating fresh air may not be enough. A dehumidifier can prove to be an effective tool. It extracts moisture from the air, maintaining a dry environment that isn’t conducive to mold growth.
• Stepwise Mold Removal
Should you identify mold on your hardwood floors, act promptly to prevent further growth and potential health risks. Here’s a simple stepwise method that I recommend:
Step 1. Mix equal parts of white vinegar and water. Cleaning the floor with this natural disinfectant helps remove mold effectively. Vinegar penetrates porous materials and can kill both visible and hidden mold spores.
Step 2. While wearing a mask and gloves, wipe the floor carefully with a paper towel soaked in the vinegar-water solution. This helps to avoid inhaling mold spores, which can have harmful effects on your health.
Step 3. Once the floor is dry, vacuum it thoroughly to ensure it’s clean and mold-free. This helps to remove any spores that might have been left behind.
• Mold Damage: When to Seek Professional Help
Sometimes, in cases of severe mold damage, simple home remedies are not enough. You may need to seek professional help from a mold removal specialist.
They possess the right tools and knowledge to handle extensive mold growth and can ensure mold is completely eliminated and doesn’t return in the future.
Remember, timely action can make all the difference. With hardwood floors, you’re dealing not only with surface-level mold but potentially with mold that has permeated down to the subfloor.
Prompt, effective action can help mitigate health risks and prevent further structural damage to the floor. Learn more about this from the Environmental Protection Agency.
Take the preventative measures mentioned above, and keep your eye out for signs of mold on your hardwood floors. Remember, it’s always better to prevent mold growth than to combat an infestation later.
• Identifying Water Damage: The Warping of Floorboards
When wood comes into prolonged contact with water, it starts to absorb this fluid, causing it to bloat and soften. A consequence of this absorption and resulting softness is that your floorboards often start pushing against each other.
The unexpected pressure results in warping, a condition where these boards take on hump-like distortions. Overcrowding and expansion ultimately disfigure your floor structure, betraying the callous hand of water damage.
• The Mystery of the Changed Colors: A Signature Stamp of Water Damage
If you’ve ever noticed unsightly stains or dark patches on your floors, these discolorations could be a result of water damage. The absorption, evaporation, and resultant displacement of water in wooden floors often leave behind mineral deposits and salts. These remnants cause staining and discoloration.
Moreover, your floor’s finishing may also react with the water, leading to streaks and rings varying in color, often white. This watery ballet paints a vivid picture, allowing you to identify water damage through color discoloration.
• Treacherous Fungi: The Growth of Mold and Mildew
The most dangerous consequence of water damage isn’t physical but biological. Dampness in wood leads to the growth of harmful fungi – mold and mildew.
These organisms find havens, especially on surfaces with limited sunlight exposure. Mold and mildew thrive in these damp, dark areas, and growth is even more likely if water damage has been left unattended in the past.
This fungal growth often manifests as unsightly black patches on the floor, while mildew can have a fuzzy white appearance. A comprehensive guide for dealing with mold and mildew can be found on the United States Environmental Protection Agency website.
• Engineered vs. Solid Wood: The Battle of Water Resistance
Engineered wood flooring has a higher resistance to water as compared with solid wood floors. However, extended contact with water can compromise even this resistance. Continuous exposure to water makes the engineered wood’s water-resistant barrier weaker, making it more susceptible to damage over time.
• From the Forest: Binding Strength with Elegance
One of the leading manufacturers of engineered hardwood flooring in the USA, From the Forest, offers long-lasting protection against water damage. Their product range includes durable engineered wood floors coated with an industrial-grade sealant.
This coating reinforces the natural water resistance of engineered wood, safely preventing water damage for longer periods.
• With Experience Comes Wisdom: Personal Recommendations
Keeping the disastrous consequences of water damage in mind, Id recommends regular inspection of your wooden flooring. On spotting the initial signs like warping, discoloration, or fungal growth, some immediate maintenance can save your wooden floors from extensive damage.
Investing in quality engineered wooden floors such as those by From the Forest can also be a worthwhile consideration. Their industrial-grade coating provides an additional defense line against water damage. The aesthetic and functional benefits of these floors make them a prudent choice.
• To Summarize
Water damage to wood flooring is much more than just an eye sore. It can lead to health hazards like mold and mildew, making early detection crucial.
Regular inspections and choosing quality products can significantly extend the life of your wooden floors. Discovering signs of water damage should trigger immediate remediation actions to avoid any long-term effects.
• Importance of Prompt Action in Mitigating Water Damage to Wood Floors
When it comes to repairing water damage to wood floors, acting swiftly can greatly reduce the severity of damage. You should make it a priority to repair the affected area immediately to avoid escalating the damage.
• Enlisting Professional Help for Major Water Disasters
While you may be able to handle minor water spills on your own, severe water disasters require the input of professionals. If your wood floors have been badly damaged by water, I recommend involving a professional water damage mitigation team within the first 24 hours.
Such a team will have the necessary expertise and equipment to salvage your floors and mitigate further damage. The Water Damage Advisor is an invaluable resource to find reliable professionals in your vicinity.
• Recognize Signs of Water Damage
Water damage can manifest in several ways on your hardwood floors. Odors emanating from beneath the surface of the wood, along with staining, discoloration, and crown formation, are signs of water damage.
Other signs include lifting nails and the dreaded mold growth. Recognizing these symptoms early can help you act promptly and salvage your hardwood floors.
• Dealing with Swelling and Bulging in Water-damaged Wood Floors
Water has an unsettling effect on the wood, causing it to swell and bulge. In such cases, using thick towels to absorb the excess moisture and using a dehumidifier can help return the wood to its original state.
My experience has shown that this combination of methods can greatly reduce the extent of the damage.
• Five-Step Drying Process for Water-damaged Hardwood Floors
When dealing with water damage to your hardwood floors, a proven five-step drying process can aid in minimizing its impact and preventing any further damage.
The process involves removing excess moisture, dehumidifying the affected areas, ventilating, checking for mold, and finally, repairing any damages.
• Utilizing Water Vacuums for Efficient Water Removal
A water vacuum is a highly efficient tool used for pulling water out from wood floors. Drawing upon my personal experiences with water-damaged spots, I can attest to the efficacy of these vacuums in mitigating damage and promoting quicker drying.
• General Protection Measures against Water Damage
Laying down rugs and mats throughout the house can absorb minor spills and help protect your wood floors. Regular inspection for leaks and potential sources of flooding is likewise important. Sealing the hardwood floors every few years can also protect your wood floors from potential water damage.
• Dealing with Water Damage on Engineered Wood Floors
In the case of engineered wood floors, the best course of action for water damage is to replace the affected boards and refinish the floor. This helps maintain the uniformity of the flooring while effectively mitigating water damage.
• Professional Help for Severe Water Damage
In severe cases of water damage, professional assistance will be necessary. Experts can provide invaluable guidance and perform the necessary repairs to save your wood floors.
Having worked as a professional in this sphere for many years, I can certainly vouch for the fact that professional help can make a world of difference when it comes to dealing with serious, pervasive damage.
Understanding Water Damage to Hardwood Floors
Water damage to hardwood floors is a common issue faced by homeowners living in areas prone to hurricanes and floods.
The excess moisture absorbed by the wood can cause warping, discoloration, and rot. Wood, being a porous material, can retain moisture leading to an environment conducive for the growth of mold and mildew.
– Importance of Immediate Restoration
It is of great importance to promptly start the restoration process once the damage is noticed. Irrespective of the severity of the damage, immediate steps will help prevent the proliferation of mold and mildew. The longer water sits on your wood floor, the more it soaks in, exacerbating the damage.
– Removing Surface Water
To initiate the drying process, use a wet-dry shop vacuum to remove any standing water. Put the vacuum in ‘wet mode’ to suction up as much water as possible. It’s pivotal in the restoration process as it greatly reduces the moisture levels on the flooring surface.
– Cleaning the Affected Area
It is recommended to scrub the entire floor area affected by water, which includes the baseboards and stairs, using a mixture of mild detergent, disinfectant, and clean water.
This step will not only eliminate the surface dirt but also kill bacteria or any other contaminants that might have been left behind by the flooding.
– Treating Mold
If mold has formed, it is best to address it head-on by using a mixture of TSP (Tri-Sodium Phosphate) or a TSP substitute mixed with water. TSP is a heavy-duty cleaner that will effectively kill mold and reduce the possibility of it returning. Follow the manufacturer’s instructions for the right dilution.
– Natural Drying
Post-cleaning allows the floor to dry naturally by keeping the windows open and maintaining fans to create good air circulation. This non-invasive drying method will help in drying out the floor gradually, thereby reducing the risk of further damage.
– Avoid Heat Application
Steer clear of applying heat to the flooring as this can cause the wood to dry out too fast, leading to cracking or splitting. Contrary to common belief, heat can sometimes exacerbate the situation by causing irreversible damage to the wood.
– Sanding to Smooth Out
It might become necessary to use a drum or orbital sander to sand down minor high spots in the wood floor and address cupping when the edges of the boards rise higher than the center due to water absorption.
– Treating Painted Floors
If your hardwood flooring is painted and mold has reached underneath the paint, it is recommended to use an abrasive cleaner or a TSP-water solution mixed with bleach. This is essential as it aids in removing mold growth.
– Laminate Flooring and Water Damage
Laminate flooring, unlike hardwood, is highly susceptible to water damage. The composite material used in laminate flooring reacts adversely to strong moisture content, leading to swelling and distortion. Unfortunately, once soaked, laminate flooring usually needs to be replaced.
Follow these steps meticulously and you increase the chances of restoring your wood flooring to its former glory. Don’t hesitate to seek professional advice if the damage seems too extensive.
In cases of extensive or severe damage, I highly recommend referring to guidelines provided by the US Government’s Office of Housing and Urban Development, found here, for a detailed clean-up plan.
Remember, the faster you respond, the lesser the damage and the easier the restoration process will be.
• Understanding the Process of Cupping in Wood Floors
Cupping is an unfortunate and somewhat common occurrence that can affect your wood flooring. It’s a process that occurs when the unfinished underside of the flooring boards absorbs more moisture relative to the top side.
The result is an imbalance in the moisture levels on different sides of the board. The bottom side expands more than the top, causing a deformation on the floor surface, which presents a concave or “cupped” appearance.
You may ask why this happens. It can be due to a plumbing leak, a high humidity level in the house, or whenever water is left standing on the wood floor for a prolonged time.
To learn more about the topic, you can check out this source at the University of Kentucky College of Agriculture, Food and Environment.
• Drying Out Water Damaged Floors
If your wood floor has suffered water damage, it is crucial to dry them properly. This can be a time-consuming and meticulous process, requiring a significant amount of time and effort.
Standing water should be removed promptly, and the area should be thoroughly dried with fans, heaters, or professional drying equipment.
Even after the surface seems dry, it’s beneficial to carry out a moisture test. This test can help determine whether the moisture levels in and beneath the floorboards have returned to normal.
This test is best conducted by a flooring contractor who has the necessary tools and understanding to interpret the results accurately. The contractor can also recommend further steps toward fixing or replacing the damaged wood floor.
• Replacing Severely Damaged Wood Floors
In some situations, the damage to the wood floors can be so severe that it’s beyond repair. An extreme case would be when the wood floorboards peak up (also known as crowning) significantly off the floor due to intense swelling, indicating extensive water damage.
When crowning happens, repairs are often not enough to restore the floor. Replacing the entire floor becomes a necessity to restore the conditions back to normal. It’s a costly and time-consuming process, but you will have the assurance of a secure, safe, and stable flooring surface.
• Prompt Cleaning of Water Spills
Cleaning up any water spills or pooled water as soon as they occur can significantly reduce potential damage to your flooring. Whether it’s from a knocked-over glass, a wet dog dashing in, or a faulty pipe, promptly removing the water can save your floor from unnecessary damage.
This approach can also prevent issues like cupping, crowning, or extensive water damage from happening at all. This means fewer problems to deal with, less stress, and more overall satisfaction with the condition and appearance of your wood flooring.
• Properly Maintaining Your Wood Floors
Preventing water damage can be as simple as keeping your floors in good repair. Ensure to steer clear of applying excessive water or cleaning solution during cleanups. Use cleaning methods and products that are specifically designed for wood floors.
Through proper maintenance and cleaning, you preserve the strength of your flooring and extend its longevity. Moreover, you can ensure that your flooring continues to bring you the beauty and warmth that wood floors are known for.
• Regularly Check Plumbing to Prevent Water Damage
Preventing water damage also involves cross-checking plumbing and fixtures routinely. This approach can help detect water leaks and fix them before they cause serious damage to your flooring.
If you’re going to be away from home for some days, consider having a neighbor, a relative, or a professional check on your house. They can identify any potential plumbing or water leakage issues that crop up in your absence.
Ultimately, preventing water damage saves costs, time, and stress that come with addressing the damage and restoring the flooring.
Regular checks and adequate maintenance can go a long way in preserving the condition of your wood floors. Remember, the sooner you catch a problem, the easier and less expensive it will be to fix.
With these points in mind, maintaining excellent wood flooring free from water damage is achievable. Despite the potential problems, if properly managed, your wood floors can stay beautiful, strong, and last for generations.
Spotting Water Damage in Wood Flooring
• Deformation in Wood is a Red Flag
One of the most apparent signs of water damage is warped floorboards. This physical distortion happens when wooden floors absorb water, causing the material to expand. As the boards swell, they push against each other, leading to a raised and uneven surface.
Knowing how to spot warped floorboards could save you from extensive damage and costly repairs. The National Wood Flooring Association provides guidance on how to identify and tackle flooring issues effectively.
• Discoloration: A Warning Sign of Water Damage
Another clear sign of water damage is color discoloration. Water often holds varying types of minerals or salts that it deposits on the wood as it evaporates.
These shadowy patches or stains thoroughly mar the wood floors’ otherwise pristine appearance. This unquestionable sign of water damage should be checked often as it can be an early detection tool against underlying water issues.
• Mold and Mildew: Fungal Alarms of Water Damage
Mold and mildew growth is another particularly unfortunate indication of water damage. When wood becomes damp, it creates an ideal environment for these fungi.
Characteristic signs of mold and mildew include black splotches, white fuzzy patches, or a persistently musty smell. The National Institute of Health offers an information comprehensive guide on managing simple to complex mold infestation cases in your home.
• Risks Even for Engineered Wood Flooring
It’s essential to keep in mind that while engineered wood flooring is more resilient against water compared to other kinds, excessive water exposure can still undermine its water-resistant barriers. To prevent this, homeowners need to be mindful of potential leaks and address them early.
• Durability with From the Forest Flooring
From the Forest is a renowned engineered hardwood flooring manufacturer based in the USA, boasting a lineage of lasting engineered wood floors.
With their industrial-grade coating, these floors offer an extra layer of protection against water damage. From personal experience, I recommend their products for their combined durability and aesthetic appeal.
• The Defense Against Water Damage
By choosing the right types of flooring, having prevention methods in place, and being savvy about spotting water damage signs, homeowners can maintain their homes in prime condition.
These practical steps will keep your home safe and free from potential water damage headaches. Implementing effective prevention measures and responding swiftly to early signs of water damage is key to long-lasting wood flooring.
Quick Response to Water Damage
When your hardwood floors sustain water damage, swift action is critical. It’s important to remove the water as soon as possible to minimize the extent of the damage. Water sitting on your wooden floor for longer hours can cause irreversible harm, such as structural weakening and staining.
• Dry Before Assessment
Once the water has been removed from the area, drying the hardwood floor thoroughly is a crucial next step. This is because moisture that remains trapped under the wooden surface can lead to further issues such as mold growth and rotting.
Additionally, a dry surface allows for a more accurate assessment of the extent of the damage and aids in the planning of essential repairs.
• Resurfacing for Uniformity
In cases where water damage to hardwood floors has occurred, experts often recommend resurfacing the entire floor. This helps to ensure a cohesive look across your floor, with consistent color and texture, thus eliminating the ‘patchy’ effect that may appear when only the damaged sections are resurfaced.
• Identifying Water Damage
High levels of moisture can produce bad odors and lead to cupping and buckling in hardwood floors. Other distinct signs of water damage include mold growth, conspicuous wet spots, and weak spots on the floor.
Being able to identify these signs promptly allows for appropriate measures to be taken to halt further damage.
• Diagnosis: Finding the Source
Identifying and remedying the source of the water damage is a critical step in the recovery process. Leakages, humidity, or floods could be responsible. Addressing the root cause will protect against future instances of water damage.
• Analyzing Damage Severity and Type for Appropriate Action
When deciding whether to repair or replace water-damaged hardwood floors, two primary factors must be considered: the severity of the water damage and the type of water involved.
Clean water from sources like rain or leaks may require less intensive treatment than greywater, blackwater, or saltwater, which can pose higher risks due to potential contaminant content.
As a homeowner, reviewing your insurance coverage after water damage to your hardwood floor is important. This will help you understand whether repairs or replacements will be covered by your policy, thereby informing your overall response strategy.
• Recognizing the Need for Replacement
In certain instances, visible damage to your hardwood floor may necessitate replacement rather than repair. Signs such as crowning, buckling, staining, or cupping could indicate that the water damage to your floor is too severe for simple repairs.
• Considering the Repair Timeline
The timeline for repair or replacement should also be recognized. This is especially important if there are high-traffic areas in the home or potential dangers to children and pets from the damaged floor. Swift action is often required to minimize disruption and risk.
• The Replacement Versus Repair Debate
Ultimately, homeowners should compare the cost and effort involved in repairing the water-damaged hardwood floors against the option of a fresh start with new floors. In some situations, replacement might be the most time and cost-efficient solution.
• Professional Consultation
For comprehensive and effective water damage control, professional consultation is advisable. Flooring experts would provide tailor-made advice for your unique situation, making it easier to decide on repair or replacement, understand the potential costs, and manage the entire recovery process.
In essence, their guidance is invaluable in navigating the challenges of water-damaged hardwood floors.
– Act Quickly – The Key to Minimizing Water Damage to Hardwood Floors
Understanding the need for prompt action is vital in dealing with any water damage, particularly in the context of hardwood floors. The faster water is removed and the area is dried, the less severe the damage will be, and the possibility of rectifying said damage becomes greater.
– Identifying Signs of Water Damage on Hardwood Floors
To effectively tackle water damage, one should be aware of its common signs. These include an abnormal odor, a noticeable crowning or bulging of the wood, staining, discoloration, and buckling.
A significant sign of water damage is the growth of mold, visible to the naked eye, and can lead to health problems if left unchecked.
– Fixing Swollen Wood Floors
Swollen hardwood floors are a common side effect of water intrusion. This can be remedied by placing thick towels over the affected area, running a dehumidifier, and using an upright vacuum over the swollen spots to help draw out the excess moisture.
– A Five-Step Drying Process
A tried and true method to manage water damage is this five-step drying process.
- Locating and Cutting Off the Water Source: The first step should always be to identify and stop the source of the water.
- Removal of Wet Objects: Items soaked with water need to be removed immediately as they can harbor a conducive environment for mold growth.
- Drying Thoroughly: It’s crucial to dry the hardwood floors fully to prevent further damage.
- Cleaning Floors: This can be done using a water vacuum, taking advantage of proper ventilation, and running a dehumidifier to stave off remaining moisture.
- Checking for Mold Growth: This is a critical step in ensuring the area is free from potential health hazards.
– Protecting Against Water Damage
Prevention is always better than cure. One effective way is laying down mats and rugs to protect your hardwood flooring. Regular inspections are essential to catch any water damage signs, and sealing your hardwood floors adds an extra protective layer.
The National Wood Floor Association provides excellent resources and tips on how to perform regular maintenance and inspection of hardwood floors.
– Addressing Water Damage under Engineered Wood Floors
When engineered hardwood floors are affected, the process might become a bit tricky. Often, if the water damage is severe, replacing the affected boards and refinishing the entire floor is the best course of action.
– Seek Professional Help
In instances where the damage is extensive, seeking professional help from companies like Jenkins Restorations is an optimal solution. Their expertise can prove invaluable in repairing water damage, reducing long-term impact, and restoring your home to its original state.
– Common Questions on Hardwood Floor Water Damage
There are several frequently asked questions regarding hardwood floor water damage. These include how to treat water-damaged wood floors, remove old water stains, replacement of wet subfloor, and floor replacement in severe cases.
Additionally, issues on mitigation, prevention, and recovery techniques, including how to refinish hardwood floors after water damage, are common queries.
In conclusion, water-damaged hardwood floors can be a challenging issue to face. However, with a rapid response, proper drying, preventative measures, and the right professional help, it is possible to minimize damage and maintain the longevity and appeal of your hardwood floors.