How to Restore Water-Damaged Hardwood Floors. What Pros Say
Finding water standing on your hardwood floor can be heartbreaking and even scary. You may not know what to do or where to turn to get the help you need with your repairs. If you notice that your wooden floors are water-damaged, it’s a good idea to call a professional for help.
How to Restore Water-Damaged Hardwood Floors
The best way to restore water-damaged hardwood floors is to ensure they are completely dry, including the subfloor. Assess the damage, and depending on the severity, repair the damaged section. There are various methods to replace floors that are damaged by water. I recommend always refinishing the entire floor after the repair.
In this blog post, I will explain in more detail the steps you need to follow to restore your water-damaged hardwood floors. I will also answer some questions I often get, like how long it takes before you can see the damage. And how long it takes for a hardwood floor to dry.
Contents
- 1 Damaged Hardwood Floors Treatment
- 2 How Long Does It Take For Hardwood Floors To Show Water Damage?
- 3 How Long Does It Take Hardwood Floors To Dry After Water Damage?
- 4 Can Water Ruin A Hardwood Floor?
- 5 Do Water Damaged Hardwood Floors Need To Be Replaced?
- 6 Identifying and Stopping the Water Leak
- 7 Water Damage to Wood Floors
- 7.1 • How Water Finds Its Way In
- 7.2 • Extracting Surface Water
- 7.3 • Scrubbing to Remove Dirt and Organics
- 7.4 • Addressing Mold Issues
- 7.5 • Proper Drying Methods
- 7.6 • Leveling and Smoothening
- 7.7 • Dealing with Heavily Cupped Wood
- 7.8 • Mold Under Painted Surfaces
- 7.9 • Special Note on Laminate Flooring
- 7.10 • Timely Response is Key
- 7.11 • Dealing with Severe Water Damage
- 7.12 • Preventing Future Water Damage
- 7.13 • Considering Professional Help
- 7.14 • The Impact of Water Damage on Hardwood Floors
- 7.15 • The Speed of Water Damage on Hardwood Floors
- 7.16 • Major Water Disasters and Your Hardwood Floors
- 7.17 • Recognizing Signs of Water Damage on Hardwood Floors
- 7.18 • How Water Ruins Hardwood Floors
- 7.19 • Addressing Water Damage on Hardwood Floors
- 7.20 • Cleaning Water-Damaged Wooden Floors With a Vacuum
- 7.21 • Proactively Protecting Your Hardwood Floors From Water Damage
- 7.22 • Dealing With Engineered Wood Flooring Water Damage
- 7.22.1 – Addressing the Source: Stop the Leak
- 7.22.2 – Mitigate Damage: Immediate Cleanup Actions
- 7.22.3 – Enhance Drying: Ventilation and Dehumidifiers
- 7.22.4 – Damage Assessment: Evidence of Harm
- 7.22.5 – When to Hire a Professional
- 7.22.6 – Uniform Repair: The Benefit of Refinishing the Entire Floor
- 7.22.7 – Early Signs of Water Damage
- 7.22.8 – Intriguing Warping Damage
- 7.22.9 – Salvaging Less Damaged Floors
- 7.22.10 – Understanding Subfloor Damage
- 7.22.11 – Prompt Repairs: Timing Matters
- 7.22.12 – Replacement vs Salvage: The Right Strategy
- 7.22.13 – Spot Damage: Partial Replacement
- 7.22.14 – Professional Assessment: Necessity or Luxury?
- 8 Locating and Addressing the Source of the Water Leak
- 8.1 • Rapid Removal of Standing Water
- 8.2 • Thorough Drying of Floors
- 8.3 • The Threat of Mold Growth
- 8.4 • Consulting a Professional for Repairs
- 8.5 • Wood Refinishing After Repairs
- 8.6 • Quick Identification of Water Damage
- 8.7 • Drying Time Frame
- 8.8 • Understanding the Impact of Water on Hardwood Floors
- 8.9 • Not All Floors Need Replacement
- 8.10 • Importance of Quick Action
- 9 Water Penetration in Wood Floors
- 9.1 • Fast Action with Shop Vacuum and Squeegee
- 9.2 • Deep Cleaning with Mild Detergent
- 9.3 • Managing Mold with Trisodium Phosphate
- 9.4 • Optimal Drying Process
- 9.5 • Managing Cupping or Convex Floorboards
- 9.6 • Mold Issues under Painted Floors
- 9.7 • Vulnerability of Laminate Flooring
- 9.7.1 – Mold Growth and Water Damaged Floors
- 9.7.2 – Finding the Root Cause of Water Damage
- 9.7.3 – Eliminating Surface Water
- 9.7.4 – Importance of Proper Floor Cleaning
- 9.7.5 – Necessary Drying Equipment
- 9.7.6 – Promoting Airflow
- 9.7.7 – Addressing Cupping issues using Sanding
- 9.7.8 – Face Nailing for Severely Cupped Areas
- 9.7.9 – The Role of Professionals in Sanding
- 9.7.10 – Presence of Mold under Paint
- 9.7.11 – Prevention and Routine Maintenance
- 9.7.12 – Opting for Professional Water Damage Restoration
- 9.7.13 – Helpful Resources
- 9.7.14 – In Conclusion
- 9.7.15 – Importance of Timely Response to Water-Damaged Hardwood Floors
- 9.7.16 – Identifying Water Damage on Hardwood Floors
- 9.7.17 – The Impact of Water on Hardwood Floors
- 9.7.18 – Steps to Repair Water-Damaged Wood Floors
- 9.7.19 – Utilizing a Water Vacuum for Efficient Water Removal
- 9.7.20 – Precautionary Measures for Preventing Water Damage on Floors
- 9.7.21 – When to Seek Professional Help for Water Damage
- 9.7.22 – Restoration and Replacement in Extreme Cases
- 9.7.23 – Common Inquiries on Wood Floor Water Damage
- 9.8 • Documenting Water Damage on Wood Floor for Insurance Claims
- 9.9 • Identifying Signs of Cupping and Crowning
- 9.10 • Making the Tough Decision: Repair or Replace?
- 9.11 • Extracting Remaining Water from the Floor
- 9.12 • Cleaning Affected Areas to Prevent Mold Growth
- 9.13 • Ensuring Thorough Drying
- 9.14 • Preparing Floorboard for Repairs
- 9.15 • Dealing with Severely Cupped Floorboards
- 9.16 • Applying Stains or Paints to Treat Mold
- 9.17 • Consulting a Professional
- 9.18 • Regular Maintenance and Water Exposure Management
- 10 Understanding Cupping in Wood Floors
- 10.1 • The Point of No Return for Cupped Floors
- 10.2 • Three Ways to Save a Water-Damaged Floor
- 10.3 • Avoid Sanding Wet and Cupped Floors
- 10.4 • Hire a Pro for Floor Sanding and Refinishing
- 10.5 • Applicability of Homeowners Insurance
- 10.6 • Personalized Assistance for Floor Repairs
- 10.6.1 – Assessing Water Damage on Hardwood Floors
- 10.6.2 – Dealing with the Source of Water Damage
- 10.6.3 – Water Extraction must be Prompt
- 10.6.4 – Allow the Floor to Dry Before Checking the Damage
- 10.6.5 – Checking for Mold Growth
- 10.6.6 – Hiring a Professional Might Be Necessary
- 10.6.7 – Refinish your Entire Hardwood Floor
- 10.6.8 – Subfloor Damage
- 10.6.9 – Replacing Water Damaged Floors May Be Required
- 11 Identifying Signs of Water Damage on Wooden Floors
- 12 The Primary Cause of Buckling in Hardwood Flooring: Excess Moisture
- 12.0.1 • Improper Installation and its Contribution to Hardwood Floor Buckling
- 12.0.2 • Repairing Minor Buckling in Hardwood Floors
- 12.0.3 • How to Handle Severe Buckling Damage
- 12.0.4 • Why Hire a Professional for Tongue-and-Groove Floor Repairs
- 12.0.5 • Preventing Buckling in Hardwood Floors
- 12.0.6 • Express Flooring: Hardwood Flooring Experts in Arizona
- 12.0.7 • The Bottom Line
- 13 Experiencing Hardwood Floor Damage Due to Moisture
- 13.1 • Visible Floor Damage Signs: Raised Joints and Gaps
- 13.2 • Worries: Will the Swelling Revert to Normal?
- 13.3 • Seeking Speedy Solutions: Drying Out the Floor
- 13.4 • Determining the Shrinkage Process Completion
- 13.5 • Addressing Water Damage: Drying, Sanding, and Finish Repair Options
- 13.6 • Evidence-based Steps to Control Water Damage
- 13.7 • Dealing with Water Damage: Recommendations
- 13.8 • Last Thoughts on Hardwood Floor Water Damage
- 14 Impact of Water Damage on Wood Floors
- 14.1 • Identifying Signs of Water Damage on Wood Floors
- 14.2 • Scope of Damage Based on Water Exposure
- 14.3 • Immediate Steps post Water Leak or Flood
- 14.4 • Drying Process post Water Infiltration
- 14.5 • Implication on the Subfloor
- 14.6 • Waterproofing Solutions
- 14.7 • Potential Replacement of Floors
- 14.8 • Conclusion
- 14.8.1 – Warping Due to Water Damage on Hardwood Floors
- 14.8.2 – Discoloration and Stains on Hardwood Floors
- 14.8.3 – Mold and Mildew Growth on Hardwood Floors
- 14.8.4 – The Reliability of Engineered Wood Flooring
- 14.8.5 – Choosing Durable Wood Flooring with an Industrial-Grade Coating
- 14.8.6 – Prevention of Water Damage on Hardwood Floors
- 15 Spotting Water Damage Early on Hardwood Floors with Restorerz Emergency Services
- 16 Damaging Effects of Water on Hardwood Floors
- 16.1 • Importance of Quick Action against Water Spills
- 16.2 • Use of Specialized Drying Equipment
- 16.3 • Recognizing the Signs of Water Damage
- 16.4 • The Risk of Prolonged Water Accumulation
- 16.5 • Considerations for Repairing or Replacing Water-Damaged Hardwood Floors
- 16.6 • Repair Options Based on the Degree of Damage
- 16.7 • Solid Hardwood Floor Repair Options
- 16.8 • Importance of Refinishing for Aesthetic Uniformity
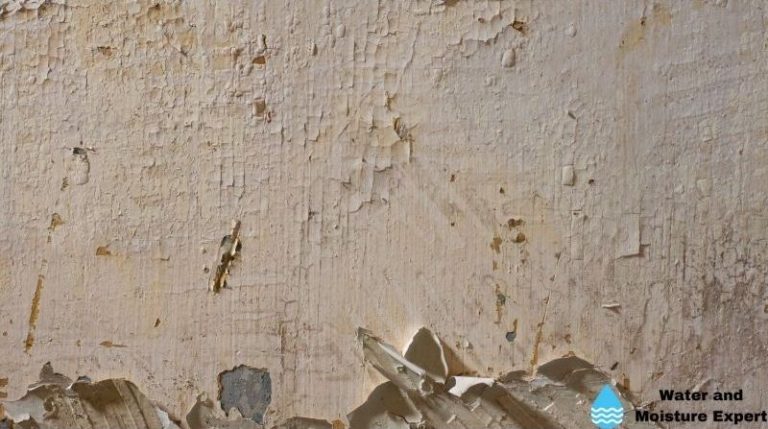
- 16.8.1 – Identifying Water Damage on Wood Floors: Rotted and Soft Floorboards
- 16.8.2 – Swollen Wood and Its Hazards
- 16.8.3 – The Cupping Phenomenon on Wooden Floors
- 16.8.4 – Rapid Mold Development in Water-Damaged Areas
- 16.8.5 – Common Causes of Water Damage to Wood Floors
- 16.8.6 – The Art of Preventing Water Damage
- 16.8.7 – Trusting Dry Force for Water Damage Restoration
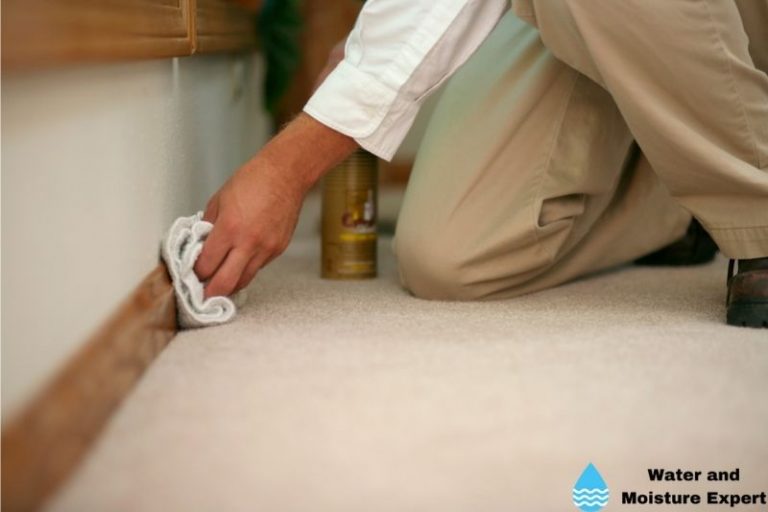
Damaged Hardwood Floors Treatment
If you see water on your hardwood floor, there are some things to do immediately that can help reduce the chance of more severe damage. Acting quickly can help save your floor and save you time and money.
● Find The Leak
If a leak is the cause of your flood or water damage, find it as soon as possible and repair it. As long as water continues to leak onto your floor, you won’t be able to make repairs. This is something I notice a lot of homeowners forget to do. They immediately jump into repairs instead of fixing the cause of the leak or flood. Don’t waste your time making repairs on a floor that will be damaged again in no time. Fix the problems before you start to work on the damage.
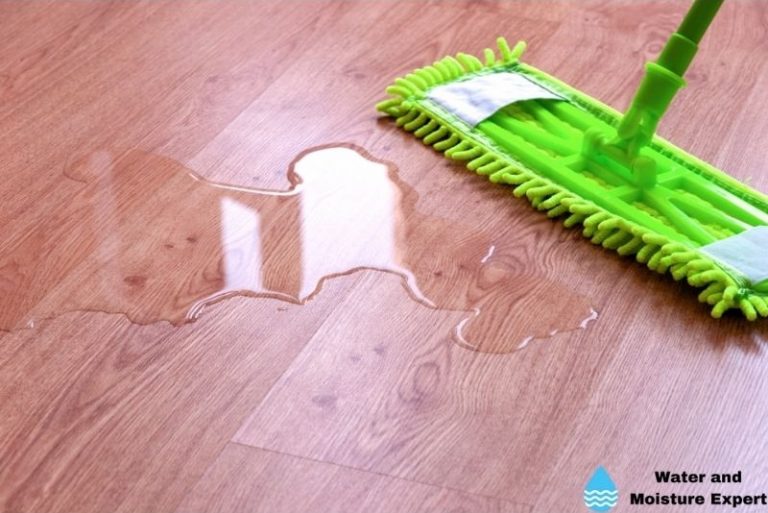
● Remove The Water
As soon as you notice the standing water on your hardwood floors, work to remove it. You can do this with a mop, towel, paper towels, a wet vacuum, or in some cases, a sump pump. The faster you remove the water, the less it will be able to soak into the floor and walls, and the less damage you will have.
● Dry The Floors
You won’t be able to tell how bad the damage is until you see the floors dry. It would be best if you let your floors dry for a few days or until you no longer see or hear water on the floor. Open windows in the room or your entire home to ventilate the room and improve airflow. If you have fans, use them to help dry the floors quickly too. If your floor was completely flooded and there was a lot of standing water, you might need to buy commercial fans that can dry up the floors faster and more effectively.
I also recommend using a dehumidifier to remove water as quickly as possible. You can rent them in many places. Depending on the amount of water, it can take days before all the water is gone. Particularly if it is under the floor and on the subfloor.
● Assess The Damage
Once your floors are completely dry, you can start to check for damage. Of course, you will check with your eye first. Remember that not all signs of water damage can be seen. You may be able to smell water damage before you see it. If you notice a musty, damp smell in the room, it could mean there is still water on or under the floor, or the floor has absorbed a lot of water. You can also step on the floor gently and carefully to see if it feels soft or sounds squishy.
If the floor is dry, they may no longer feel mushy, but they could still feel soft and weak. Also, look for signs of cupping, buckling, and mold growth. These are all signs that your floor is damaged and needs to be repaired.
● Check For Mold
Mold can grow quickly in a home that has been flooded, has a lot of humidity, or has standing water. Mold can grow under the floors and behind walls, so you may not notice it immediately. The longer you ignore the mold, or if it goes unnoticed, the more it can grow and the worse it can become. Mold growth can cause serious illness, so it’s essential to find the mold and have it remediated by a professional as soon as possible.
● Plan The Hardwood Floor Repairs
Once you see what the damage is like and how bad it is, you can start to make your repairs. Some damage you can fix yourself if you know what you are doing. If the damage is only on the top layer, you can refinish the floor. You can remove those planks if the water has caused irreparable buckling and warping locally. Replace them with some undamaged ones. If only part of the plank is damaged, you could use the undamaged part and only replace a smaller part.
To remove the damaged parts, you can use a circular saw. Set the depth exactly to the plank thickness. Be careful with any nails, if used. Use a screwdriver or a chisel to remove the part that you cut.
In case of more severe damage, I recommend asking a professional. I have worked on water-damaged floor repairs for many years, and I know first-hand how difficult some repairs can be. Homeowners who want to save time and money doing it themselves could cause more harm to their floors and the structure of their homes.
You can save yourself a lot of stress by hiring a contractor to handle these repairs. In most cases, the damaged sections of the floor can be removed and replaced. The parts of the floor that are not damaged may be able to be salvaged. You should know what needs to be done and how much to expect to pay for it.
● Refinish The Entire Water Damaged Hardwood Floor
I recommend always refinishing the entire wood floor after fixing the hardwood floor, even if it was only a small portion. The floor should be a solid color, and everything should match. Adding new boards to old boards can create a mismatched look. Refinishing the entire floor ensures it’s uniform and looks nice and complete. It might be a little extra work, but it will be worth it to know your floor looks new and will have plenty of durability to help it last for many years.
How Long Does It Take For Hardwood Floors To Show Water Damage?
Hardwood floors can start to show water damage as soon as 24 hours from the time it gets wet. If there was a lot of water on the floor, it might cause noticeable damage much faster. The more water, the easier it is to notice the damage. Keep in mind that you may not always see the water damage before it becomes severe. Some warping damage may only be visible when the floor and subfloor is completely dry. This can take some time.
When you are looking for water damage, be sure to use your other senses as well. Smell the room and check for bad odors that could mean water is sitting or leaking somewhere. Listen for sounds of weak boards or squishy, mushy subfloor.
How Long Does It Take Hardwood Floors To Dry After Water Damage?
It usually takes 48 to 72 hours for less severe water-damaged floors to dry completely. The exact time can vary based on the severity of the flood or leak and how long the water has been soaking into the floor. The more water on the floor and the longer it’s been there, the longer it will take to dry. Opening windows to improve ventilation, using fans, and even commercial drying equipment can help speed up the drying time and even reduce the severity of the damage.
Remember, just because the floors appear to be dry on the surface doesn’t mean they aren’t wet underneath. Wood and subflooring can absorb a lot of water and swell up. The surface can be dry, but all the water may have soaked into the flooring and is hard to notice. You will need to gently step on the floor to see if it feels weak or if you hear any squishing sound. You can also watch around the creases of the board to see if you notice any water coming up through them as you step down. If the floor still feels mushy or you see water leaking upward, the floors need to dry longer before you can begin repairs.
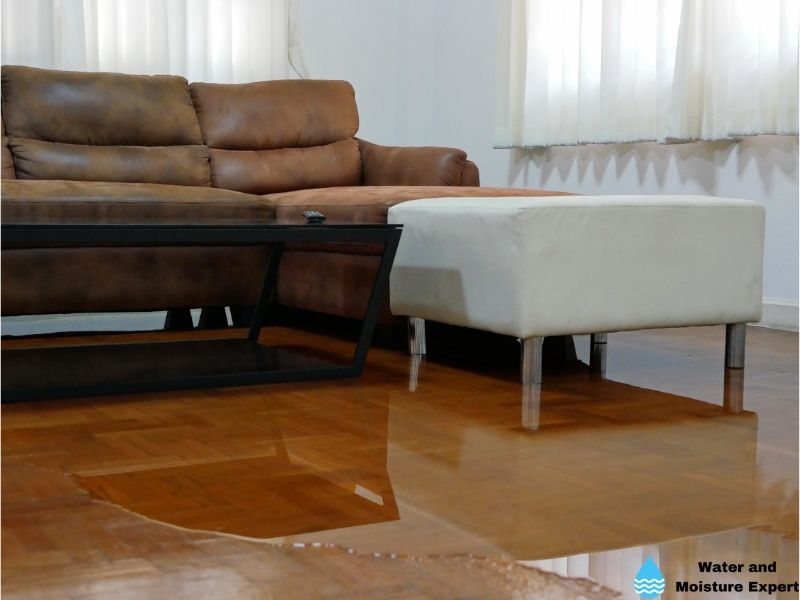
Can Water Ruin A Hardwood Floor?
Water can easily ruin a hardwood floor. Hardwood floors are very durable, but if there is water on the floor or under it, it can cause damage to the boards and the subfloor. The hardwood flooring can prevent some water from leaking down into the subfloor, but usually, it will find its way under the boards and to the subfloor if there is a lot of water.
Subflooring is typically made from pressed wood, and it can be very weak. If water gets to it, it can absorb it quickly and swell. The swelling causes the boards on top to spread apart, push together, and even bow. They may become broken, weak, or soft. The sooner the water damage is found and repaired, the better your chances of saving your hardwood floors.
Do Water Damaged Hardwood Floors Need To Be Replaced?
Wat damaged floors do not need to be replaced in all cases. If you are able to remove the water and dry the floor quickly, and before the water has a chance to soak into the wood floor or subfloor underneath, you may not need to replace the floor. If the damage is limited, you may be able to replace small sections of your hardwood floors. Anytime there is standing water on your hardwood floor, you will want to refinish the whole thing.
If the whole floor is flooded, and the water has been there for some time, there is a high chance you need to replace the whole floor. In those cases, I always recommend checking with a professional. He can help decide if replacing the entire floor is needed in your situation.
Identifying and Stopping the Water Leak
The initial step to addressing water-damaged wood floors is pinpointing and curtailing the source of the water leak. Without identifying the actual origin of the water damage, any efforts to repair the floor will be futile.
Based on my years of experience dealing with water damage, I recommend investigating places like the bathroom, kitchen, or basement, as these are often the typical culprits of water leakage. It is critical to fix the issue promptly to avoid further damage, mold formation, and decay of the wooden floor.
• Understanding Different Types of Water Damage
Different types of water can cause damage to your wood floors. Each type of clean water, gray water and black water, has distinct characteristics that require unique cleaning and sanitizing methods.
Nobody wishes to deal with black water damage as it originates from sewage and other contaminated water sources. Gray water is somewhat cleaner, typically coming from sinks, showers, or washing machines.
Finally, clean water, straight from your supply lines, is the least damaging, but it can still cause significant damage if not addressed promptly. By identifying the type of water causing the damage, the appropriate cleaning technique can be applied effectively.
• Recognizing Signs of Water Damage on Wood Floors
Water damage on wood floors may manifest in various forms, such as cupping, crowning, buckling, cracking, warping, and discoloration. Each of these symptoms indicates a different level of water penetration and the extent of wood floor damage.
Cupping and crowning often suggest changing moisture levels beneath the floor, while warping and buckling indicate more severe damage that may require board replacement.
Cracking and discoloration often point to surface damage which, albeit cosmetic, should not be ignored as it can quickly lead to more significant issues.
• Repairing Water-Damaged Floors
Repairing water-damaged floors is usually a multi-step process that involves removing surface water, drying the floor thoroughly, and cleaning the surface with a wood-safe disinfectant.
It is critical to extract all the water from the floor as any remaining moisture can lead to mold formation and rotting. Additionally, using a wood-safe disinfectant will help to eliminate any remaining bacteria or mold spores.
• Considerations for Severe Damage
For severe cases of water damage, your floors may require more than just cleaning and drying. Some boards might need to be sanded and re-varnished to restore their original appearance.
In some instances, you may also need to reattach loose or distorted boards to ensure the floor’s structural integrity.
However, if there is significant mold growth or damage to the underlying subfloor, it may be necessary to replace the entire flooring. This is generally a last resort, but it is sometimes the safest and most cost-effective solution.
• Preventing Further Damage
To protect your wood floors from future water damage, measures such as installing a dehumidifier in your home can be highly beneficial. A dehumidifier reduces the level of humidity in your home, which is particularly crucial in preventing mold formation.
Additionally, another practical method I highly recommend is using area rugs to cover portions of the floor. Rugs offer a simple and cost-effective way to protect your floors from spills and other sources of water that could potentially cause damage.
• When to Seek Professional Help
Remember, if you’re uncomfortable or feel risky performing these repairs independently or dealing with potentially hazardous black water flooding, it’s always wise to seek professional help.
Experts in water damage restoration are equipped with the requisite knowledge, skills, and tools and can ensure that all the repair work is done correctly, effectively, and safely.
If you need more information on water damage restoration, The University of Florida offers a comprehensive guide on the subject.
Water Damage to Wood Floors
In areas prone to hurricanes and flooding, water damage to wood floors is indeed quite common. As someone who has dealt with numerous such instances, I’ve found that immediate and precise responses can significantly reduce the impact and restore the beauty of your wood floors.
• How Water Finds Its Way In
Water has a unique talent for finding infiltration points, even in situations you’d assume to be waterproof. For wooden flooring, these infiltration points include seams, breaks in the coating, under baseboards, and through heating registers.
This article from the National Wood Flooring Association (.org) NWFA describes more about different types of damage that could occur in hard wood floors due to water.
• Extracting Surface Water
To eliminate surface water, I recommend using a shop vacuum on wet mode without a bag and a wide flooring attachment on the vacuum hose. This step is critical, as surface water if left unattended, can easily migrate to other regions, causing further damage.
• Scrubbing to Remove Dirt and Organics
Next, scrub the entire floor with a mixture of mild detergent and disinfectant dissolved in clean water. This helps to remove dirt, mud, silt, and organic material that might have been brought in with the water.
• Addressing Mold Issues
Upon noticing any regions showing signs of mold, the affected areas should be cleaned with trisodium phosphate (TSP) or a TSP substitute mixed with water. Scrub until the mold is gone, then rinse with clear water. This might require some elbow grease, but it’s critical as mold can pose serious health risks.
• Proper Drying Methods
Post cleaning, the floor might appear dry but there is probably water infiltrated in the wood. This is why the floor needs to be dried slowly and meticulously. I suggest using fans but avoid applying heat directly onto the woodworking, as this can cause the wood to crack.
• Leveling and Smoothening
Minor high areas can arise due to the expansion of the wood due to water absorption. These can be leveled through heavy sanding using a drum or orbital sander. Be cautious not to over-sand, as it could cause a dip in the floor level.
• Dealing with Heavily Cupped Wood
In some cases, the wood might get heavily cupped due to water absorption. In such circumstances, the wood might need to be face-nailed back down to the substratum.
• Mold Under Painted Surfaces
If mold is present under the paint on a painted floor, the finish must be stripped to allow the wood to dry properly. This can be achieved by scrubbing the wood with an abrasive cleaner or a TSP-water solution with added bleach.
• Special Note on Laminate Flooring
Laminate flooring, comprised of wood pulp (similar to particleboard or MDF), is highly prone to water damage. In most cases, it needs to be replaced if water-soaked, as it is almost impossible to restore it to its original condition.
• Timely Response is Key
Quick action to remove water and following these steps for cleaning and drying can help salvage water-damaged wood floors. However, it is essential to note that heavily damaged areas may require replacement or repairs to ensure the integrity of the flooring.
Overall, treating water-damaged wooden floors may be a daunting task, but with the right steps and approaches, it’s entirely manageable.
In addition to these procedures, I strongly recommend revisiting your home’s waterproofing measures, particularly if your area frequently experiences hurricanes or flooding.
• Dealing with Severe Water Damage
In instances of severe water damage, the wooden subfloor beneath your hardwood often necessitates replacement along with the flooring itself. This degree of repair requires careful handling and expertise.
– Addressing and Remedying the Root Cause
Addressing the water damage is a crucial step, but identifying and fixing its source is of equal importance.
Failure to do so can lead to recurring damage, significantly reducing the lifespan of your hardwood flooring. This could be due to leaks, condensation, or surface water seepage which needs to be addressed promptly.
– Required Tools and Materials for the Repair Process
The necessary tools for this restoration process are easily accessible. You would need items like a shop vacuum, bucket, stiff brush, squeegee, and rubber gloves. Fans or dehumidifiers come in handy for the drying process, and disinfectant solutions are crucial for sanitizing the area.
– Cleaning and Mold Treatment
Begin the repair process by thoroughly cleaning the floor. This includes treating moldy patches with mild detergent and disinfectant solutions. This step should not be skipped, as mold and bacteria can lead to health issues.
– Scrubbing the Surface
As with any cleaning process, scrubbing is a vital aspect. A stiff brush should be used to scrub the entire hardwood surface and associated woodwork. This removes accumulated dirt and grime.
– Cleaning Remnant Molds
Once the basic cleaning process is done, inspect the area for any remaining mold. If found, use a trisodium phosphate solution to clean it. This chemical is highly effective in mold removal.
– Drying the Floor
A clean floor should be dried thoroughly. For this, employ the use of dehumidifiers and fans. If conditions permit, you could also allow for natural air circulation to assist in the process.
– Sanding the Floor
Following the drying process, the floor would most likely require sanding to reduce signs of cupping or unevenness. In instances of significant cupping, an expert approach, such as face nailing the floorboards back down, might be required.
– Staining and Refinishing
Staining and refinishing should take place post-sanding. In instances of mold growth underneath the paint, removing the entire finish is necessary before the refinishing process. This ensures a smooth, even finish.
• Preventing Future Water Damage
Preventing future instances of water damage is ideal. Applying appropriate sealants, addressing water leaks promptly, and adopting routine maintenance practices can ensure the longevity of your hardwood flooring.
The U.S. Department of Housing and Urban Development provides a host of resources to learn more about caring for wooden floors.
• Considering Professional Help
While it is certainly possible to undertake this repair process on a DIY basis, hiring professionals is highly encouraged. This ensures proper handling of water damage restoration and, more importantly, guidance to prevent a recurrence.
The cost of hiring professionals is well worth considering the extent of damage that may be prevented. From years of experience, I can’t stress enough; quality and timely professional intervention can save you from frequent, expensive repairs down the line.
• The Impact of Water Damage on Hardwood Floors
Hardwood floors are aesthetically pleasing and a popular choice among homeowners. However, they can be susceptible to water damage, leading to mold growth and warping. Over time, these damages can have a significant impact on your property’s overall value.
• The Speed of Water Damage on Hardwood Floors
Where the damage occurs can greatly influence how rapidly water affects your hardwood floor. The closer the water source is to the floor surface, the quicker the damage may occur. As such, close attention should be paid to areas near sinks, toilets, and windows.
• Major Water Disasters and Your Hardwood Floors
If your hardwood floors encounter substantial water damage, such as in the case of a flood, professional intervention is crucial. Water damage mitigation specialists should ideally be contacted within the first 24 hours to prevent further deterioration.
• Recognizing Signs of Water Damage on Hardwood Floors
Being able to identify signs of water damage on your hardwood floors is essential in preventing further harm.
Several indicators of damage include a persistent damp smell, stains, buckling of the floor, lifted nails and floorboards, and the existence of mold. You may also find crowning – a condition where the floorboards rise in the middle.
• How Water Ruins Hardwood Floors
Water penetrates the wooden flooring, causing it to swell and form an uneven surface. This fundamentally alters the floor’s structure and aesthetics, leading to severe damage and potentially rendering it beyond repair.
• Addressing Water Damage on Hardwood Floors
To repair water-damaged hardwood floors, it is paramount to identify the water source first. Wet objects that could be contributing to water exposure should be removed. Proper cleaning of the floors must follow this, assuring all dirt and damp debris are eliminated.
Drying the floors thoroughly is essential to prevent the potentially dangerous growth of mold.
• Cleaning Water-Damaged Wooden Floors With a Vacuum
A water vacuum is an effective method for removing water from hardwood floors after damage has occurred. Echoing the cleaning recommendations from experts at the University of Florida, remember to treat the vacuumed space with a mold prevention solution to halt the growth of fungi.
• Proactively Protecting Your Hardwood Floors From Water Damage
Taking steps to shield your hardwood floors from potential water damage is a smart move. Using mats and rugs in high-risk areas can absorb water before it reaches the floor. Regularly inspecting pipe systems and other household items that might leak can also prevent water-induced damage.
• Dealing With Engineered Wood Flooring Water Damage
Engineered wood flooring, though less susceptible to water damage, can still face issues such as expansion and cupping. When damage occurs, it often necessitates the replacement of affected boards and refinishing of the whole floor to keep its aesthetic appeal.
– Addressing the Source: Stop the Leak
Repairing a water-damaged hardwood floor begins with finding and rectifying the origin of the leak. The sooner the root cause is addressed, the lower the risk of severe floor damage.
Acting swiftly is crucial because hardwood floors can start showing signs of water damage within 24 hours of exposure to moisture.
– Mitigate Damage: Immediate Cleanup Actions
To limit further damage, use a wet vacuum or sump pump to eliminate standing water as soon as possible. The effectiveness of these tools in taking off water minimizes the time your floor remains under water, hence reducing the extent of possible destruction.
– Enhance Drying: Ventilation and Dehumidifiers
Drying floors rapidly is critical to manage water damage. Multiple strategies can be used together to optimize drying, including fans, open windows, and dehumidifiers. If possible, invest in commercial drying equipment for best results.
Remember to factor in external weather conditions, as they affect the rate at which your hardwood floor dries.
– Damage Assessment: Evidence of Harm
Conduct a comprehensive evaluation for soft spots, mold growth, and signs of cupping or buckling to determine the extent of the water damage. Try to identify small issues before they become larger, more expensive problems.
– When to Hire a Professional
For severe water damage, it is a prudent idea to engage a professional to ensure that repairs are done correctly. Professionals bring with them expert knowledge and tools that provide a thorough drying process and quality repairs that feel like new.
– Uniform Repair: The Benefit of Refinishing the Entire Floor
After fixing water-damaged sections, I recommend refinishing the entire floor to ensure a non-segmented and consistent appearance. This action not only improves aesthetics but also enhances the durability of the hardwood floor, increasing its lifespan.
– Early Signs of Water Damage
Hardwood floors can have subtle signs of water damage. Utilize all your senses, especially smell, and sound, to identify problems. Moldy and musty smells indicate possible issues.
– Intriguing Warping Damage
Warping damage may not be apparent until the floor is completely dry. The degree of this type of damage can vary from minor issues that can be quickly addressed to more serious disfigurements requiring professional intervention.
– Salvaging Less Damaged Floors
A floor with minimal water damage can be dried in approximately 48 to 72 hours. If the surface appears dry, do remember to check for weakness or water coming upward before beginning repairs.
– Understanding Subfloor Damage
The floor isn’t the only component that can be impacted by water damage; the subfloor underneath can quickly absorb water, causing it to swell. This swelling can cause the hardwood boards to spread apart, creating a negative impact on the strength and appearance of the floor.
– Prompt Repairs: Timing Matters
I cannot stress enough the importance of repairing water damage as quickly as possible. Prompt action improves the chances of saving hardwood floors, minimizing the extent and cost of repairs.
– Replacement vs Salvage: The Right Strategy
The good news is not all water-damaged hardwood floors need to be replaced. Quick water removal and efficient drying can save even heavily damaged floors from needing to be replaced entirely. The replacement or salvage decision should ideally be made after a professional assessment.
– Spot Damage: Partial Replacement
For localized floor damage, it is possible to replace specific sections of the floor. This strategy is cost-effective when the damaged area is limited.
– Professional Assessment: Necessity or Luxury?
Even if you feel confident about addressing floor damage, a professional’s perspective can save time and money in the long run. Especially for severe water damage, a professional assessment can offer clarity and determine whether replacement is necessary.
Remember, the key to managing water damage to hardwood floor is acting quickly, drying effectively, and bringing in professional expertise when needed. A vigilant approach can save both your floor and your wallet from getting hit hard. Don’t shy away from seeking professional help when needed.
Locating and Addressing the Source of the Water Leak
Locating and fixing the source of the water leak is crucial before focusing on repairing the hardwood floors. This step helps prevent additional water from damaging your already-compromised flooring.
It is important not to neglect this initial assessment and remediation in haste to fix the floor aesthetic. Leaving the source unattended allows for recurrent damage.
• Rapid Removal of Standing Water
Once the water source is addressed, draw attention to removing standing water from the floors. The faster standing water is removed, the lesser the damage to your hardwood floor.
As The University of Kentucky explains, water is an enemy of hardwood floors. Speedy removal helps to negate irreversible damages and protect against further damage.
• Thorough Drying of Floors
Drying the floors thoroughly is a necessary prep step before assessing the total damage. This process may seem mundane, but it is vital to avoid estimating inaccuracies. Overlooking this step can lead to under or overestimated cost projections, improper assessment, and ineffective repair practices.
• The Threat of Mold Growth
Mold growth can become a massive problem within the shortest time. Addressing possible mold infestation with the help of a professional promptly can save you future costly remediation. When left unattended, mold can cause health problems as well as structural damage.
• Consulting a Professional for Repairs
The scope of the damage often determines your next steps. Depending on the severity, you might need to hire a professional to make the repairs.
Although some homeowners might prefer to do this themselves, bear in mind that some repairs can exceed DIY expectations. Trusting professionals with this job ensures lifelong fixes while taking a burden off your shoulders.
• Wood Refinishing After Repairs
To ensure a uniform and cohesive look of your hardwood floor, I recommend refinishing the entire floor after repairs. Considering the time and cost that has gone into resolving water damage, it would be best to finalize the project with a finish that reinstates the floor’s original look.
• Quick Identification of Water Damage
Interestingly, hardwood floors can start showing signs of water damage within 24 hours of water exposure. A quick identification can aid in mitigating the extent of the damage and inform the right course of action to be taken.
• Drying Time Frame
It is important to acknowledge that drying hardwood floors requires time. On average, a water-damaged hardwood floor may take 48 to 72 hours to dry completely. However, factors such as the severity of the damage and the amount of water present can influence this timeframe.
• Understanding the Impact of Water on Hardwood Floors
Water is known to cause significant damage to hardwood floors, including warping, buckling, and weakening of the boards and subfloor. Understanding these modes of damage helps when identifying the issues and addressing them correctly.
• Not All Floors Need Replacement
Not all water-damaged hardwood floors need to be replaced completely. A professional should assess the extent of the damage. In some instances, a proper repair and refinishing job can salvage even severely damaged hardwood floors.
• Importance of Quick Action
Quick response to water damage on hardwood floors helps prevent additional damage or potential mold growth. Water damage can spiral fast when left unaddressed, so swift and proportionate action is always the best course.
In summary, dealing with water damage requires a proactive guide and quick measures. It involves taking the necessary steps, such as locating and addressing the water leak source, removing standing water, drying the floors thoroughly, and addressing any threat of mold growth.
Depending on the damage’s severity, professional help might be needed.
All steps taken towards the repair should be appropriately assessed, whether it’s deploying the right drying timeframe, understanding the water’s impact on hardwood floors, and acknowledging not all floors need a complete replacement.
Water Penetration in Wood Floors
Water has a crafty way of finding its way through even the tiniest of cracks, spaces, or areas of weakness in your wooden floors. It can quite easily penetrate through seams, breaks in the coating, baseboards, and even heating registers.
Research strongly suggests that understanding how water penetrates the surfaces inside your house can be a game changer in preventing potential damage in the future.
• Fast Action with Shop Vacuum and Squeegee
When water invades your precious wooden floors, swift action is key. This includes physical water extraction. To initiate this, switch to a shop vacuum in wet mode.
Partner it with a squeegee to gather as much water as possible from the surface. This will ensure maximum water removal, safeguarding your floors from subsequent damage.
• Deep Cleaning with Mild Detergent
After successfully extracting excess water, the next critical step is deep cleaning. A combination of a mild detergent and a compatible disinfectant should be mixed with clean water. This solution can be employed to scrub the entire floor and related woodwork.
A stiff brush works well in executing this step, but remember to rinse frequently.
• Managing Mold with Trisodium Phosphate
Now, frequent water intrusion can lead to mold growth, especially in damp spaces. Areas of mold or mold discoloration can be resolved using trisodium phosphate (TSP) or a TSP substitute mixed with water.
Scrub these moldy areas vigorously until the mold and its discoloration are gone. As an experienced home care professional, I highly recommend using safety gear during this step, as mold can present health hazards.
• Optimal Drying Process
After successfully cleaning the wooden surfaces, the next action item is drying. Dry the floor slowly and naturally with fans and plenty of airflow. Cross-ventilation can be quite beneficial; treat this by opening windows and doors.
Hastening the drying process can lead to unintended damage, so patience is key here.
• Managing Cupping or Convex Floorboards
Given the nature of wood, cupping or convex formation on the floorboards may be noticed after drying. Do not panic. Many minor high areas can be sanded down. For severely cupped wood, it should be face-nailed back down. Applying this technique will restore your once-even floor surface.
• Mold Issues under Painted Floors
In some cases, you may find mold under the paint on a painted floor. Don’t worry! This can be resolved by removing the finish by scraping off the paint. This must be followed by scrubbing the wood with an abrasive cleaner or a TSP-water solution with laundry bleach added in for an enhanced cleaning effect.
• Vulnerability of Laminate Flooring
An essential point to remember is that laminate flooring, which is made with wood pulp, is highly vulnerable to water damage. In most such cases, it will likely need to be replaced entirely. Stay vigilant regarding the early signs of water damage in these types of floors to prevent a total loss.
When stepping through these stages, remember each action matters towards maintaining the health and longevity of your wooden floors. Acting quickly and effectively can pave the path to healthy, damage-free flooring in your home.
– Mold Growth and Water Damaged Floors
Water-damaged hardwood floors invite an unwelcome consequence: mold growth. If the floors remain untreated, the wetness encourages mold to foster, posing an array of serious health risks. Therefore, addressing water damage promptly and effectively is excessively important.
– Finding the Root Cause of Water Damage
It’s insufficient just to fix the visible damage. One should ascertain the root cause of the water damage to prevent exacerbating the issue. Undetected leaks or spills can damage the underlying layers of your flooring and destroy its lifespan.
– Eliminating Surface Water
Removing the surface water is the preliminary action. Using equipment like a shop vacuum or squeegee is beneficial in eliminating the excess water. Quick and efficient removal of water is vital in preventing extensive damage to your hardwood flooring.
– Importance of Proper Floor Cleaning
Post-water removal, rigorously cleaning the floor with a mild detergent and disinfectant is essential to keep eventual mold growth at bay. Focus on getting rid of all the residual dampness and leftover debris.
– Necessary Drying Equipment
Even after exhaustive cleaning and disinfection, the floors may still be damp. Hence, the usage of drying equipment such as dehumidifiers and heaters is crucial. These instruments facilitate slow and natural drying of your wood floor, thus curtailing floor buckling or cupping issues.
– Promoting Airflow
Our homes aren’t designed for fast drying. Opening doors and windows coupled with the use of fans can promote airflow. This home-friendly strategy supports swift drying and helps counter water damage promptly.
– Addressing Cupping issues using Sanding
Heavy sanding using Drum sanders or orbital sanders can prove advantageous when dealing with prominent cupping issues.
However, one needs to remember that sanding removes material and reduces the lifespan of the floor. It should be used as a last resort when other methods of restoring your floors prove ineffective.
– Face Nailing for Severely Cupped Areas
In the scenario of severe cupping, regular sanding might fail to provide satisfactory results. Here, face-nailing the floorboards back down might be in order. This necessarily involves manual labor and a calculated judgment call.
– The Role of Professionals in Sanding
Everybody isn’t skilled when it comes to sanding. Poor workmanship can inadvertently lead to more damage. Getting this task done by professionals is usually a safer and recommended option.
– Presence of Mold under Paint
Mold is a sneaky organism. Cases of mold growth under paint are not uncommon, requiring the removal of the entire floor finish before the hardwood flooring can be refinished. It is substantial to check into this aspect, especially if your floor had standing water for a considerable duration.
– Prevention and Routine Maintenance
Hardwood floors deserve care and attention. Ideally, prevention is better than repair. A proper sealant, timely addressing water leaks, and conducting regular inspections aid in preventing water damage. This seems like a lot of effort but it is easier on the pocket than replacing your entire flooring.
– Opting for Professional Water Damage Restoration
Sometimes, the water damage is beyond basic home repairs. In such cases, considering a professional water damage restoration or flood cleanup company is essential. Enlisting their expertise ensures thorough and proper restoration.
– Helpful Resources
For more helpful insights on maintaining your hardwood floors and protecting them from water damage, you may want to visit the National Wood Flooring Association’s website NWFA.
– In Conclusion
Our households house our precious memories and our expensive investments, including hardwood floors. Keeping them in top condition with timely preventative measures and necessary repairs is vital in maintaining their ageless charm.
Whether you tackle the water, damage yourself, or hire professionals, always remember that urgent and efficient action works best!
– Importance of Timely Response to Water-Damaged Hardwood Floors
Hardwood floors are a beautiful feature in any home, but they require care, especially when water damage occurs. Site, as a homeowner, we need to act immediately to mitigate damage. Remember, the sooner you remove water, the better chance you have of salvaging your floor.
– Identifying Water Damage on Hardwood Floors
Water damage displays unmistakable signs. If you notice an unusual odor coming from your floor, it could be a warning sign. Additional signs include swelling, staining, discoloration, buckling, or even mold growth. Be vigilant for lifted nails and floorboards, as they can indicate significant water-related damage.
– The Impact of Water on Hardwood Floors
Water can cause severe harm to hardwood floors. It may cause the floor to swell and bulge, creating unsightly humps that may lead to increased wear and tear over time. Attention to such hydrostatic pressures is key to maintaining your floor’s longevity.
– Steps to Repair Water-Damaged Wood Floors
Fixing water-damaged floors involves removing excess moisture and addressing high humidity. A five-step process can help minimize further damage:
- Locate and cut-off water source: Identifying the source of water leakage is the first step. It could be a leaky faucet, pipe, or even a window. Once found, cut off the water leak immediately.
- Remove wet objects: Remove any wet objects like rugs or furniture from the floor to prevent more soaking.
- Dry the floors: Use a water vacuum or a wet mop to remove as much water as possible from the floor surface.
- Clean the floor: Clean the floor to remove dust, dirt, and any impurities that could further damage the wood.
- Check for mold: Keep an eye out for mold, particularly in damp areas.
– Utilizing a Water Vacuum for Efficient Water Removal
A water vacuum can be an invaluable tool during this process. It works efficiently to extract water, quickly reducing the amount of time your floor remains wet.
– Precautionary Measures for Preventing Water Damage on Floors
Water damage prevention measures include placing rugs and mats in high-traffic areas, regular inspection for leaks, and applying good sealant on hardwood floors. These steps lower the risk of water damage and can ensure a longer life for your floor.
Even so, some leaks are inevitable, and when they do occur, act swiftly.
– When to Seek Professional Help for Water Damage
Severe water damage can sometimes require professional attention. If you find that the water damage is extensive or you’re dealing with persistent mold issues, it’s time to call in the professionals.
Experts, such as companies specializing in wood floor water damage repair, can provide the necessary assistance and guide you through the repair process.
– Restoration and Replacement in Extreme Cases
In certain cases, for instance, with engineered wood floors, water exposure may necessitate replacing affected boards and refinishing the entire floor.
– Common Inquiries on Wood Floor Water Damage
Common queries often relate to treating water-damaged wood floors, including how to remove old water stains. A simple solution of vinegar and baking soda often suffices for removing such stains.
Questions also arise about replacing wet subfloors. If the damage or mold growth is significant, replacement is typically recommended.
I suggest looking into educational resources provided by reliable authorities, such as the University of Wisconsin, to understand how water damage affects hardwood floors and the best practices for dealing with it.
Provided by their Home & Building Science department, this comprehensive resource can add to your knowledge about maintaining your hardwood floors efficiently.
• Documenting Water Damage on Wood Floor for Insurance Claims
Whenever you encounter water damage on your wood floor, the first thing I recommend doing is taking detailed photos and making notes of the resultant damage. A visual record will significantly assist in making insurance claims and getting appropriate compensation for the damages incurred.
• Identifying Signs of Cupping and Crowning
Cupping and crowning are common signs of water damage on hardwood floors. Cupping occurs when the edges of the wood planks raise higher than the center, giving a concave shape. Conversely, crowning is the opposite of cupping. It manifests as a convex curve on the wood plank’s surface.
Revealing these signs could help in understanding the damage’s cause and strategize the clean-up effort effectively.
• Making the Tough Decision: Repair or Replace?
The decision to repair or replace the damaged floor is crucial, and it primarily depends on the damage extent, the moisture content in the Wood boards, any apparent stains on the floorboards, the level of water penetration into the subfloor, and the availability of matching hardwood flooring.
In some cases, replacement might be the only viable option. However, repair should always be the first consideration.
• Extracting Remaining Water from the Floor
Removal of any remaining water on your floor is essential. Using a shop vacuum and a squeegee can aid in extracting trapped water within the Wood boards, preventing any further damage.
• Cleaning Affected Areas to Prevent Mold Growth
I recommend cleaning the floor with mild detergent, disinfectant, and clean water. This process inhibits mold growth, which could compromise the Wood flooring’s integrity. The Environmental Protection Agency (EPA) offers additional guidelines on managing mold and moisture.
• Ensuring Thorough Drying
Once cleaning is completed, ensure that the floor is dried thoroughly. Utilizing fans, dehumidifiers, and opening windows could expedite the process. Absolute dryness is key to preventing further damage.
• Preparing Floorboard for Repairs
Before launching into the repair process, it’s essential to prepare the floorboards by sanding them. However, be mindful not to overdo it, as excessive sanding can reduce the floor’s overall life span.
• Dealing with Severely Cupped Floorboards
In instances where the cupping is severe and sanding does not flatten the floorboards, nailing down or replacing them may be necessary.
• Applying Stains or Paints to Treat Mold
If mold is found on the floor, consider staining or painting the floor. This step not only covers the mold stains but also helps to constrain further mold growth.
• Consulting a Professional
If the damage involves a large number of boards, do not hesitate to consult a professional. Professionals can provide expert guidance on the best restoration methods and may avoid costly mistakes.
• Regular Maintenance and Water Exposure Management
No matter the damage extent, practicing routine maintenance and avoiding excessive water exposure is crucial to keep wood floors in top condition. Proper care and vigilance in noticing early signs of water damage can mitigate costly repair or replacement procedures.
Understanding Cupping in Wood Floors
Cupping is a common issue in wood flooring, usually triggered by water saturation. It leads to the boards’ bottom expanding more than the top, consequently giving the floor a wavy look due to raised seams. This phenomenon isn’t just a cosmetic nuisance. It can severely affect the floor’s integrity.
• The Point of No Return for Cupped Floors
Cupping wouldn’t pose much trouble if it were confined to a minor rise in the wood. However, things get out of hand when the board’s cup is severely lifted off the floor.
This results in pulling up the fasteners that usually hold the wood in place. Life for such wood boards is summed up as ‘ruined.’ The solution at hand is to discard these boards and replace them with new, intact ones.
• Three Ways to Save a Water-Damaged Floor
Salvaging a water-damaged floor may be a daunting task, but it isn’t impossible. Let’s look at three options you might consider:
- Hiring a company offering dehumidifier services This is a quick yet efficient method to dry out your wooden floor.
- Letting the wood dry on its own This might take between 2-12 months; yes, even a year. However, it’s a natural path that ensures the wooden floor regains its original state with minimal artificial interference.
- Replacing the wet wood An immediate fix involves tearing out the wet wood and replacing it.
• Avoid Sanding Wet and Cupped Floors
Applying a sander on a wet, cupped floor is a disaster waiting to happen. This practice often leads to another problem known as crowning.’ Crowning is characterized by the boards curving upward in the middle. Hence, it’s best to let the wood dry first before any sanding attempts.
• Hire a Pro for Floor Sanding and Refinishing
After your floor has sufficiently dried out, it’s time to give it a fresh look. And no one does it better than a professional. They have mastered the art of sanding and refinishing floors to their former glory. So, consider hiring professional expertise for this stage.
• Applicability of Homeowners Insurance
There’s good news for homeowners. In some cases, your insurance might cover the cost of refinishing the entire floor. However, it’s crucial to confirm the specifics of your policy agreement to determine if this kind of damage qualifies for compensation.
• Personalized Assistance for Floor Repairs
As an individual with a wealth of experience based in the Kansas City area, I lend my expertise to homeowners grappling with floor repairs due to water damage. I couple professional knowledge with practical solutions to offer top-tier service in salvaging water-damaged floors.
Here’s my recommendation from years of experience; be proactive. Regular maintenance and immediate intervention at the first sign of water damage can save you the cost of extensive repairs.
For more helpful information about cupping and water damage on wooden floors, see the National Wood Flooring Association page on the subject.
The NWFA is a non-profit organization that provides resources and standards for professionals and consumers about wood flooring. Their site is full of informative articles and resources on various topics related to wood flooring.
– Assessing Water Damage on Hardwood Floors
If your hardwood floors have been subjected to water damage, the first step is to assess the severity of the damage. Doing so will help in making informed decisions on the necessary repairs.
Water stains, warping, or swelling indicate severe water damage. If the hardwood planks have started to peel or show cracks, this signals significant damage.
It’s critical to remember water damage can be evident within 24 hours of exposure to water, even if it is not initially visible. Therefore, swift actions will prevent further degradation of your floor.
– Dealing with the Source of Water Damage
The next significant step is finding the source of the water leak or flood causing the damage. Regardless of whether it’s a leakage pipe, a faulty gutter, or a flood, you need to address the source promptly.
Repairing the source of the water damage is paramount in preventing further impairment to the floors. An unchecked water source can lead to further deterioration, which means more costs for repairs or replacements.
– Water Extraction must be Prompt
The urgency of removing standing water from your hardwood floors cannot be overstated, as prolonged exposure may devastate the integrity of your floors. Using water vacuums or dry-wet vacuums can provide efficient and quick water extraction.
– Allow the Floor to Dry Before Checking the Damage
After eliminating all the standing water, it is important to let the floor dry completely. The drying time for hardwood floors can range between 48 and 72 hours, depending on the severity of the water impact and environmental conditions.
Note that proper drying is necessary to assess the full extent of the water damage accurately.
– Checking for Mold Growth
Mold growth in your hardwood floor can be exacerbated by water damage. Thus, it’s important to inspect for any signs of mold since it presents both a potential risk to your family’s health and can further damage your floor.
– Hiring a Professional Might Be Necessary
Tackling water damage might be daunting depending on its severity; hence hiring a professional should be considered.
They have the experience and knowledge to restore your floor to its original condition, ensuring no further damage or reoccurrence of the problem. The Institute of Inspection, Cleaning, and Restoration Certification (IICRC) might be a good start to finding certified professionals in your area.
– Refinish your Entire Hardwood Floor
If you wish to restore the aesthetic appeal of your floor, it is highly recommended to refinish the entire hardwood floor. Having your entire floor refinished will provide a uniform and complete look, making the water damage invisible.
– Subfloor Damage
Remember, water can cause significant damage not only to the hardwood floors but also to the subfloor beneath. The subfloor needs to be completely dry before placing any new flooring over it.
– Replacing Water Damaged Floors May Be Required
Depending on the severity of the water damage, replacement of your hardwood floors might be a requirement. A professional can help assess if that’s the most viable option.
Maintaining your hardwood floor’s excellence after water damage might seem challenging, but it’s certainly achievable. Prompt actions, adequate drying time, professional assistance, and potentially refinishing or replacing are all pivotal steps to restore the glamour of your floor.
Identifying Signs of Water Damage on Wooden Floors
One of the most conspicuous signs of water damage on wooden floors is swelling. This occurs when the wooden planks absorb a significant volume of water, causing them to enlarge and be distorted.
The distortion of the wood can eventually lead to buckling. This is when the wooden floorboards warp and lift up from the subfloor that they are attached to.
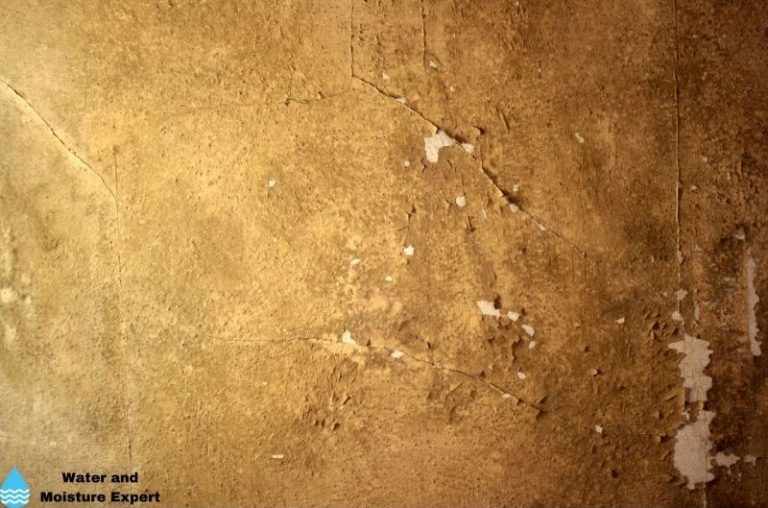
The discoloration is another sign to look out for. When water stains a wooden floor, it forms a grayish or dark discoloration. This discoloration often occurs along the edges of the water damage and can sometimes spread throughout the entire surface of the affected board.
Accumulation of water is a clear sign of water damage. You may notice puddling water or even the manifestation of molds and fungi. This usually means there’s a consistent source of water soaking into the floor.
Lastly, the smell or odor of dampness or mustiness is another indicator of underlying water damage. The wood-trapped moisture and the accompanying mold infestation produce this distinct damp and musty odor, clearly hinting at a water damage issue.
• Assessing the Level of Damage: Factors to Consider
The type of wood, the adhesives used, and the level of moisture trapped in the floor should be factored in when assessing the level of damage. Different types of wood have different absorption rates, and the adhesive used can either hinder or advance wood decay.
For example, hardwoods such as oak and maple have a low absorption rate compared to softer woods like pine. Therefore, hardwood floors may be less affected by water damage. Furthermore, the level of moisture trapped within the wood can provide insight into how deep the damage has reached.
A moisture meter can detect the level of water penetration, which provides a clear indication of the severity of the water damage. The University of Hawaii explains in detail the absorption properties of wood.
• Repairing Water-Damaged Floors
The degree of damage dictates the approach for repairing water-damaged floors. Scraping the surface, dehumidification, using sandpaper, and introducing air conditioners and humidity stabilizers are some techniques to address minor damages.
Scraping involves using a scraper to remove the affected surface of the wooden floor. This method is useful when the damage is limited to the surface level. After scraping, a layer of finish can be applied to restore the appearance of the floor.
Dehumidification entails using dehumidifiers to absorb the excessive moisture on the floor. This method helps prevent further water absorption and mold growth.
Sandpapering can renew the appearance of the wooden floor after water damage. It involves sanding the damaged pieces to reduce the visible signs of damage, such as discoloration.
Air conditioners and humidity stabilizers play an essential role in maintaining optimal humidity levels, minimizing further moisture absorption by wooden floors.
• Advanced Water Damages: Replacement and Refinishing Options
In severe cases of water damage, where the mentioned techniques fail to restore the floor to a satisfactory state or where the structural integrity of the flooring is at stake, replacement might be the best course of action. This involves removing the damaged boards and installing new ones.
On the other hand, if the water damage is limited to the finish of the wooden floors, refinishing could be the ideal solution. Refinishing involves sanding off the old finish and applying a new one, thus restoring the floor to its original appearance.
• Importance of Seeking Professional Help
Carrying out a do-it-yourself repair of a water-damaged floor can be a taxing and time-consuming task. Therefore, in the event of water damage, seeking professional help is of utmost importance.
A professional has the right tools, techniques, and experience to handle water damage and restore wooden floors properly.
Professionals can effectively assess the extent of the damage, recommend the best course of action, and execute the repairs to bring your wooden floors back to their original state.
Opting for professional help saves you valuable time and ensures thorough restoration, negating the potential future damage that might ensue if the issues are not adequately addressed.
Remember, treating water damage is an urgent matter. The longer you allow the water to sit on the floor, the more irreversible the damage becomes. The ideal scenario is to mitigate water spills as soon as they occur and in worst-case scenarios, hire a professional as soon as possible.
The Primary Cause of Buckling in Hardwood Flooring: Excess Moisture
Excess moisture is the leading culprit behind buckling in hardwood flooring. This issue can emerge from sudden incidents like flooding or from a progressive build-up of moisture over an extended period. Moisture seeping into the wood causes expansion, leading to deformities like buckling.
• Improper Installation and its Contribution to Hardwood Floor Buckling
Improperly installed floors are another major contributor to the buckling issue. This can occur when the floor doesn’t have sufficient space to expand and contract, pinching points develop, and inadequate or incorrect adhesive is used.
These factors can ultimately lead to buckling, causing aesthetic and functional distress to your floor.
• Repairing Minor Buckling in Hardwood Floors
Repairing minor buckling on hardwood floors can be tackled with some general household tools. First, soak up any excess moisture using absorbent materials like towels or mops. Once the area is free from visible moisture, clean it using a mild, non-abrasive cleaner.
Once cleaned, the area needs to be thoroughly dried. This can be facilitated by using ventilation aids like an electric fan. To ensure that all residual moisture is eliminated, consider using a dehumidifier.
• How to Handle Severe Buckling Damage
In cases where the damage has transcended minor buckling, more aggressive repair strategies might be needed. One common approach is to replace the damaged boards altogether. Although this might sound rather straightforward, it is not always the case, particularly with tongue-and-groove floorboards.
• Why Hire a Professional for Tongue-and-Groove Floor Repairs
Tongue-and-groove boards are unique and require skill to repair or replace without further damaging adjoining planks. Thus it’s recommended to hire professionals for such repairs. Experts have the proper tools and knowledge to minimize disruption to the rest of your floor.
• Preventing Buckling in Hardwood Floors
Preventing buckling in hardwood floors involves vigilance and proper care. Ensure that spills are promptly cleaned. Regularly check plumbing fixtures for potential leaks, as these can contribute to increased moisture content under your hardwood flooring.
Footwear can impact your floor’s health, too. Shoes with pointed or damaged heels can dent hardwood floors and allow moisture to seep in. Using water sparingly while mopping and choosing the correct cleaning products can also help prevent buckling.
• Express Flooring: Hardwood Flooring Experts in Arizona
Express Flooring offers top-notch hardwood flooring and installation services. With a footprint in Phoenix and Tucson, Arizona, they provide excellent customer service paired with quality materials for all your hardwood flooring needs.
• The Bottom Line
Maintaining the health of hardwood flooring requires regular care and immediate action in the case of excess moisture. Using the correct cleaning procedures and promptly addressing any water-related issues can prolong the life of your flooring.
For more information and expert advice on hardwood flooring concerns, visit the National Wood Flooring Association.
Remember, it’s always advisable to contact a professional when in doubt. Professionals like Express Flooring can provide the experience and expertise required to maintain and repair your hardwood floors, preserving their beauty and extending their lifespan.
Experiencing Hardwood Floor Damage Due to Moisture
Having dealt with instances of hardwood floor damage, I experienced yet another setback recently caused by an innocent-looking non-waterproof mat. It seemed beneficial initially but soon led to swelling and damage to my hardwood floors on account of the trapped moisture.
• Visible Floor Damage Signs: Raised Joints and Gaps
Upon closer inspection, it was evident that the moisture had caused considerable damage. The floors’ raised joints and gaps along the joint lines were clearly visible.
A picture was taken to document the extent of the damage, evidence of the havoc moisture can wreak when allowed to seep into hardwood floors.
• Worries: Will the Swelling Revert to Normal?
Naturally, doubts and concerns arose from this incident. There was uncertainty about whether the swollen hardwood would go back to its original state.
The idea of sanding the flooring smoothly crossed my mind, but then would it end up with chamfered edges? Moisture damage, as it was proving, had many complexities and required a well-thought-out approach.
• Seeking Speedy Solutions: Drying Out the Floor
My main goal then focused on damage control. I sought advice on how to speed up the drying process and halt further damage. Proactivity would be key in this scenario, as any further delay could spell disaster for the entire hardwood floor.
• Determining the Shrinkage Process Completion
Through my research, I discovered that timeliness is crucial for effective moisture damage reversal. But, the question on my mind was – how can we determine when the shrinkage process has been completed?
Each hardwood piece absorbs different moisture amounts, making it even more difficult to ascertain a definitive timeline for complete shrinkage.
• Addressing Water Damage: Drying, Sanding, and Finish Repair Options
As a homeowner, addressing water damage was not only necessary but also pivotal in preserving the home’s aesthetic value.
I wanted to understand the standard solution for handling water damage, particularly drying, sanding, and finish repair options. Clarity on these potential measures would ensure an efficient resolution to the problem.
• Evidence-based Steps to Control Water Damage
In seeking answers, I learned that drying the hardwood is an essential initial step in controlling water damage. Then, sanding can be used to smooth out raised edges. A finish repair completes the process.
These steps, backed by the American Hardwood Information Center, encourage homeowners to test the moisture content in their hardwood floorboards before and after the remedial action. Monitoring the moisture levels can indicate when the entire shrinkage process is over.
• Dealing with Water Damage: Recommendations
Based on my experiences and resources like the American Hardwood Information Center, two recommendations stand out:
- Invest time in identifying moisture sources in your home and removing them promptly. As illustrated by my case with the non-waterproof floor mat, seemingly harmless items could cause significant damage.
- Address water damage promptly – drying, sanding, and finish repair should be performed swiftly once moisture damage is detected. This mitigates further damage and helps restore the hardwood floor to its original state.
• Last Thoughts on Hardwood Floor Water Damage
In sum, water damage to hardwood floors can be disastrous but it isn’t the end of the world. The critical point to remember is there’s room for recovery if timely action is taken.
Early moisture detection, speedy initiation of restoration methods (like drying and sanding), continuous moisture monitoring, and finally, finish repair can ensure a healthy, damage-free hardwood floor.
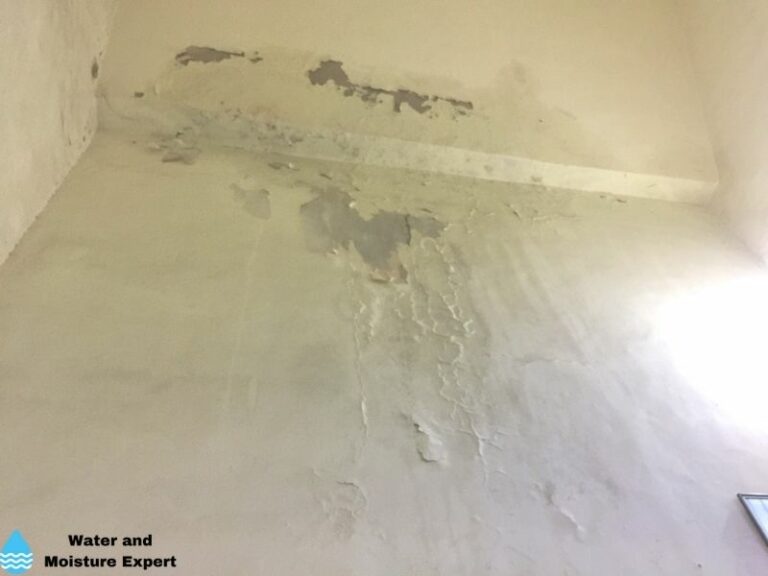
Impact of Water Damage on Wood Floors
Water damage can adversely affect different aspects of the wood floor. The three primary areas that can suffer damage are the top surface and finish, the body below the finish, and the subfloor, along with the fastening system.
• Identifying Signs of Water Damage on Wood Floors
Early identification of water damage is essential. Signs may often be apparent, such as wetness or visible moisture on the surface, water seeping through the floorboard seams, or dark areas. Other subtle signs may include warped boards and a blistering, peeling finish.
Boards can come loose, become uneven, buckle, rise, or even start making squeaky sounds when stepped upon. In between boards, you may notice cupping or rippling, a clear indication of moisture infiltration.
If your floors consist of engineered flooring, look for delaminating layers. Elevated moisture readings evident with a wood floor moisture meter can also be a telltale sign.
• Scope of Damage Based on Water Exposure
The extent of water exposure often influences the severity of the damage. A large water leak, floods, or prolonged water exposure can lead to extreme damage. On the other hand, small spills that are promptly cleaned are unlikely to have a lasting impact.
• Immediate Steps post Water Leak or Flood
Upon discovering a leak or flood, act quickly. First, stop the water source and pat dry your floor. If the floor is completely flooded, shut off the water supply and remove the water using tools like a wet/dry vacuum, squeegee, mop, and towels.
Once the water is removed, clean the damaged materials like furniture and rugs. If the damage reaches the walls, consider removing and cleaning the affected drywall.
• Drying Process post Water Infiltration
Depending on the floors’ condition, flooring type, and water damage extent, the drying process could take weeks or even longer. The main aim should be to salvage as much of the floor as possible and prevent further damage.
• Implication on the Subfloor
Water seepage could drastically damage the subfloor, be it wood or concrete. When contemplating whether to replace a water-damaged subfloor, consider the structural damage, the drying possibility, and the contamination potential.
• Waterproofing Solutions
Opting for waterproof flooring solutions like waterproof laminate or luxury vinyl plank (LVP) can be particularly beneficial. Although designed to withstand surface moisture and minor water leaks, extensive water exposure can still damage their subsurface.
• Potential Replacement of Floors
Often, water damage results in the replacement of floors. Though wood floors can handle light spills if immediately dried, excessive water exposure can cause irreversible harm.
Here is a helpful link to a guide on water-damaged flooring from FEMA, a .gov site providing valuable knowledge on handling such situations.
• Conclusion
Proactively identifying, mitigating, and resolving issues associated with water damage is vital in preserving the longevity and aesthetic of your wood flooring. By following these tips, you can preemptively address issues and take the necessary steps toward safeguarding your floors.
– Warping Due to Water Damage on Hardwood Floors
Water damage to hardwood floors is a significant concern that can lead to permanent and unsightly deformations in the wood. The culprit is often moisture seepage that leads to the absorbent wood planks swelling and eventually warping.
When left untreated, this warped flooring can become a significant eyesore and even a safety hazard. From my experience, immediate action is crucial upon noticing water damage on your hardwood floors to prevent warping and further disfigurement.
– Discoloration and Stains on Hardwood Floors
Beyond warping, another symptom of water damage on hardwood floors is discoloration and staining. This effect results from staining agents in the water soaking into the grain of the wood, permanently changing its color.
A light patch of water discoloration might not appear too damaging, but dark, large, or numerous spots are incommodious. If you observe discoloration or staining on your hardwood floors, it’s vital to address it immediately.
You can seek advice from the National Wood Flooring Association on how to remove stains and restore your floor’s original coloring.
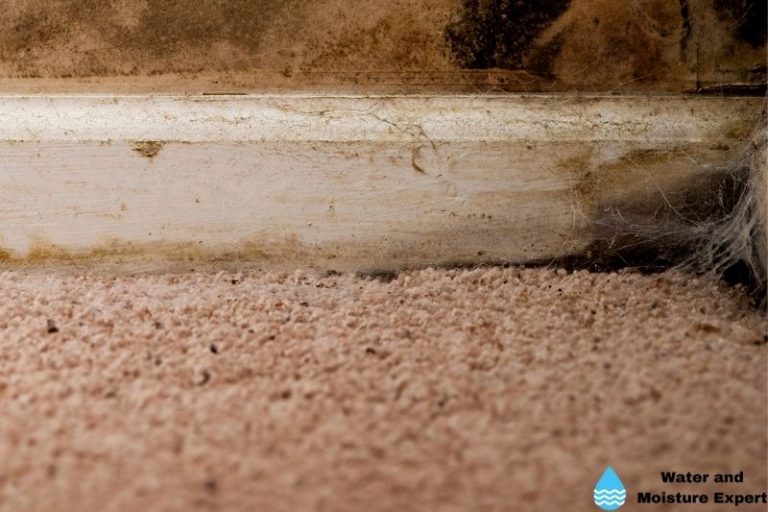
– Mold and Mildew Growth on Hardwood Floors
Mold and mildew growth on hardwood floors are clear indications of water damage. These fungi thrive in damp, humid conditions and can quickly spread on wood surfaces.
This issue is dangerous not just for the structural integrity of your flooring but also for the health of occupants in your home. Exposure to mold can cause respiratory issues such as asthma and allergies.
When you spot any mold or mildew on your hardwood floors, act immediately to remove it and seek ways to reduce the moisture content that contributes to its growth.
– The Reliability of Engineered Wood Flooring
When choosing flooring, it’s worth considering engineered wood. It provides greater resistance to water compared to solid wood flooring due to its layered construction. This feature makes it less likely to warp or stain due to water exposure.
However, while engineered flooring is a great choice, it’s crucial to remember that water-resistant barriers can degrade over time. This can compromise the durability of your flooring and can potentially result in water damage.
– Choosing Durable Wood Flooring with an Industrial-Grade Coating
Protect your home from water damage by choosing a durable wood floor with an industrial-grade finish. This extra level of protection can greatly increase the life of your floor, resist scratches, and, most importantly, provide additional water resistance.
Additionally, remember to reapply the coating every few years to keep up this level of protection. A well-maintained and durable hardwood floor can withstand minor water spills and damage, conserving its elegance for many years.
– Prevention of Water Damage on Hardwood Floors
Ultimately, the best form of protection against water damage is prevention. Regular maintenance, such as cleaning spills immediately, keeping the humidity in your home at the right level, and periodically checking for signs of water damage, can go a long way in protecting your hardwood floors.
In my experience, employing a proactive approach to wood floor care is beneficial. I have found that staying alert to signs of water damage and conducting regular maintenance routines helps keep these problems at bay.
Knowledge is power. Check out this guide from the University of Missouri Extension for more comprehensive tips on hardwood floor care.
Spotting Water Damage Early on Hardwood Floors with Restorerz Emergency Services
Hardwood floors are often the pride and joy of a home, adding not only value but also a touch of class. However, hardwood floors are particularly susceptible to water damage.
The Los Angeles-based company, Restorerz Emergency Services, aims to address this issue effectively. They offer professional water damage restoration services aimed at helping homeowners preserve their beautiful hardwood floors.
• Recognizing the Top Five Signs of Water Damage
It is important to be aware of the potential signs of water damage on wood floors. The impacts can be drastic if the damage goes unnoticed. Here are the top five symptoms of water damage to keep an eye out for:
- Warped Floorboards: Warping is a clear sign of water damage. Often, this indicates that water has seeped underneath your floorboards, causing them to twist out of shape.
- Stained or Discolored Floors: Unusual coloration or staining is another indicator of potential water damage. A dark or wet spot that doesn’t dry could be a sign of an unseen leak.
- Mold or Mildew Growth: Molds thrive in damp environments. If mold growth is spotted, it is crucial to act immediately, as it can pose serious health risks.
- Soft Floorboards: Soft or spongy sections of your floor often spell moisture problems. This softness is due to saturated wood losing its strength.
- Swelling, Cupping, and Buckling Boards: If your floorboards are uneven and begin to pull away from the subfloor, this is typically due to water damage.
• Importance of Prompt Restoration
Recognizing these signs early and taking immediate steps for restoration is key to preventing further damage. Water leakage can not only weaken the structure and aesthetics of hardwood floors, but it can also lead to other serious issues such as mold infestation, warped floor planks, and paint damage.
Mold can pose serious health risks. It can trigger allergic reactions, asthma symptoms, and other health issues. Therefore, it is imperative to initiate the restoration process as soon as possible to prevent these health hazards.
• Why Choose Restorerz Emergency Services
Restorerz – Emergency Services is a certified and licensed team that swiftly assesses water damage, proposes effective solutions and guarantees fast and efficient cleaning and restoration.
With formidable expertise in water damage and restoration services, they ensure to bring back the beauty and value of your hardwood floors.
• 24-Hour Service And Customer Satisfaction
Understanding that emergencies can occur at any time, they offer 24-hour service to cater to your urgent needs.
Furthermore, they offer a 100% satisfaction guarantee, making sure that you are pleased with the results. This commitment to customer satisfaction places them as one of the leading emergency services companies in Los Angeles.
• Immediate Action Required
Water damage, like many other home repair issues, is not something that should be delayed. The longer you wait, the more severe the potential damage could be. If you suspect water damage to your hardwood floor, reach out immediately to Restorerz Emergency Services at (323) 973-2076 to schedule an in-home consultation.
• Personal Recommendation
From personal experience, I strongly recommend acting at the first sign of water damage. The sooner the issue is addressed, the lesser the damage and the lesser the expense.
To further educate yourself on water damage and its implications, visit the U.S. Environmental Protection Agency’s website here. It offers abundant resources that delve into the science behind mold growth, its effects on health, and measures to control its spread.
Remember, preserving the beauty of your hardwood floors is not only about aesthetics but also about maintaining a safe and healthy home environment.
Damaging Effects of Water on Hardwood Floors
Water intrusion can lead to several undesirable outcomes on hardwood floors. It can lead to warping, discoloration, and in some instances, permanent damage.
It doesn’t discriminate between the types of wood used; both solid hardwood and engineered wood flooring are susceptible to the ravages of water if not swiftly addressed.
For those of you who value your hardwood floors as I do, it is essential to attend to even the tiniest spill as promptly as possible.
• Importance of Quick Action against Water Spills
Even a small amount of water, if left unattended, can seep into the depths of your hardwood floor, leading to irreversible damage; thus, swift action is necessary.
• Use of Specialized Drying Equipment
From my experience, industrialized high-powered fans can be excellent tools for drying out a water-damaged hardwood floor. They help evaporate moisture quickly, minimizing the risk of sustained damage.
• Recognizing the Signs of Water Damage
Being able to identify the signs of water damage in hardwood floors is half the battle. Keep an eye out for staining, cupping, buckling, lifting nails and floorboards, and the growth of mold. These are all prominent signs that water has infiltrated and damaged your hardwood floors.
• The Risk of Prolonged Water Accumulation
It is crucial to remember that the duration for which water sits on the hardwood floor can significantly affect the extent of the damage. The longer the time, the worse the damage. An early indication of water damage can be individual planks cupping or several planks crowning.
• Considerations for Repairing or Replacing Water-Damaged Hardwood Floors
When it comes to fixing water-damaged hardwood floors, some factors come into consideration. Namely, the length of exposure to water, type of flooring used, extent of damage, and whether water has reached the subflooring.
• Repair Options Based on the Degree of Damage
Depending on the extent of the damage, the steps taken can greatly vary. For minor damage, it may be enough to repair isolated floorboards. However, if significant damage has been inflicted, then replacing the entire floor might be the only option to restore the room to its former glory.
• Solid Hardwood Floor Repair Options
For those with solid hardwood flooring, repair options can include sanding, scraping, and replacing individual problematic planks.
• Importance of Refinishing for Aesthetic Uniformity
Post repair, it is highly recommended to refinish the entire floor for a cohesive look. It not only removes the signs of repair work but also reinforces the durability of the hardwood flooring and confers a refreshed look to the space.
To extend your knowledge on this topic, visit the following non-commercial government link: Managing Water Infiltration Into Buildings.
Keep in mind that although hardwood flooring gifts an unparalleled aesthetic appeal to a room, maintaining its charisma requires vigilance against water damage. With the knowledge given above, you can assure the longevity and allure of your hardwood floors.
– Identifying Water Damage on Wood Floors: Rotted and Soft Floorboards
Among many indicators of extensive water damage in homes, rotted and soft floorboards are strong pointers. Waterlogged wood can deteriorate over time and will likely need replacing.
Continuous soaking causes the wood fibers to soften and eventually break down, leading to spongy and unsafe flooring sections. Additional safety hazards, like tripping, are also prevalent in such scenarios.
A link to the Federal Emergency Management Agency’s guide for water damage at FEMA helps with understanding the next steps in tackling such scenarios.
– Swollen Wood and Its Hazards
Another typical manifestation of water damage on hardwood floors is the swelling of wooden planks, leading to uneven surfaces. Water can seep through these expanded areas into the subfloor, causing additional damage. Swollen portions could eventually split and chip, detrimental to both the aesthetics and integrity of your home flooring.
– The Cupping Phenomenon on Wooden Floors
Cupping is a type of warping where the edges of wood planks curl up, forming a concave shape on the floor surface.
Caused moisture imbalance can lead to significant inconsistency on your wooden flooring, damaging its appeal and functionality. More importantly, cupped floors can retain water in pockets, exacerbating water damage further.
– Rapid Mold Development in Water-Damaged Areas
One of the most hazardous after-effects of water damage, mold can develop quickly in moisture-laden areas. Often, it might not be visible immediately and lurk under the surface or in concealed corners.
Mold can cause respiratory issues, allergies, and other health problems if not dealt with promptly and appropriately.
– Common Causes of Water Damage to Wood Floors
Common culprits of water damage include leaky water pipes, rainwater penetration, ice damming, toilet overflow, and malfunctioning appliances such as dishwashers or washing machines.
Regular maintenance and vigilance can help spot these issues in the earliest stages, preventing catastrophic damage to your wooden flooring.
– The Art of Preventing Water Damage
To avoid extensive water damage, one must adhere to certain preventive measures. Clean up water spills immediately and maintain the conditions of your wood floors.
An often overlooked but crucial factor is to avoid using string mops, as they can leave excessive water on the floor. Regular monitoring of plumbing fixtures and appliances is recommended. In the case of recurring faults, resorting to replacement is the most effective prevention.
– Trusting Dry Force for Water Damage Restoration
As professionals in the field of water damage restoration, Dry Force offers a comprehensive set of services that cater to various damage instances.
These include storm damage repair, burst pipe maintenance, roof leak cleanup, and mold removal, in addition to flood damage restoration. Trust your homes to Dry Force to resolve any water damage and restore the safety and beauty of your spaces effectively.